Breaking Down Raid Wave Mechanics
Underestimating the sheer strategic depth required for Minecraft raids is a common misstep, even for seasoned players. These challenging in-game events demand more than just combat prowess; they require a thorough understanding of their intricate wave mechanics, mob behaviors, and environmental factors. Without this knowledge, what starts as a heroic defense can quickly devolve into a chaotic struggle for survival, often costing you valuable villagers and resources.

Minecraft raids are designed to push players to their limits, pitting them against increasingly difficult waves of Illager mobs. To emerge victorious and claim the coveted “Hero of the Village” status, you must grasp the underlying systems that govern these invasions. This guide will meticulously break down every aspect of raid wave mechanics, from initiation to triumph, providing you with the expertise needed to safeguard your settlements.
Triggering the Onslaught: How Raids Begin
A raid doesn’t simply appear out of nowhere; it’s a direct consequence of player action. The catalyst is the “Bad Omen” status effect. This ominous debuff is acquired by defeating a Pillager Captain, an Illager identifiable by the distinct banner it carries on its back. Once a captain is slain, the method of acquiring “Bad Omen” differs slightly between game editions:
- Java Edition (1.21+): Defeating a Pillager Captain causes it to drop an “Ominous Bottle.” The player must then consume this bottle to gain the “Bad Omen” effect. This provides a deliberate choice, allowing players to postpone or avoid initiating a raid if they wish.
- Bedrock Edition: In Bedrock, defeating a Pillager Captain directly applies the “Bad Omen” effect to the player, with no intermediate item.
With “Bad Omen” active, the next step is crucial: entering a valid village. A village, for raid purposes, is defined by the presence of at least one villager and a claimed bed. In Java Edition, a villager with a claimed bell or job site block also contributes to this definition. As soon as a player with “Bad Omen” steps foot into such an area, the effect transforms into “Raid Omen,” initiating a 30-second countdown. This brief window serves as a final warning before the first wave of Illagers spawns, signaling the start of the battle.
The Flow of Battle: Understanding Raid Progression
Once the “Raid Omen” countdown concludes, the invasion begins. Raids are structured into multiple waves, each presenting a distinct challenge. A prominent boss bar at the top of your screen will appear, displaying the total remaining health of all active raid mobs. This bar is your primary indicator of overall raid progress.
The transition between waves is marked by a distinctive horn sound. Crucially, this horn not only announces the next wave but also indicates the general direction from which the new raiders are spawning. This auditory cue is invaluable for strategic positioning and anticipating incoming threats. Each subsequent wave generally becomes larger and introduces stronger, more dangerous mob types, escalating the difficulty as the raid progresses.
A raid concludes in one of two ways:
- Victory: All Illager mobs across all waves are successfully defeated. This grants the player rewards and the “Hero of the Village” effect.
- Defeat: All villagers within the raided settlement are killed, or all their claimed beds are destroyed. If either of these conditions is met, the raid is considered lost, and no rewards are given.
Scaling the Challenge: Number of Waves and Difficulty
The intensity and duration of a raid are directly influenced by the game’s difficulty setting and, in Java Edition, the level of your “Bad Omen” effect. Understanding these factors is key to knowing what to expect:
- Easy Difficulty: Raids consist of a manageable 3 waves. This setting is ideal for newer players or those seeking a less intense challenge.
- Normal Difficulty: This standard setting increases the challenge to 5 waves, introducing a broader range of Illager types and greater numbers.
- Hard Difficulty: For the most formidable challenge, Hard difficulty presents a grueling 7 waves. These raids are significantly more demanding, requiring extensive preparation and tactical execution.
In Java Edition, the “Bad Omen” level adds another layer of complexity. If a player triggers a raid with a “Bad Omen” level of II or higher (up to V), one additional wave is appended to the raid. This bonus wave mirrors the composition of the final wave, effectively making the raid even longer and more difficult by repeating its toughest segment. This means a Hard difficulty raid with a high “Bad Omen” level can feel like an unending onslaught.
Illager Arsenal: Mobs You’ll Face
The Illager forces are diverse, each mob bringing its own unique threat to the battlefield. Knowing your enemies is half the battle:
- Pillagers: These crossbow-wielding Illagers are the most common raiders, especially in early waves. They provide ranged support and can quickly overwhelm unprepared players with their numbers.
- Vindicators: Equipped with iron axes, Vindicators are dangerous melee combatants. In Java Edition, on Normal and Hard difficulty, they can open and sometimes break wooden doors. In Bedrock Edition, they will break wooden doors on Normal difficulty if they pass by them, posing a direct threat to villagers in wooden structures.
- Witches: These spellcasters are priority targets. Witches can throw a variety of harmful potions at players and, critically, can heal other Illager mobs, prolonging battles and increasing overall difficulty.
- Evokers: Among the most dangerous Illagers, Evokers possess powerful magical abilities. They can summon “Vexes,” small, aggressive flying creatures that pass through blocks, making them incredibly difficult to deal with. Evokers also have increased movement speed during raids, making them harder to pin down. They are the only source of the coveted Totem of Undying.
- Ravagers: These massive, beast-like creatures are formidable tanks, capable of dealing significant damage and knocking players back. They often appear ridden by other Illagers, such as Vindicators, effectively creating a combined threat. Their high health and destructive power make them a major threat in later waves.
Strategic Engagement: A Step-by-Step Guide to Success
Conquering a raid requires a clear action plan. Follow these steps to maximize your chances of victory:
- Obtain Bad Omen: Actively seek out and defeat a Pillager Captain. Remember to drink the Ominous Bottle in Java Edition if it drops.
- Enter a Village: With the “Bad Omen” effect, enter a village that has at least one villager and a claimed bed (or job site/bell in Java).
- Raid Omen Countdown: Utilize the 30-second “Raid Omen” window for last-minute preparations. If you accidentally triggered the raid, drinking milk during this time will cancel it.
- First Wave Spawns: As the first wave appears, a boss bar will signify the raid’s commencement. Begin engaging the raiders.
- Defeat Waves: Systematically eliminate all hostile mobs in the current wave. Listen for the horn sound, which signals the next wave and its general direction.
- Repeat & Adapt: Continue fighting through the progressively more difficult waves. Prioritize dangerous mobs and adapt your tactics as new threats emerge.
- Victory or Defeat: Successfully clear all waves to win, earning rewards and the “Hero of the Village” effect. Failure to protect villagers will result in a loss.
Fortifying Your Defenses: Preparation and Tactics
Preparation is the bedrock of raid success. Going in unprepared is a recipe for disaster. Consider these essential tips:
- Secure Villagers: Your villagers are your most vulnerable asset. Lock them safely in buildings, underground bunkers, or behind robust walls. Ensure they have claimed beds to prevent despawning or wandering too far.
- Establish a Spawn Point: Set your spawn point near the village with a bed. This minimizes downtime if you are defeated, allowing you to quickly return to the fight.
- Equip Superior Gear: Good armor (diamond or netherite is ideal) and strong weapons (sharpness V sword, power V bow) are non-negotiable. Bring plenty of healing items like golden apples, potions of healing, and food.
- Build Defenses: Simple walls, moats, or even strategically placed lava can funnel raiders and protect villagers. Iron Golems are invaluable allies; they can tank damage, distract mobs, and deal significant melee damage. Place several around your village.
- Prioritize Dangerous Mobs: During the raid, always target Witches first to prevent them from healing other Illagers. Evokers should be next to stop them from summoning Vexes, which are incredibly annoying and lethal.
- Utilize Your Environment: A bow is highly effective for picking off Evokers, Witches, and Pillagers from a distance or from elevated positions. Boats can be surprisingly effective for trapping singular raiders, especially large Ravagers, rendering them harmless.
- The Bell’s Advantage: If raiders get stuck or you can’t find the last few, ring a bell. It will briefly glow the outlines of all nearby Illagers, revealing their positions and helping you clear the wave.
- Collect Totems: Evokers are your sole source of Totems of Undying. Always aim to defeat them to gain this life-saving item.
- Listen to the Horn: Pay close attention to the direction from which the horn sounds. This tells you where the next wave is spawning, allowing you to position yourself advantageously.
Spoils of War: Rewards for Victory
Successfully defending a village against a raid yields significant rewards, making the effort worthwhile:
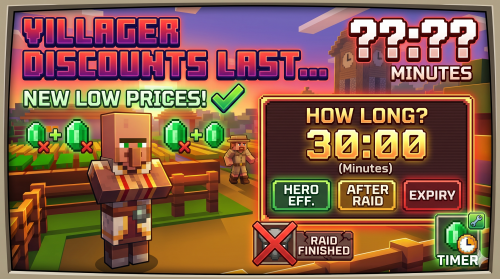
- Hero of the Village: This prestigious status effect is applied to the player upon victory. It lasts for a duration determined by the raid’s difficulty and “Bad Omen” level, and grants significantly better trade offers with villagers in that specific village. This can be a fantastic way to acquire rare items or efficiently trade for emeralds.
- Emeralds: Illagers often drop emeralds upon defeat, providing a direct currency for villager trading.
- Enchanted Gear: Some raiders, particularly higher-tier ones, may drop enchanted weapons or armor, giving you a chance to upgrade your equipment.
- Totems of Undying: As mentioned, Evokers are guaranteed to drop a Totem of Undying upon defeat. This invaluable item saves you from death once, making it a critical resource for dangerous expeditions.
Pitfalls to Avoid: Common Mistakes
Even with thorough preparation, certain errors can turn the tide of a raid against you:
- Underestimating Difficulty: Raids are not to be taken lightly. On higher difficulties or with elevated “Bad Omen” levels, they become significantly harder, demanding peak performance and robust defenses.
- Ignoring Villager Safety: The raid fails if all villagers or their beds are destroyed. Prioritizing your own survival over theirs is a critical mistake. Ensure they are well-protected before the raid even begins.
- Not Prioritizing Dangerous Mobs: Allowing Witches to heal their allies or Evokers to summon a swarm of Vexes will quickly make the raid unmanageable. Focus fire on these high-threat targets first.
- Losing Track of Raiders: Illagers can sometimes get stuck in caves, hidden structures, or wander off. This can prolong the raid indefinitely, as the next wave won’t spawn until the current one is fully cleared. Use a bell to locate stragglers.
- Lack of Proper Gear: Attempting a raid with insufficient armor, weak weapons, or a scarcity of healing items is almost guaranteed to end in defeat. Always over-prepare rather than under-prepare.
Mastering raid wave mechanics transforms you from a casual survivor into a true protector of the realm. By understanding how raids trigger, progress, and what threats they contain, you can strategically prepare, defend your villagers, and reap the generous rewards. Approach each raid with knowledge and vigilance, and no Illager force will stand a chance.
Tags:
YOU MAY ALSO LIKE...