

Copper Oxidation Stages Explained
Many Minecraft players mistakenly believe that external factors like rain or direct sunlight directly influence how quickly copper blocks oxidize in their builds. In reality, the process is far more nuanced, driven by internal game mechanics rather than environmental exposure. Understanding these mechanics is key to mastering copper’s unique aesthetic journey, allowing builders to harness its transformative properties for stunning and dynamic creations.
The Invisible Hand: How Oxidation Works
Copper blocks in Minecraft possess a distinctive characteristic: they undergo a gradual, time-based oxidation process. This mechanic brilliantly simulates the real-world chemical reaction where copper develops a green patina as it reacts with oxygen. However, in the blocky world, this isn’t a direct chemical reaction but rather a series of internal game events.
- Random Game Ticks: Oxidation progresses when copper blocks receive random game ticks. These are periodic, internal updates that occur randomly for individual blocks, similar to how crops grow or leaves decay. Each tick presents a chance for a copper block to advance to its next oxidation stage. This randomness means adjacent blocks might not oxidize at the exact same rate.
- Simulation Distance Dependency: For oxidation to occur, copper blocks must be within the player’s simulation distance. If blocks are outside this loaded area, their oxidation process will effectively pause until a player returns to the vicinity.
- No Environmental Influence: Contrary to popular belief, environmental factors such as rain, being submerged in water, or exposure to direct sunlight have absolutely no bearing on the speed of oxidation. Copper can oxidize just as readily underground as it can on a rooftop.
- Neighboring Block Influence: Interestingly, the presence of nearby copper blocks can subtly influence the oxidation rate. Specifically, copper blocks at a similar or lower oxidation stage can slow down a block’s progression. This suggests that blocks “prefer” to oxidize independently to reach their final state faster.
From Bright Orange to Verdant Green: The Four Stages
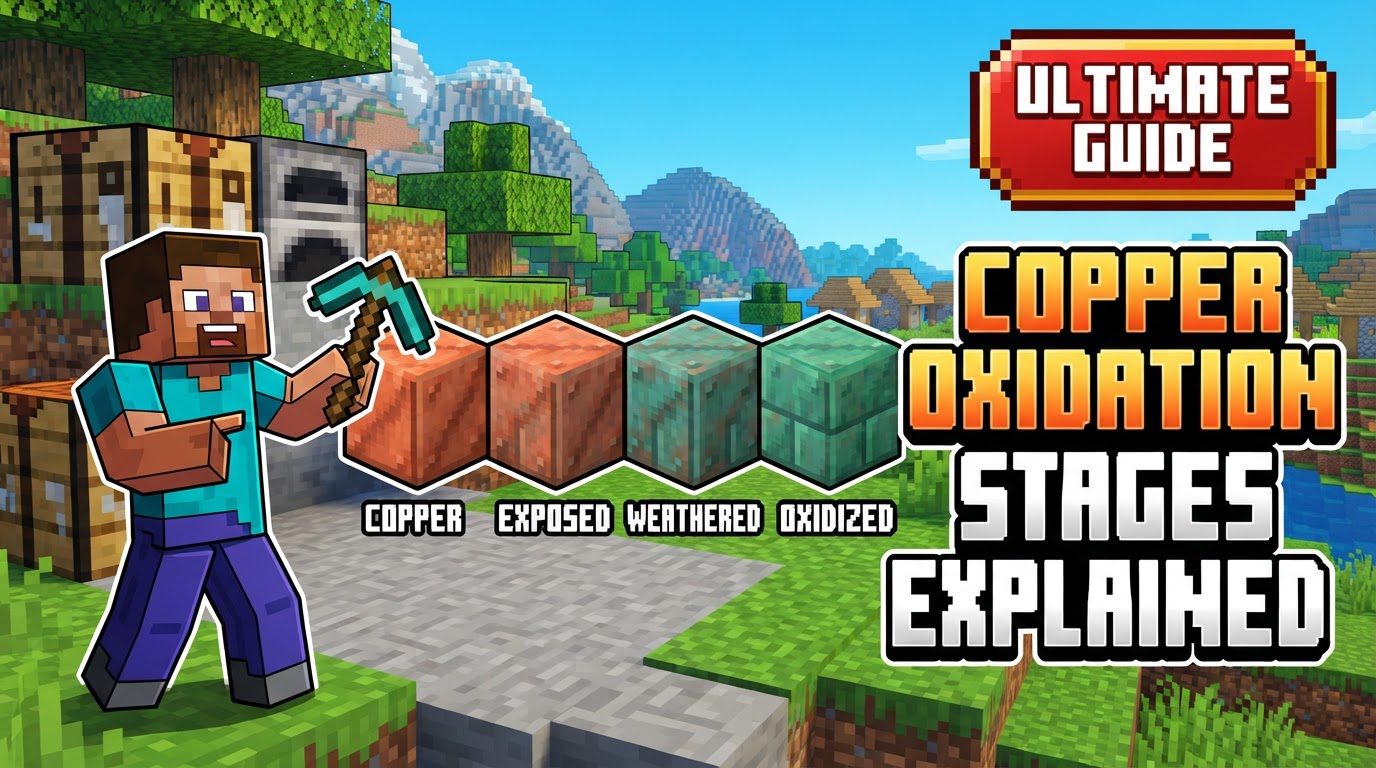
The transformation of copper is a journey through four distinct stages, each marked by an increasing amount of green patina. These stages offer a versatile palette for builders, from pristine metallic gleam to ancient, weathered charm.
- Copper Block: This is the initial state of the copper block. Freshly placed or crafted, it boasts a vibrant, bright orange-brown metallic luster. This stage is indicative of new, unblemished copper.
- Exposed Copper: The first step in the oxidation process, Exposed Copper shows a faint, subtle green tint beginning to appear on its surface. The original orange-brown is still largely dominant, but the nascent patina is clearly visible, marking the start of its aging.
- Weathered Copper: Also sometimes referred to as Degraded Copper, this stage features a much more advanced and noticeable green coloration. The patina covers a significant portion of the block, giving it a distinct aged appearance, though hints of the underlying metallic color might still be discernible.
- Oxidized Copper: The final and most advanced stage, Oxidized Copper is entirely covered in a rich, distinct, and full green patina. At this point, the original orange-brown metallic color is completely obscured, leaving a block that appears truly ancient and weathered.
Accelerating and Halting the Change: Managing Oxidation Rates
While oxidation is a natural process, players have several methods to either speed it up or halt it entirely, granting precise control over their copper builds.
- Speeding Up Oxidation: To encourage faster oxidation, the most effective strategy is to place copper blocks with at least four air blocks separating them. This isolation minimizes the “slowing” effect of nearby copper blocks at similar or lower stages, allowing each block to progress more independently and quickly. For large-scale projects, while individual blocks oxidize fastest when spaced out, placing blocks in rows alternating with already oxidized copper or on a layer of oxidized copper can also be effective for influencing the overall rate of adjacent blocks.
- Preventing Oxidation (Waxing): If you’ve achieved a desired oxidation state and wish to preserve it permanently, “waxing” is your solution. By using a honeycomb on a copper block, you can apply a wax coating that locks its current appearance indefinitely. This can also be done more efficiently in a crafting grid, which is particularly useful when preparing many blocks.
Advanced Techniques: Waxing, Scraping, and Lightning’s Touch
Beyond simply letting copper age, builders can actively manipulate its state for specific aesthetic outcomes.
- Reversing Oxidation (Scraping): Should you decide a block has oxidized too much, an axe can be used to “scrape” off the patina. Each scrape reverts the copper block to its previous oxidation stage, allowing for precise control over its appearance.
- Mass De-oxidation with Lightning: For a dramatic and somewhat unpredictable reversal, a lightning strike can deoxidize a copper block entirely, reverting it back to its initial Copper Block state. Furthermore, a lightning strike can randomly affect and deoxidize nearby non-waxed copper blocks, creating an interesting, chaotic effect. It’s important to note that lightning can also de-wax waxed copper blocks, making them susceptible to re-oxidation.
- Efficiency in Crafting: When working with copper, always prioritize using a stonecutter for crafting variants like cut copper, stairs, or slabs. A stonecutter yields four times more products than a crafting table, making it vastly more resource-efficient. A smart strategy is to wax your copper blocks before crafting them into variants, as this saves on honeycomb by only waxing the base block once.
Avoiding Pitfalls: Common Mistakes and Smart Crafting
Even seasoned builders can fall prey to common misconceptions or inefficient practices when dealing with copper. Awareness of these can save time and resources.
- Placing Blocks Too Close: One of the most frequent errors is placing copper blocks immediately adjacent to each other without air gaps. This significantly slows down the oxidation process, as the blocks influence each other’s rate of change.
- Ignoring Waxing: Failing to wax copper blocks that you intend to keep at a specific oxidation stage is a common oversight. Without waxing, copper will continue to age, potentially ruining a carefully planned aesthetic.
- Misconceptions about External Factors: As mentioned, believing that rain, water, or direct sunlight affects oxidation speed is incorrect. This can lead to inefficient build designs based on false assumptions.
- Inefficient Crafting: Using a crafting table for copper block variants instead of a stonecutter is a wasteful practice. Always opt for the stonecutter to maximize your copper yield.
- Exposure to Lightning: Building with un-waxed copper in areas prone to lightning strikes can lead to unwanted and random de-oxidation, potentially undoing hours of patient waiting or careful scraping. Consider waxing critical structures if lightning is a concern.
The dynamic nature of copper oxidation adds an unparalleled layer of depth and realism to Minecraft builds. By understanding its mechanics, mastering its stages, and employing smart management techniques, players can transform their creations from static structures into evolving works of art, embracing the passage of time within their blocky worlds.
Tags:
YOU MAY ALSO LIKE...


