Hardcore Questing Mode Mod (1.19.2, 1.18.2) – Multiple-Life Hardcore System
Hardcore Questing Mode Mod (1.19.2, 1.18.2) introduces a possibility to play a life based hardcore mode, but with more than only 1 life before your world gets deleted or you get banned from a server. Furthermore, you can complete quests to gain rewards, the rewards might be cool items or even extra lives. The quests aren’t however included in the mod, it’s up to you or a map maker to create them. To create them you will have to use the in-game editor. You can then export the quests to a file to share with your friends or the players of your map.
Features:
- Unique questing system.
- Tiered reward system (loot bags).
- In game Editor.
- Death Counter/ Tracker.
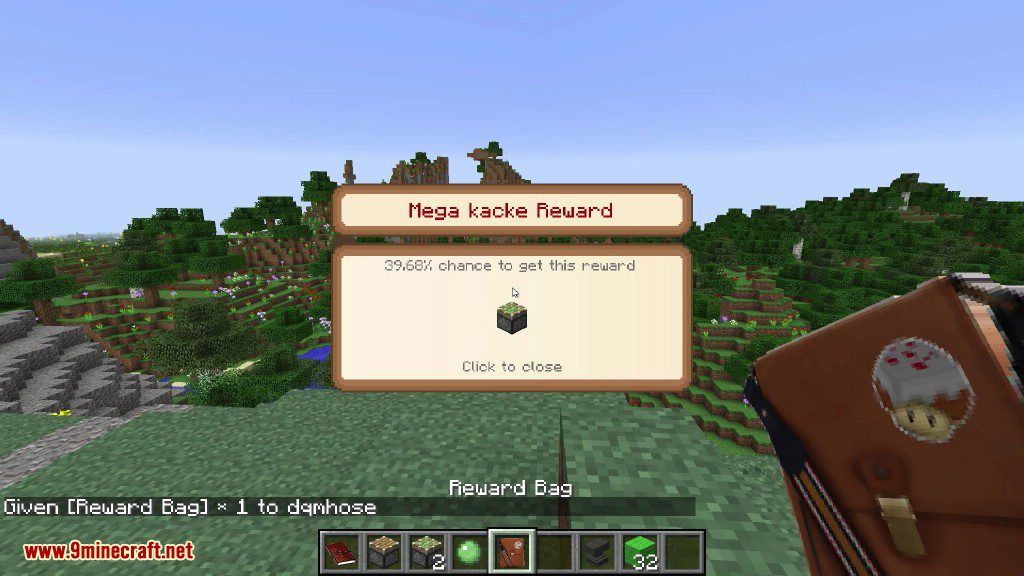
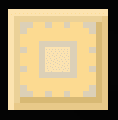
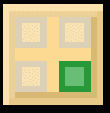
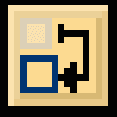
Screenshots:


Commands:
Player Commands
/hqm help
- Returns a list of available commands
/hqm version
- Returns the currently installed version of Hardcore Questing Mode
/hqm lives
- Returns the players current lives remaining
Op Commands
/hqm help
- Returns a list of available commands
/hqm version
- Returns the currently installed version of Hardcore Questing Mode
/hqm lives
- Returns the players current lives remaining
/hqm lives playercheck <playername>
- returns current lives remaining of a player
/hqm lives add
- Can be used to add lives to a player Arguments include <playername> <amount>
- Combinations:
- /hqm lives add – This will give YOU 1 life.
- /hqm lives add <amount> – This will give YOU <amount> of lives.
- /hqm lives add <playername> – This will give <playername> 1 extra life.
- /hqm lives add <playername> <amount> – This will give <playername> <amount> extra life.
- Example:
- /hqm lives add Vswe 10 – This will give the player (Vswe) 10 extra lives
/hqm lives remove
- Can be used to remove lives from a player Arguments include <playername> <amount>
- Combinations:
- /hqm lives remove – This will remove 1 life from YOU.
- /hqm lives remove <amount> – This will remove <amount> of lives from YOU.
- /hqm lives remove <playername> – This will remove life from <playername>.
- /hqm lives remove <playername> <amount> – This will remove <amount>of lives from <playername>.
- Example:
- /hqm lives remove Vswe 10 – This will remove 10 lives from the player (Vswe)
Adding and Removing Lives in SSP
- To add and remove lives in single player you need to world to have cheats enabled before the add and remove commands will work.
How to use:
Basic Quest Creation
Show Spoiler
Before we can actually create our quests, we first have to enable edit mode. Go into minecraft/config/hqm and open up the hqmconfig.config file (depending on your version this may be in the editmode.cfg file):
Now, find the line that asks if you want to use the editor. Change that from “false” to “true.”

Next, we just have to launch the game to be put into Edit Mode!
Once we’re in game, we’ll want to get ourselves a Quest Book. Open up the Creative Menu (or NEI, if you have it), and grab the Quest Book.

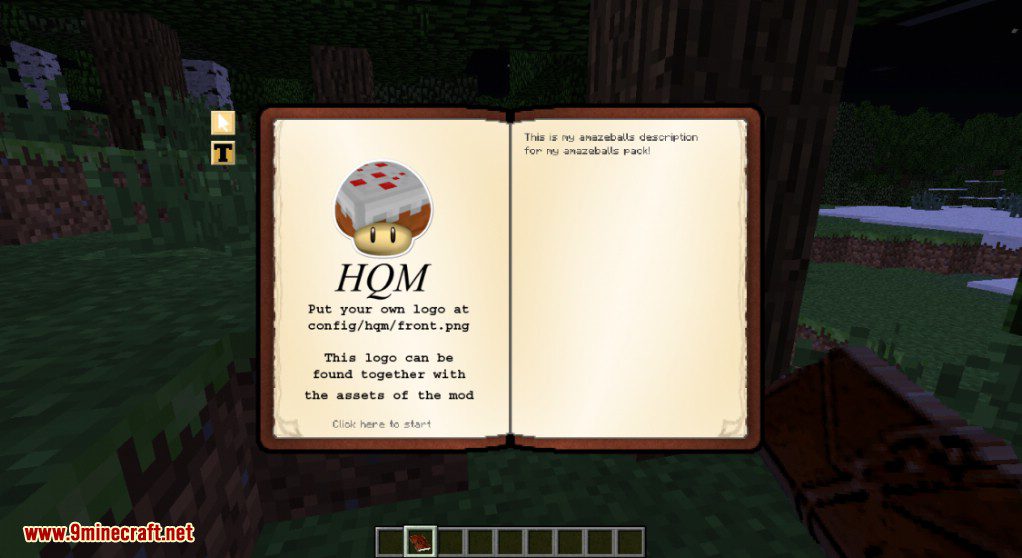
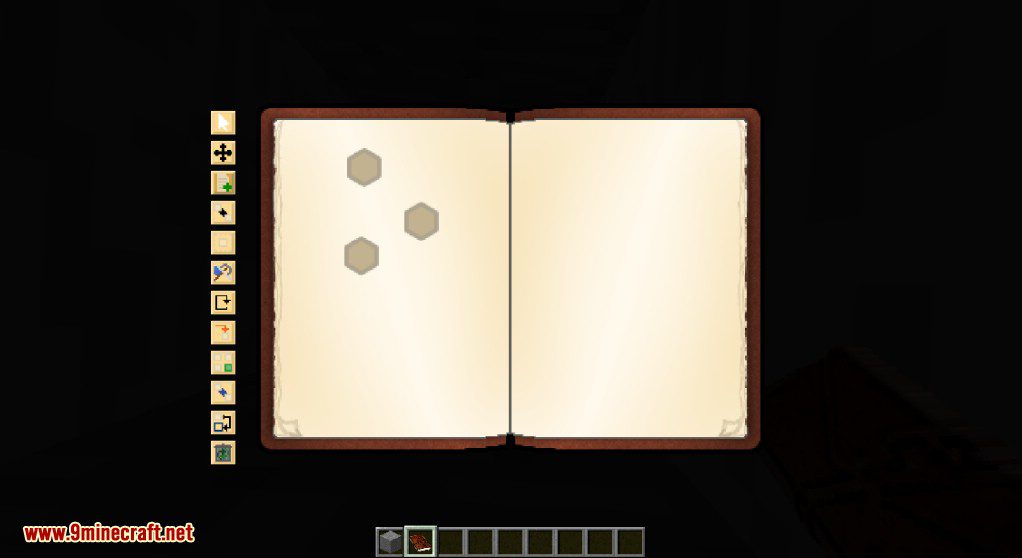
Right-click to open up the book! We’ll be met with this interface:
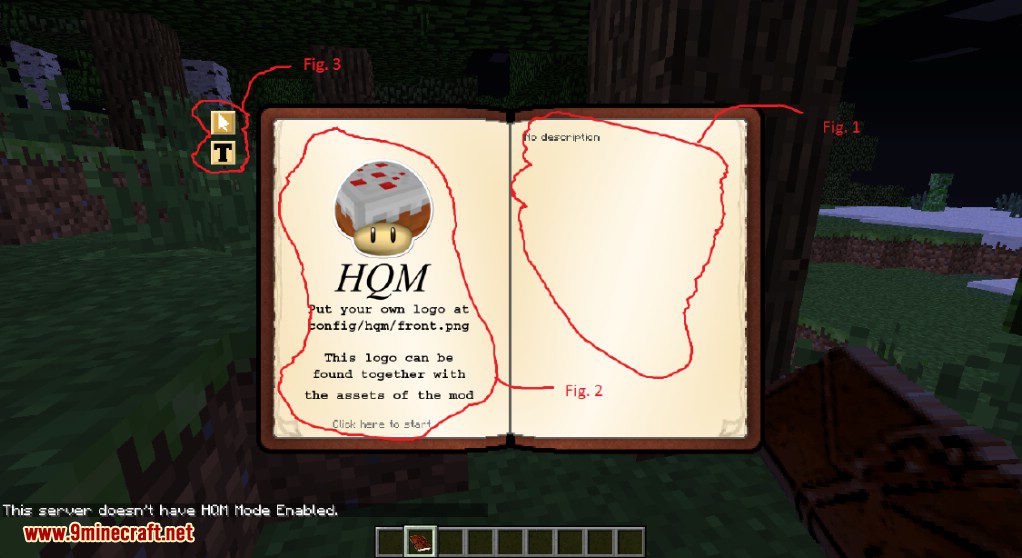
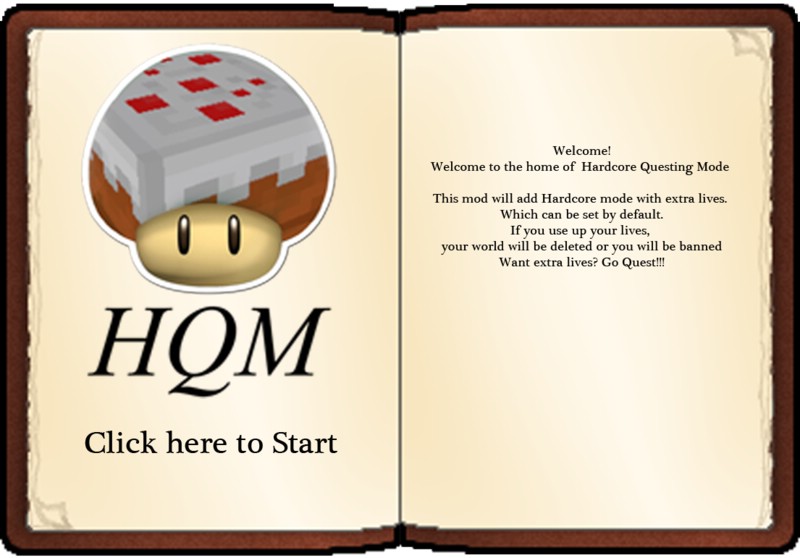
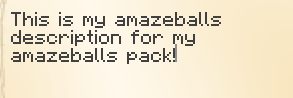
Fig. 1: This is an awesome text box that the players can read when they first open up the quest book in your modpack. You can edit this to read whatever you like, and later, even add in a file to narrate it!
Fig. 2: This is the logo that players will see when they open up your book. Later, I’ll show you how to edit this and add in your own, unique logo!
Fig. 3: This is your Tools Bar. You’ll use the tools in this very frequently throughout the creation of your quests. You can click on a tool to select it for use. On this page, there are only two tools available:
The Cursor: This is the tool you’ll use to navigate your Questing Adventure. Left-click on things to select them, or to deselect them if necessary. You can enter new menus with this, and exit the menu by right-clicking.

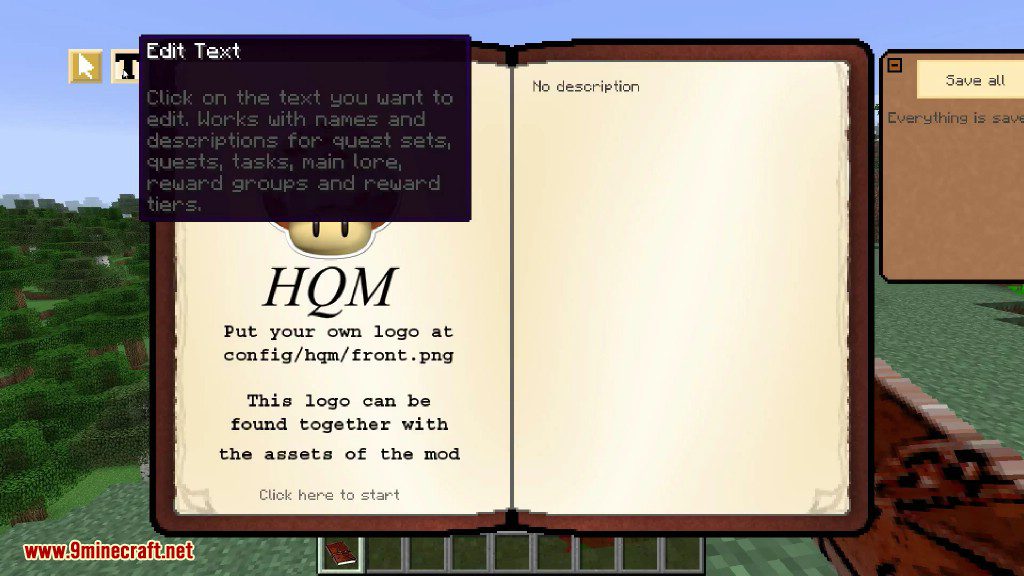
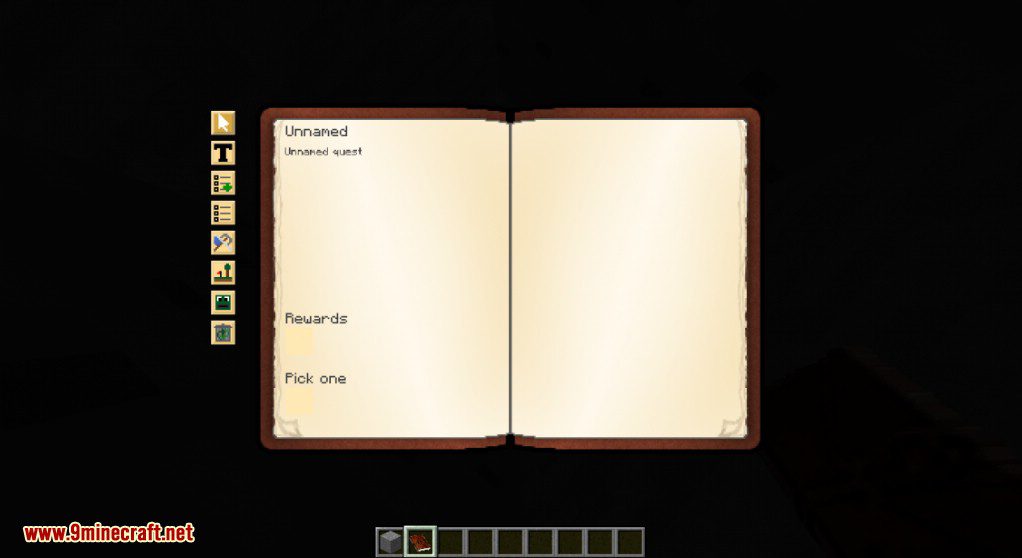
The Text Editor: The Text Editor is a useful tool that is pretty self-explanatory. If you have it selected, you can edit anything with text! Hey. Remember Fig. 1? That had no text? What if we clicked on it with this tool?

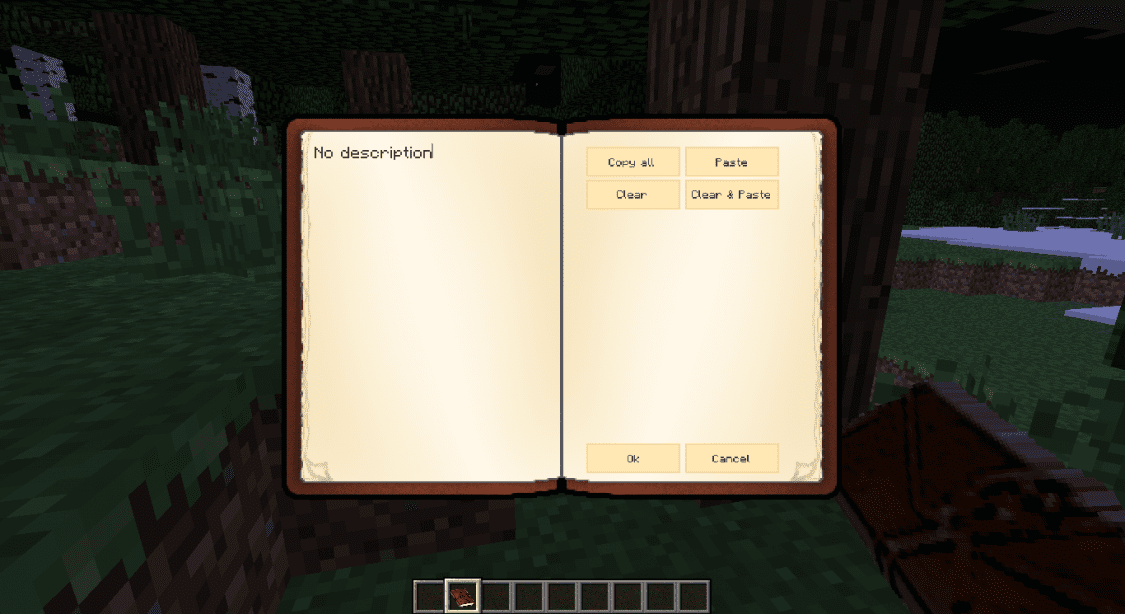
Hey! Would you look at that! We are able to edit this text! Why don’t we put in something snazzy, like:
That’s more like it! When you’re done, hit okay, and we can admire our work:
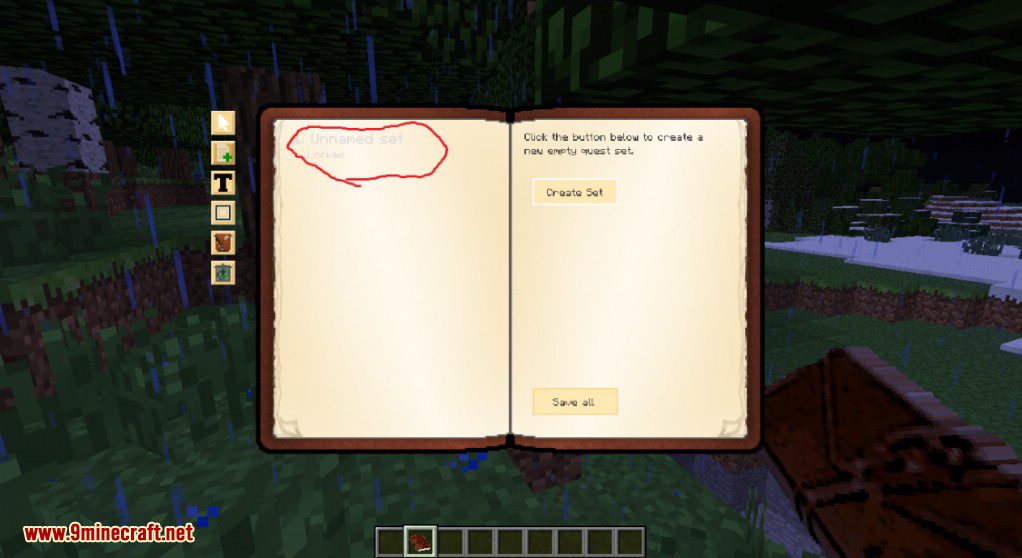
Select your Cursor tool again, and click on the “Click here to start” text. We’ll be met with this menu:
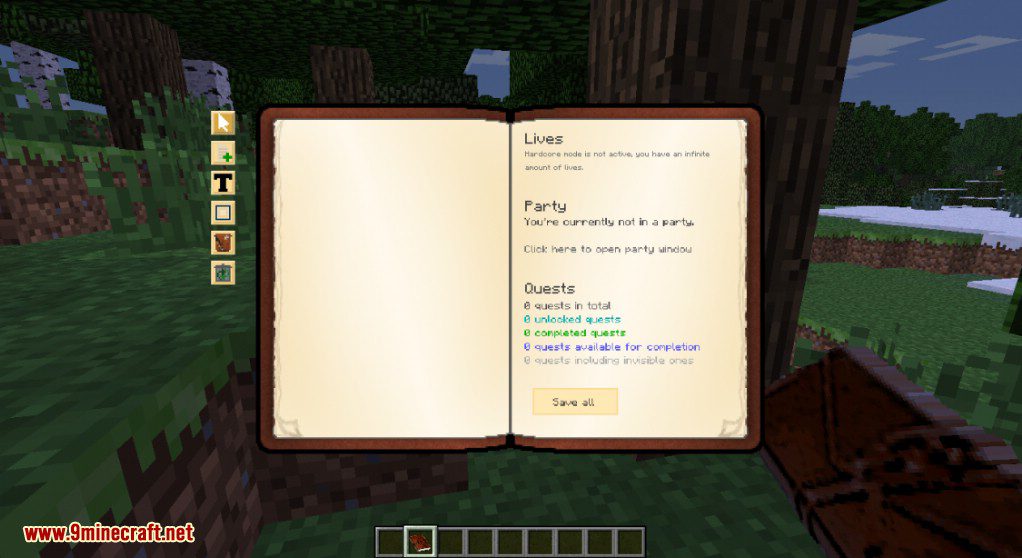
Woah. There are a lot of new buttons here. Let’s take them one by one.
The Create Set Button: In order to understand this button, we first have to understand the idea of sets. Sets are what contain all the quests we’re going to create. You can have several sets, filled with all different types of quests.

The Designate Set Button: This button has no use right now, but it will come in handy later. It allows us to select a set to move quests between. It’s like moving a file between folders, but a quest between sets. I’ll get into it more later.

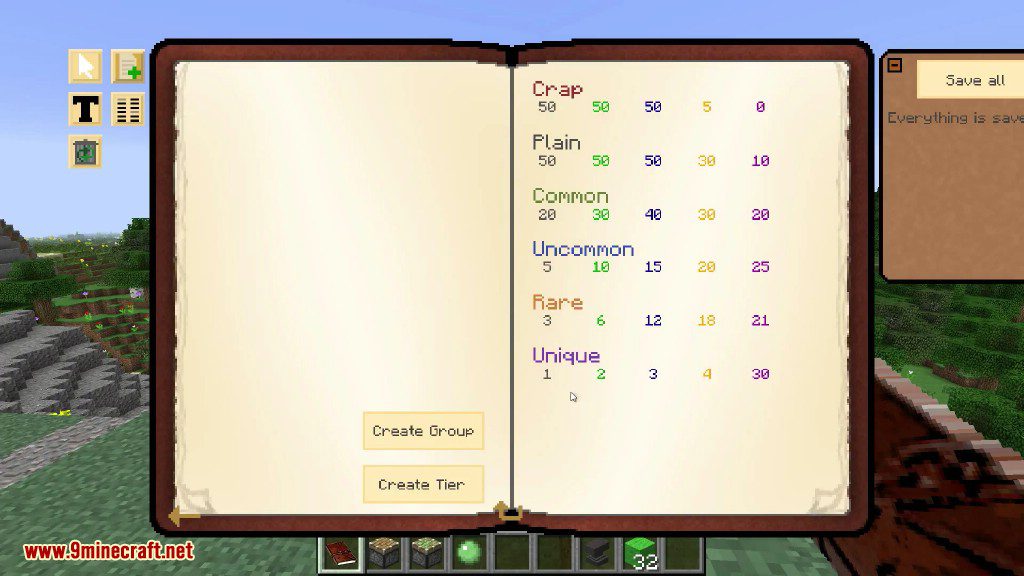
The Reward Bags Button: This button allows you to edit the Reward Bags, which are basically little goodie bags that can be given out to your players every so often. Once again, more detail later.

The BIG BAD Delete Button: This is a very scary button that you should be careful with. When you have this button selected, everything you click on will be deleted. Forever. Only use this in a case of emergency.

The Save Button: Located down on the lower right, this button allows you to save all of your progress, in case it is lost. If you exit the game without pressing this button, everything you’ve done will get itself undone, which we NEVER want to happen. So make it a mental note: every time you are going to exit, hit this button.

Now, since we know what all our tools do, it’s time to make the first set. The set is what we would use to divide our quests into various sections. It’s like a folder, and the quests are the files. Anyway, let’s use our Create Set tool to make our first set.
After first selecting the tool, we’ll be met with this interface:
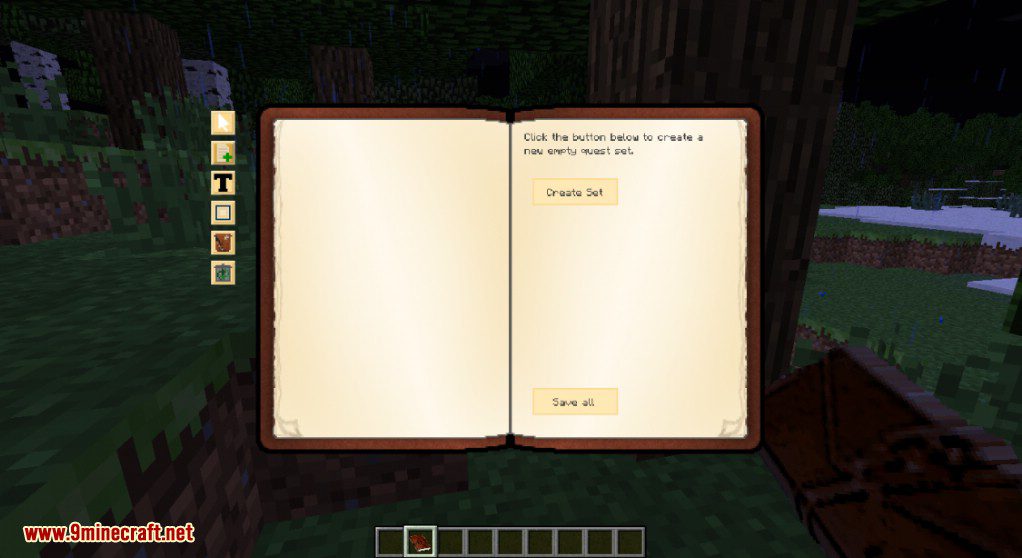
This part is simple. All we have to do is hit “Create Set,” and our first set will be created, like so:
It may be greyed out at first, but that’s simply because we don’t have any quests inside it! We can edit the title of the quest with our good old Text Editor, or we can swap to our Cursor and click on it. We’ll immediately see this:
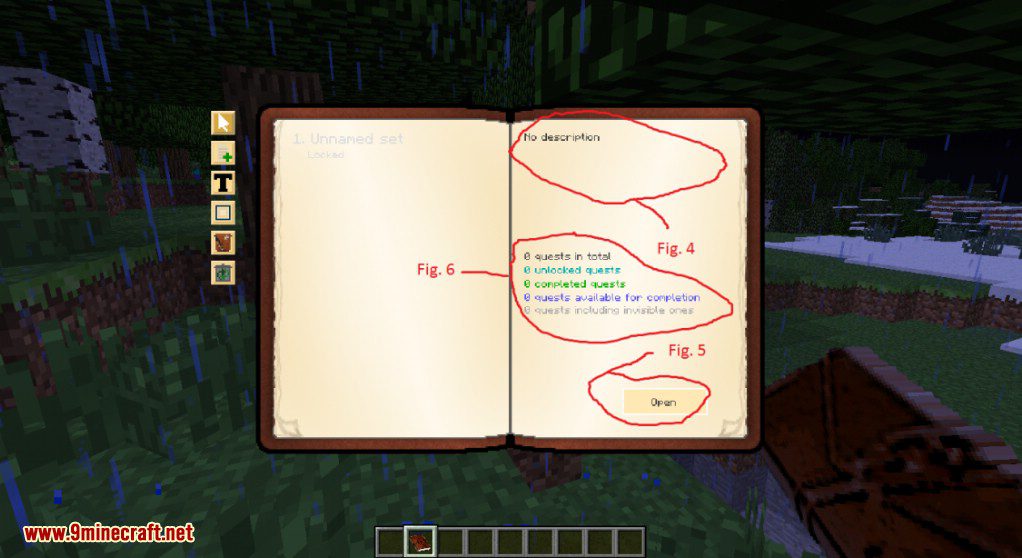
Fig. 4: This is the description for our set! We can edit this with the Text Editor, and whenever a player selects this set, they’ll see this description, all ready for them to read!
Fig. 5: This is what you would click with your Cursor in order to access the quests inside the set. It’s like opening up the folder we compared the set to earlier!
Fig: 6: This is the informational section that tells us and the player how many quests are contained within the set, and what types of quests they are.
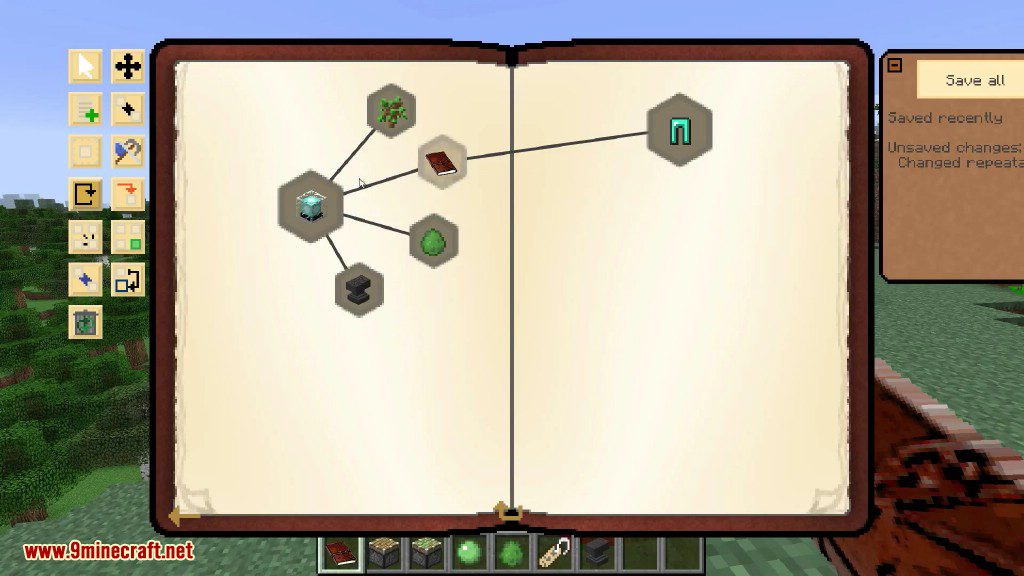
Let’s go ahead and hit the “Open” button! We’ll see a blank screen, with a whole bundle of new and helpful tools!
The Move Quests Tool: This tool, once selected, allows us to click and drag a quest around the screen! It’s helpful for making things look nice and be aesthetically pleasing to the user.

The Create Quest Tool: Hey! This tool looks familiar! It’s the Create Set Tool! Well, basically. Once we’re inside of a set, this tool changes uses. Instead of allowing us to create new sets, this allows us to create new quests! We’ll be using this shortly.

The Quest Requirements Tool: This tool allows us to link quests together. It allows us to designate that one quest should be completed before the next is unlocked. We’ll go into more detail on this later.
The Change Size Tool: This tool is more aesthetic than the other tools. This one allows us to change the visual size of the quest, to make it appear bigger than the others. This has no affect on gameplay, but it sure does look nice!
The Change Item Tool: This tool, like the Text Editor, is a good friend that we are going to be using A LOT. This allows us to change the item associated with a quest, reward, or goal. We will be using this shortly, as well!
The Repeatability Tool: This tool allows us to set the repeatability of a quest. We can have a player repeat a quest every few hours, having it unlock itself after an interval, or have it wait to unlock itself until a certain amount of time has passed since the last completion.
The Trigger Tool: This tool allows us to set the trigger for a quest, or quests after. We would use this tool in order to make quests invisible or locked until a certain requirement has been reached. We’ll go into much more detail about this and the Repeatability Tool later.

The Select Quest Tool: This is a useful tool that allows us to select a quest to bind to an object. We can make it so that there are doors scattered throughout the world that will only open when you complete a quest, or we can have TNT explode when you complete a quest. ‘Cause, I mean, who doesn’t want TNT exploding?
The Quest Option Tool: This is a fun tool that allows us to bind two quests together. Once you’ve completed one of the bound quests, you can’t complete the other!

The Change Set Tool: Earlier, back when we were on the Set screen, we had the ability to select a Set to move things to. This is the tool you would use to actually send the quests to the selected set. Think of this like dropping the quest in the mailbox. Selecting the Set is like addressing the envelope!
Those are all the new tools for this screen. It looks like most of them are useless without the a quest, so why don’t we pull out our friendly “Create Quest” tool, and click a few times!
Woah! We’ve got a whole bunch of flashing buttons! Why don’t we grab our Cursor and click on one? We’ll see this fancy screen:
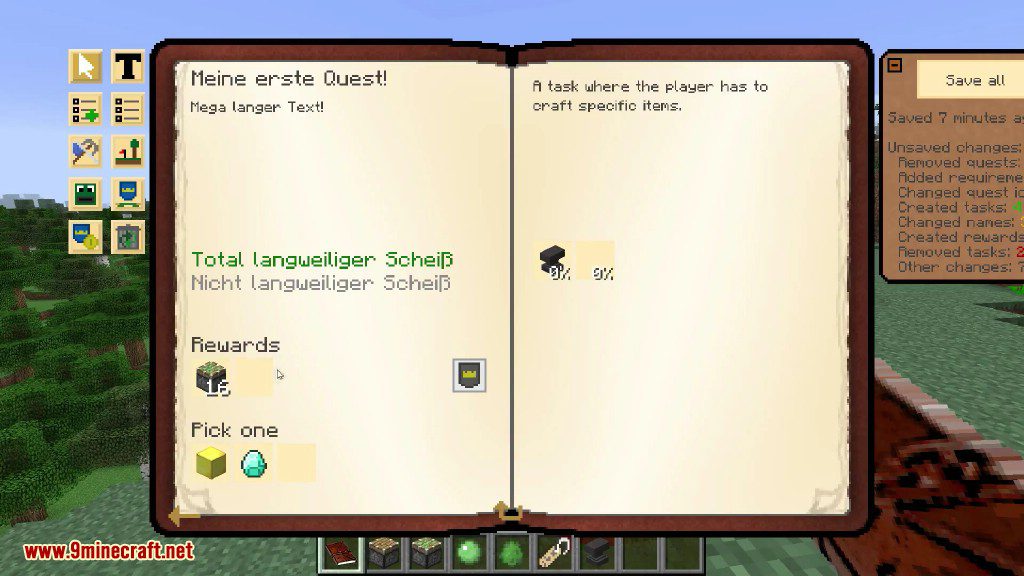
This is our good old fashioned quest screen. It’s here where we’ll be able to see the meat of our quests, like the goals and rewards. Here, let me explain all those new tools:
The Create Task Tool: This is similar to the Create Quest and Create Set tool. It lets us create a task to tell the player exactly what they need to do. There’s everything from Crafting Tasks to Killing Tasks.

The Change Task Tool: This is simple, but useful. This tool allows us to select an already made task and switch the type of task it is.

The Edit Monster Tool: This tool, like the Edit Location Tool, allows us to tell the player which monster they have to kill!

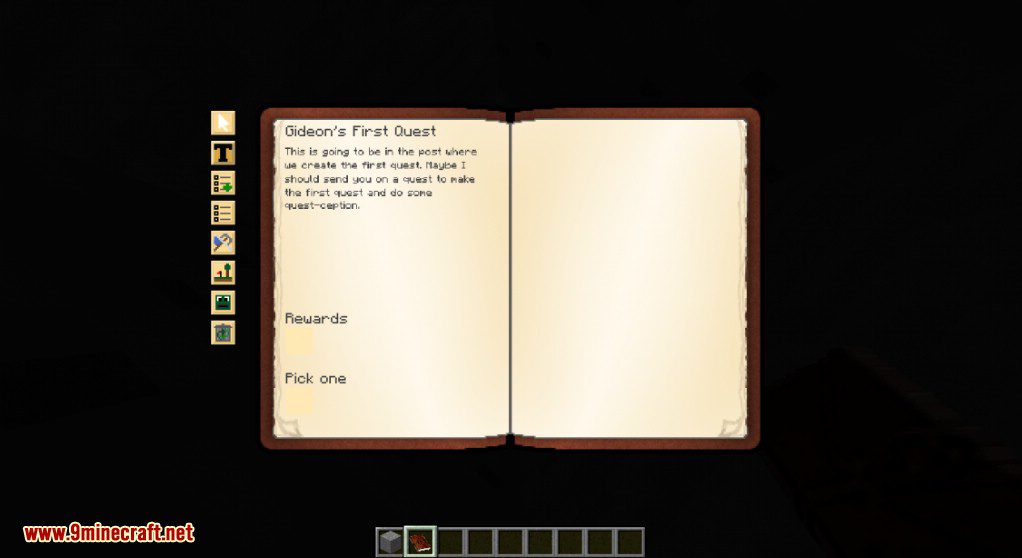
Now, since we’re already here, why don’t we brighten up our quest by adding in a description and title? Use the Good Old Text Editor to do this.
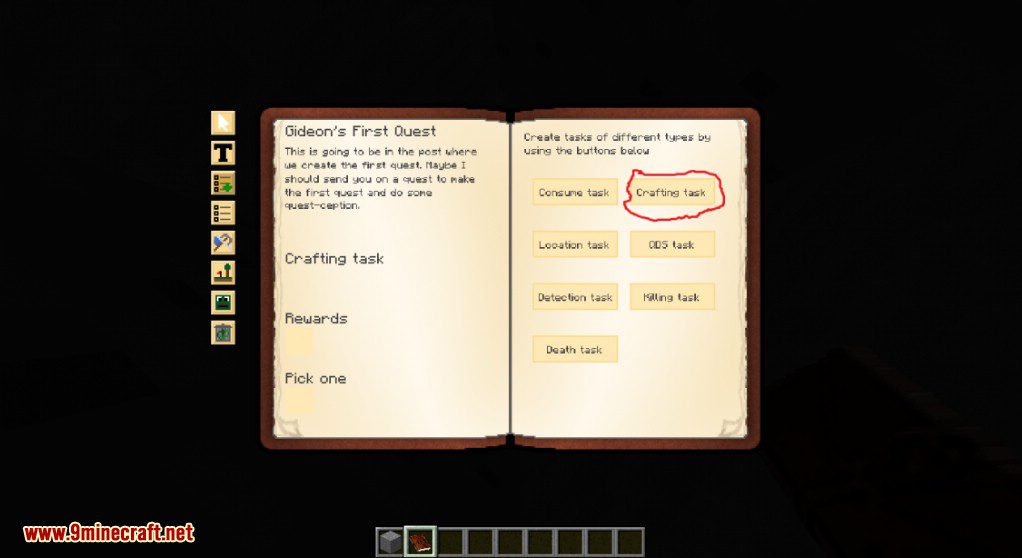
Now, to give this quest a point. Select the “Create Task” tool, and we’ll be met with this:
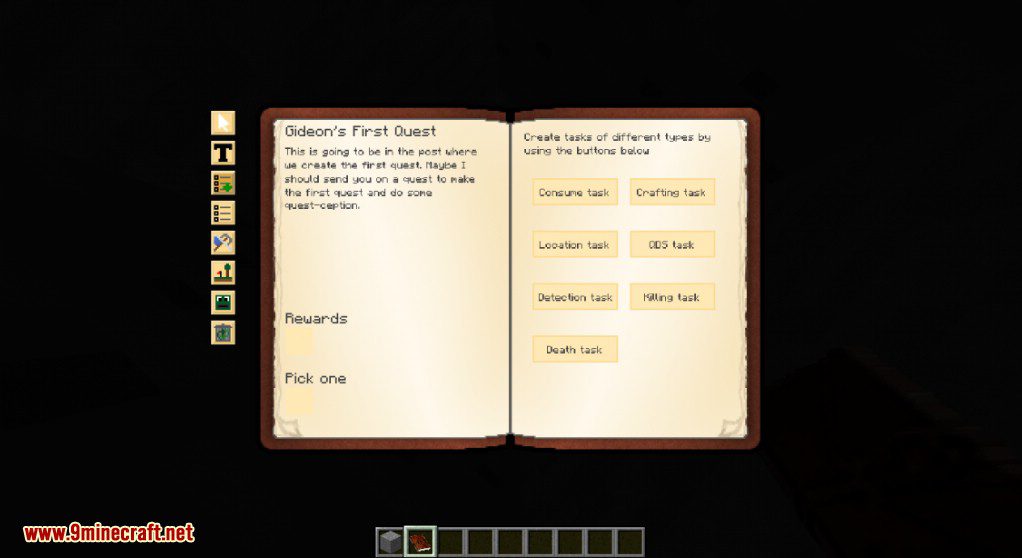
As you can see, there are a myriad of different tasks we can assign the player. We’ll get into all of them later. For now, let’s assign a “Crafting Task,” which requires the player to craft an item:
As you can see, once we’ve clicked it, it created a new Crafting Task. This means that it will detect automatically when we craft the selected item. How do we select the item we want the player to craft? Let’s use our Cursor to click on the Task to find out!
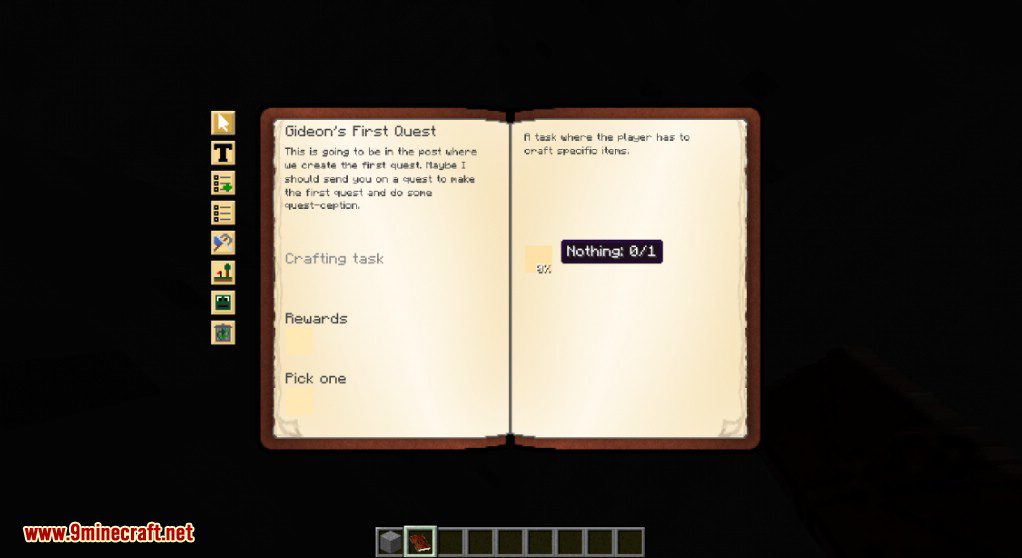
Hrm… It appears that there is nothing… Wait! Gideon! Didn’t you mention something about a Change Item Tool earlier? What if we used that tool and right-clicked on the nothing?
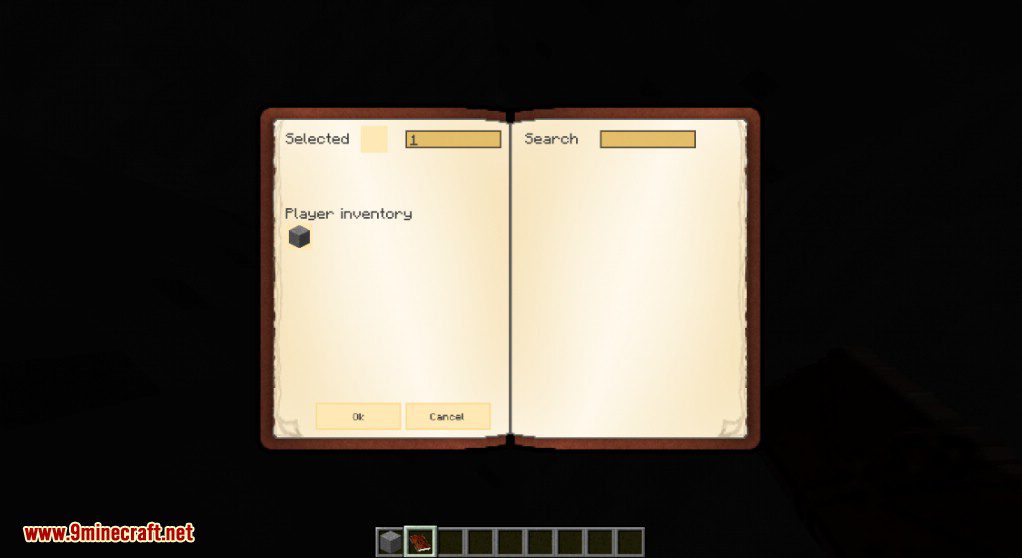
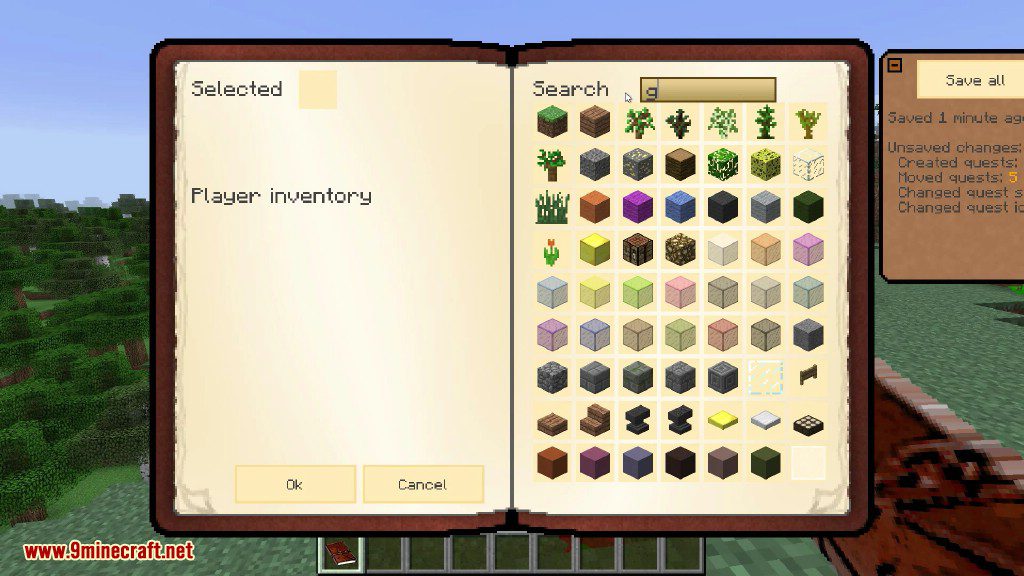
Woah. This is confusing but very nice-looking. If I could, I would even ask this GUI out on a date. Anyway, there are two ways of choosing the item we want the player to craft. You can select it if you have it in your inventory, or you can search for it on the left. Let’s make this first quest simple, and have them craft some Wooden Planks. Let’s try searching for it.
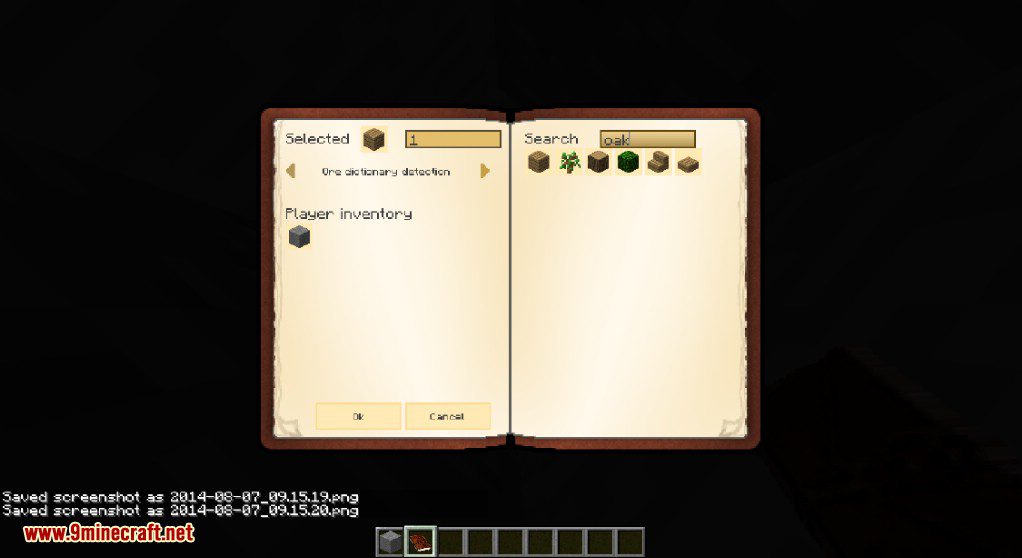
Good job! Now, we can select the amount of times we want them to craft the planks, and what kind of detection we want. For now, let’s leave the amount of crafts at one, and talk about the types of detection.
![]()
Precise detection is the default. The player must submit EXACTLY the item that it requests, else it won’t accept it. So if I had a stone sword named “Gideon is the Best” and you tried to submit a stone sword named “Gideon is NOT the Best,” it would not accept it.
![]()
However, if we had it on NBT independent detection, if it was asking for a stone sword named “Qazplm601 is the Best,” we could still submit one named “Gideonseymour is the Best.” This is also useful for mods like Blood Magic. If we had it on Precise detection, and asked for a Blood Orb bound to Padfoote, it would not accept on bound to Gideonseymour. But if we had it on this setting, it would.
![]()
Fuzzy detection is useful for things that should ignore damage values. Say we wanted them to submit a stone sword that had been used once. Unless we had it on Fuzzy detection, it would not accept a stone sword that had been used twice.
![]()
The last type of detection, Ore dictionary detection, is useful for when there are several types of a block in the game. Say we wanted the player to submit a block of Copper from Thermal Foundation. Unless we have this option enabled, it will not allow the player to submit a block of Copper from IC2.
For the purposes of this quest, we want the book to detect if the player crafts any type of Wooden Plank, whether it be Spruce, Oak, Acacia, or Birch. So, we’ll choose Ore Dictionary Detection. Select that and hit okay, and bam! We’ve created our first task.
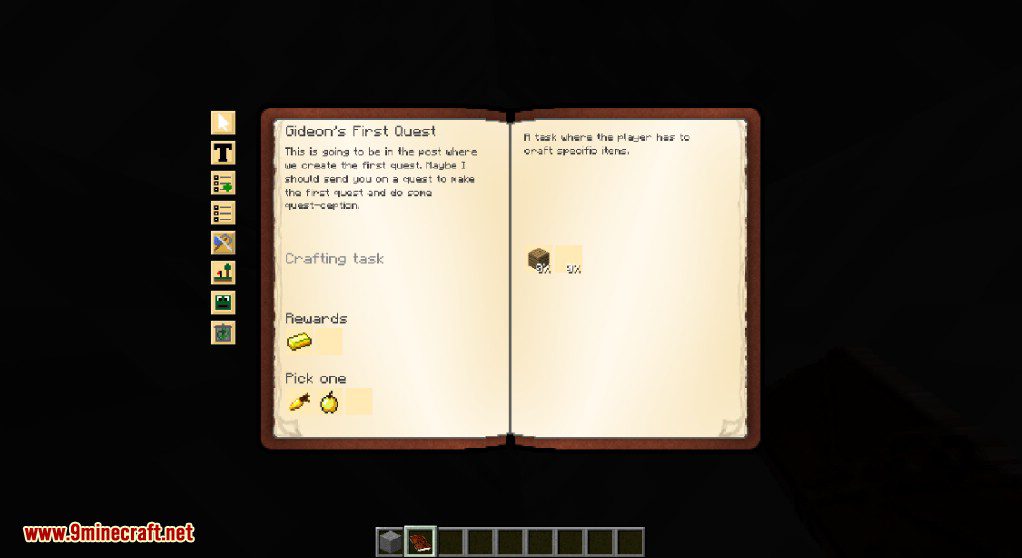
Now, we don’t want to be completely cold-hearted. Sure, we are forcing the player to craft some Wood Planks, but we can, at the least, give them a reward. Let’s use the Change Item tool to click on one of the blanks under “Rewards.” I’m going to give them a gold ingot.
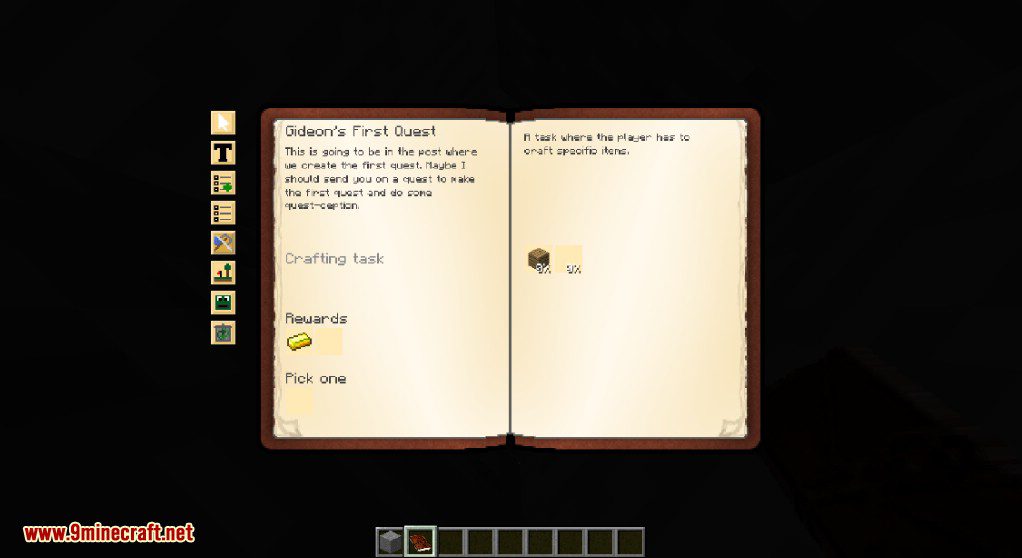
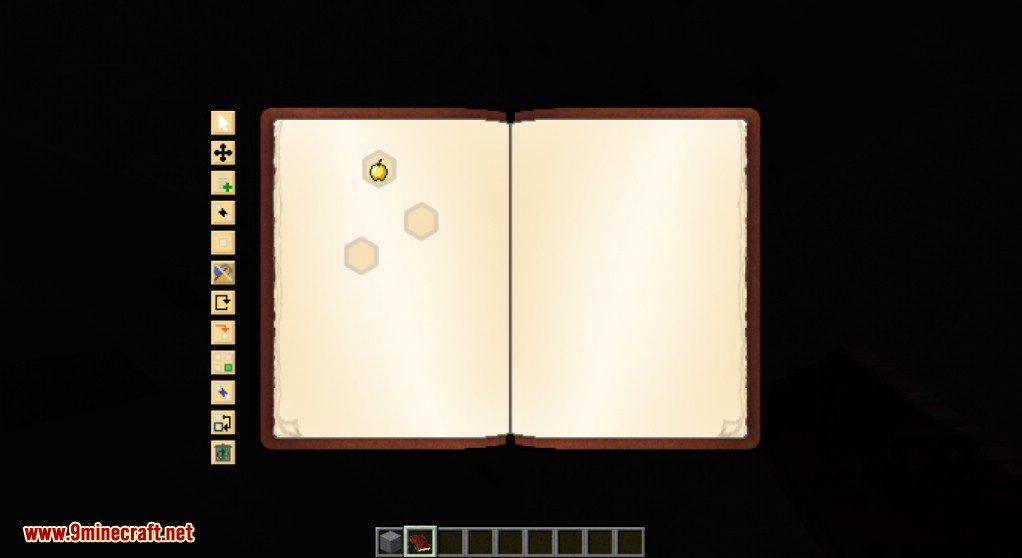
But Gideon, you ask, what does the “Pick One” area mean? Well, young grasshopper, that area allows you to specify some rewards that they have to choose between. F’rinstance, I’ll have them choose between a Golden Apple, and a Golden Carrot. They can’t have both, only one.
We’re almost done with our first quest! There are finishing touches left. Let’s select our cursor again, and head back out so we can view all the quests.
Something is missing. All of these quests lack individuality. It’s like we have a communist state going on in this book! Why don’t we take out our Change Item tool and liven things up a bit.
Ah. That’s more like it. Our quests now have some personality. In fact, now that I think about it, we’ve finished our first quest! Let’s give Gideon a break from typing madly! Why don’t you turn off edit mode and go try your quest out in a new world? Don’t forget to hit save on your way out!
Testing and Resetting the HQM Quest Book:
Show Spoiler
- To test your game and see what the player will see you first have to disable edit mode. To do this exit out of Minecraft and go into minecraft/config/hqm . Open up the hqmconfig.config file (or depending on your version this may be in the editmode.cfg file) and change the “quests.B:UseEditor” attribute from “true” to “false”.
- Next restart Minecraft and load up your game and you should find you can now do the quests in your HQM quest book, but not edit anything. Test your quests for things like how easy they are to complete, whether they work as expected (particularly location-based tasks), and whether quests which require a parent quest to be completed first are working like they should.
- To test everything again from scratch, exit Minecraft, go to your Minecraft folder, and locate \saves\YOUR WORLD NAME\HardcoreQuesting . Inside should be two files – players.dat and players.dat-backup . Make a backup of these somewhere just to be safe, and then delete both files. Now start up Minecraft again and you should have a nice clean HQM quest book, with all of your quests in place but none of the completion tasks done.
Requires:
Architectury API Mod
How to install:
How To Download & Install Mods with Minecraft Forge
How To Download & Install Fabric Mods
Don’t miss out today’s latest Minecraft Mods
Hardcore Questing Mode Mod (1.19.2, 1.18.2) Download Links
For Minecraft 1.7.10
Forge version: Download from Server 1
For Minecraft 1.12.2, 1.12.1, 1.12
Forge version: Download from Server 1
For Minecraft 1.16.5
Forge version: Download from Server 1
Fabric version: Download from Server 1
For Minecraft 1.17.1
Forge version: Download from Server 1
Fabric version: Download from Server 1
For Minecraft 1.18.1
Forge version: Download from Server 1
Fabric version: Download from Server 1
For Minecraft 1.18.2
Forge version:Download from Server 2
Fabric version: Download from Server 2
For Minecraft 1.19.2
Forge version: Download from Server 2
Fabric version: Download from Server 2

