

Minecraft How to Craft Anvil
To craft a single Anvil in Minecraft, you’ll need a surprising total of 31 Iron Ingots. This seemingly simple utility block, while demanding a significant iron investment, quickly becomes an indispensable tool for any seasoned player, offering unique functionalities that no other block can replicate.
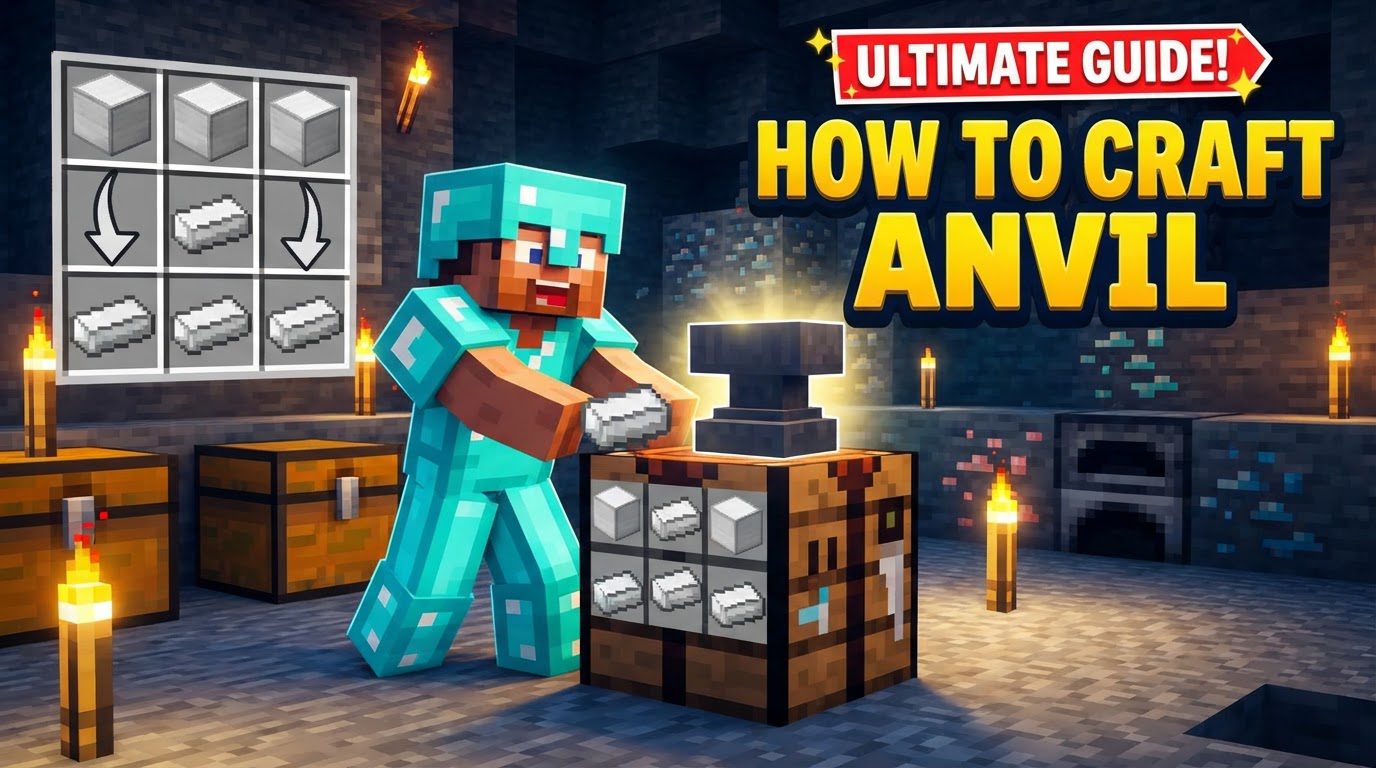
The Anvil: Your Essential Utility Block
The Minecraft Anvil stands out as a versatile and crucial utility block, fundamental for maintaining your most valuable gear and enhancing your gameplay. Its primary functions are threefold, each offering distinct advantages:
- Repairing Tools, Weapons, and Armor: Unlike simply crafting a new item or using a grindstone, the Anvil allows you to repair damaged items without stripping away their precious enchantments. This is paramount for late-game gear that has been meticulously enchanted.
- Combining Enchantments: The Anvil is the sole method for merging enchantments from two enchanted books or an enchanted book onto an item. This enables players to create incredibly powerful, multi-enchanted tools, weapons, and armor, tailoring them to specific needs.
- Renaming Items: Beyond its practical utility, the Anvil provides a cosmetic yet highly functional option to rename any item. Renamed items often stack differently or can help with organization, especially for chests filled with similar-looking but functionally different gear.
The Anvil’s Quirks: Durability, Gravity, and Experience Costs
While incredibly useful, the Anvil isn’t without its peculiarities and limitations. Understanding these mechanics is key to using it effectively and preventing frustration.
- Experience Level Cost: Every operation performed on an Anvil – be it repairing, combining, or renaming – consumes a certain number of experience levels from the player. The cost varies depending on the item’s enchantments, prior work done, and the complexity of the task.
- Limited Durability: Anvils are not indestructible. They possess a finite lifespan and will degrade through three distinct stages: intact, slightly damaged, and very damaged. After approximately 25 uses, regardless of the operation performed, an Anvil will break entirely. Crucially, Anvils cannot be repaired; once broken, a new one must be crafted.
- Affected by Gravity: Similar to blocks like sand or gravel, Anvils are subject to gravity. If the block directly beneath an Anvil is removed, the Anvil will fall. This fall can be dangerous, as a falling Anvil will deal damage to any entity it lands on, making careful placement essential.
- The “Too Expensive!” Barrier: A significant mechanic to be aware of is the increasing experience cost for items that have undergone multiple Anvil operations. Each time an item is used on an Anvil, its “prior work penalty” increases. Eventually, this penalty can make further operations on that item impossible, resulting in a “Too expensive!” message, irrespective of the player’s available experience levels.
Gathering Your Resources: The Iron Core
The first and most significant step in crafting an Anvil is amassing the necessary raw materials. As highlighted, iron is the cornerstone of this crafting recipe.
To craft a single Anvil, you will need:
- 3 Iron Blocks: Each Iron Block is a compressed form of iron, requiring 9 Iron Ingots to craft. Therefore, these three blocks alone account for 27 Iron Ingots.
- 4 Iron Ingots: These are used directly in the crafting recipe.
Combining these requirements, you’ll need a grand total of 31 Iron Ingots to craft one Anvil. This makes the Anvil a mid-to-late-game item for many players, as acquiring such a large quantity of iron typically requires extensive mining or an efficient iron farm.
Forging Your Anvil: A Step-by-Step Crafting Guide
Once you have gathered all 31 Iron Ingots (converted into 3 Iron Blocks and 4 loose Iron Ingots), the actual crafting process is straightforward and takes place within a standard crafting table.
Follow these steps to craft your Anvil:
- Access a Crafting Table: Place a crafting table in the world and right-click it to open its 3×3 crafting grid.
- Place Iron Blocks in the Top Row: In the very top row of the crafting grid, place one Iron Block in each of the three available slots.
- Place a Single Iron Ingot in the Middle: In the middle row, place one Iron Ingot in the center square. The left and right slots of this row should remain empty.
- Place Three Iron Ingots in the Bottom Row: In the bottom row, place one Iron Ingot in each of the three available slots.
- Retrieve Your Anvil: The Anvil icon will now appear in the output slot on the right side of the crafting interface. Drag this newly crafted Anvil into your inventory.
Once crafted, you can place your Anvil in your desired location, keeping in mind its gravitational properties.
Mastering Anvil Mechanics: Tips for Efficiency
To get the most out of your Anvil and mitigate the “Too expensive!” problem, consider these advanced strategies:
- Smart Renaming for Organization: Utilize the renaming feature to organize your inventory and storage. For example, renaming shulker boxes with their contents or labeling specific tools can dramatically improve efficiency in larger builds or complex farms.
- The “Playoff Bracket” for Enchantments: When combining multiple enchantments onto a single item, especially from enchanted books, avoid adding them one by one. Instead, employ a “playoff bracket pattern.” This involves combining enchantments into pairs (e.g., combining two books into one, then another two books into another), then combining those resulting pairs, and so on. This method significantly minimizes the experience cost penalty, allowing you to add more enchantments to an item before hitting the “Too expensive!” limit.
Avoiding Common Anvil Errors: Pitfalls to Sidestep
Even experienced players can fall prey to common mistakes when using the Anvil. Being aware of these can save you valuable resources and experience.
- Attempting to Repair the Anvil Itself: A frequent misconception is that Anvils, like other tools, can be repaired. This is incorrect. Anvils cannot be repaired in any way; once they reach the “very damaged” stage and break, you must craft an entirely new one. Factor this into your iron gathering plans.
- Reaching “Too Expensive!”: This is arguably the most frustrating Anvil-related issue. It often occurs when players repeatedly use an Anvil on the same item, especially by adding enchantments one at a time. The cumulative prior work penalty quickly escalates the experience cost beyond the game’s internal cap. The “playoff bracket” method mentioned above is the primary way to prevent this for enchantment combining. For repairing, try to repair items less frequently or ensure they don’t accumulate too many prior Anvil operations.
- Combining Incompatible Enchantments: Minecraft has specific rules about which enchantments can coexist on a single item. For instance, you cannot have two different types of Protection enchantments (e.g., Protection IV and Fire Protection IV) on the same piece of armor. Attempting to combine incompatible enchantments will not work and will often waste your experience levels without yielding the desired result. Always check enchantment compatibility before attempting to merge.
The Anvil, despite its costs and unique mechanics, remains an indispensable part of a robust Minecraft survival strategy. Mastering its use and understanding its limitations will empower you to create and maintain the best gear, allowing you to tackle any challenge the game throws your way.
Tags:
YOU MAY ALSO LIKE...


