

Minecraft How to Craft Armor Stand
Many aspiring Minecraft builders overlook a crucial detail when trying to display their prized diamond armor or rare mob heads: the specific crafting recipe for an Armor Stand. While seemingly straightforward, the process requires a particular material that often trips up even seasoned players, leading to frustration and wasted resources. This guide will meticulously walk you through every step, ensuring your valuable gear finds its rightful place on a decorative mannequin.
Understanding the Armor Stand’s Purpose
An Armor Stand is far more than just a block; it’s a non-solid entity designed specifically for display. These versatile mannequins allow you to showcase wearable items such as various armor sets, carved pumpkins, and even the coveted mob heads you’ve collected on your adventures. They serve as excellent decorative elements, transforming cluttered chests into organized, aesthetically pleasing displays within your base. Beyond mere aesthetics, Armor Stands can be practical, helping you organize your gear or even creating dynamic scenes when manipulated with Redstone, particularly in the Java Edition of the game.
- Decorative Mannequins: Primary use is to display armor and other wearable items.
- Organization and Aesthetics: Enhance the visual appeal of your base and keep gear tidy.
- Dynamic Displays: Can be posed in various ways, with Redstone manipulation possible in Java Edition for advanced setups.
Essential Ingredients: Gathering Your Materials
To craft an Armor Stand, you will need a precise combination of materials: 6 Sticks and 1 Smooth Stone Slab. Each of these components has its own acquisition method, which we will detail below.
Crafting Sticks
Sticks are a fundamental crafting component in Minecraft and are quite easy to obtain. You will need a total of six sticks for one Armor Stand. To craft sticks:
Step 1: Obtain Wood Planks. Any type of wood plank will suffice (e.g., Oak Planks, Spruce Planks, Birch Planks). You can get wood planks by breaking down logs from trees. One log yields four planks.
Step 2: Craft Sticks. Open your crafting inventory (default ‘E’ key) or use a crafting table. Place two wood planks vertically in any crafting grid slot (one plank directly above another). This will yield four sticks. Since you need six sticks, you’ll need to repeat this process or use three planks to get twelve sticks (by placing two planks in a 2×2 grid, for example). For exactly six sticks, you’ll need a total of four wood planks (two planks for four sticks, then two more planks for another four sticks, giving you eight total, more than enough).
Obtaining Smooth Stone Slabs
This is where many players encounter a common mistake. The recipe specifically calls for a Smooth Stone Slab, not a regular Stone Slab or a Cobblestone Slab. Obtaining smooth stone involves a two-step smelting process.
Step 1: Smelt Cobblestone into Stone. First, you need cobblestone, which is abundantly found by mining any stone block with a pickaxe. Place your cobblestone into a furnace with a fuel source (such as coal, charcoal, or wood). After smelting, the cobblestone will transform into regular Stone.
Step 2: Smelt Stone into Smooth Stone. Take the newly smelted regular Stone and place it back into the furnace, again with a fuel source. This second smelting process will convert the regular Stone into Smooth Stone. Smooth Stone has a distinct, perfectly smooth texture compared to the rougher regular Stone.
Step 3: Craft Smooth Stone into a Smooth Stone Slab. Once you have Smooth Stone, open your crafting table. Place three Smooth Stone blocks in a horizontal row across any row in the 3×3 crafting grid. This recipe yields six Smooth Stone Slabs, but you only need one for your Armor Stand.
The Crafting Table Layout: Assembling Your Stand
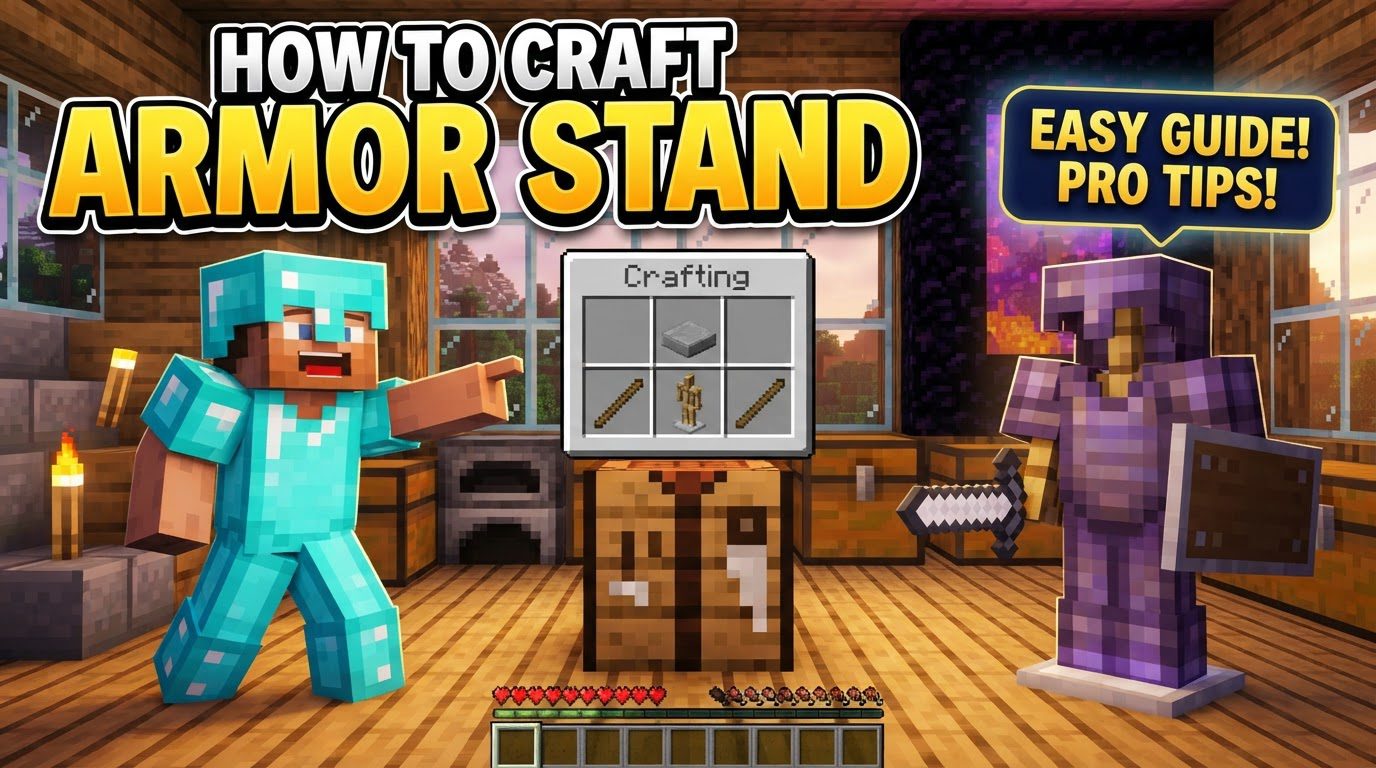
With your 6 Sticks and 1 Smooth Stone Slab in hand, you’re ready to combine them. Remember, an Armor Stand cannot be crafted in your 2×2 inventory crafting grid; you must use a 3×3 crafting table.
Open your crafting table and arrange the materials precisely as follows:
- Top Row: Place 3 Sticks horizontally across all three slots.
- Middle Row: Place 1 Stick in the center slot.
- Bottom Row: Place 1 Stick in the left slot, 1 Smooth Stone Slab in the center slot, and 1 Stick in the right slot.
Once the materials are correctly arranged, the Armor Stand item will appear in the result box on the right side of the crafting interface. Simply click and drag it into your inventory.
Utilizing Your New Display: Placement and Interaction
Once you have your Armor Stand, placing and interacting with it is straightforward.
- Placement: Hold the Armor Stand in your hand and right-click on the ground or any solid block. It will appear upright, ready for use.
- Equipping Items: To place armor, a carved pumpkin, or a mob head onto the stand, hold the desired item in your hand and right-click on the Armor Stand. The item will automatically snap into its corresponding slot (helmet, chestplate, leggings, boots).
- Retrieving Items: To take an item off the stand, simply right-click on the item you wish to retrieve.
- Breaking the Stand: If you need to move or remove an Armor Stand, quickly attack it twice (left-click). It will break and drop itself, along with any armor or items it was displaying, for you to pick up.
Advanced Display Techniques and Creative Applications
Armor Stands offer more than just static display; they can be customized to breathe life into your creations.
- Posing: In Java Edition, players can right-click an Armor Stand while sneaking (holding Shift) to cycle through various poses. This allows for dynamic displays, making your base feel more alive.
- Command Customization: For advanced users, commands can unlock even greater potential. You can summon Armor Stands that are invisible, have specific poses, or even have arms using commands like
/summon armor_stand ~ ~ ~ {Invisible:1}to create floating armor, or/summon armor_stand ~ ~ ~ {Pose:{Body:[0f,90f,0f]}}to set a custom pose for its body. - Creative Displays: Use Armor Stands to create shop mannequins, historical exhibits for your rare finds, or even as part of elaborate Redstone contraptions that reveal or hide items.
Common Missteps to Avoid
To ensure a smooth crafting experience, be mindful of these common mistakes:
- The Smooth Stone Snafu: The most frequent error is forgetting the two-step smelting process for Smooth Stone. Cobblestone must be smelted into Stone, and then that Stone must be smelted again into Smooth Stone. Regular stone or cobblestone slabs will not work in the recipe.
- Crafting Grid Limitation: Attempting to craft an Armor Stand in your personal 2×2 inventory crafting grid will fail. A full 3×3 crafting table is absolutely essential for this recipe.
- Incorrect Slab Type: Double-check that you are using a Smooth Stone Slab. Do not confuse it with a regular Stone Slab (made from regular stone) or a Cobblestone Slab (made from cobblestone). The recipe is very specific.
By following this comprehensive guide, you’ll be able to craft Armor Stands with ease, elevating your Minecraft builds and organizing your precious gear in style. From displaying your most powerful enchanted armor to creating elaborate, posed scenes, the Armor Stand is a small but mighty tool for any aspiring decorator or functional builder.
Tags:
YOU MAY ALSO LIKE...


