

Minecraft Ore Distribution Chart
Mining aimlessly in Minecraft without understanding where ores truly reside is one of the most common yet easily avoidable mistakes a player can make. The blocky world isn’t just a random assortment of resources; it operates on a sophisticated, Y-level dependent generation system that, once understood, transforms inefficient digging into highly productive expeditions. Mastering the nuances of Minecraft’s ore distribution charts is not merely a suggestion for advanced players, but a fundamental skill for anyone looking to thrive, efficiently gather resources, and progress through the game’s many challenges.
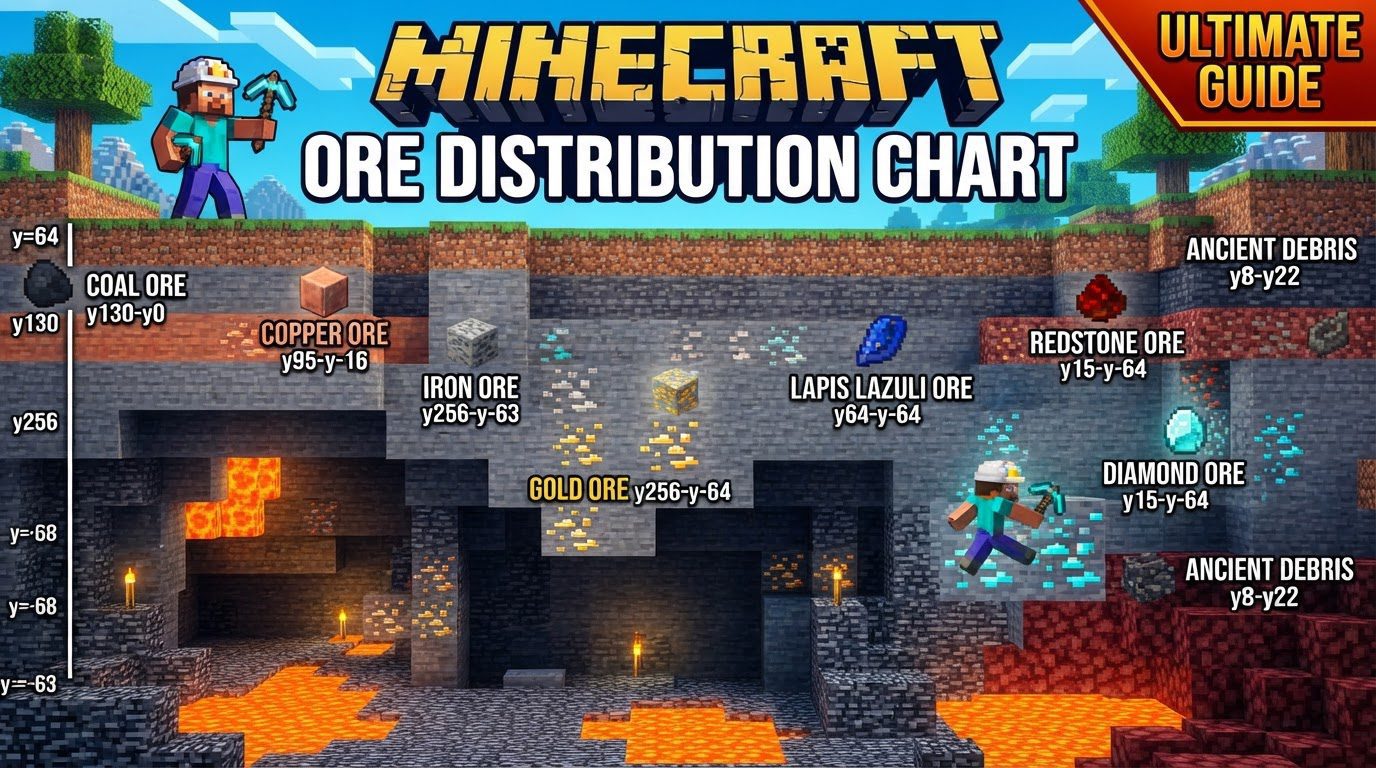
The Bedrock of Ore Generation: Key Mechanics
Understanding how ores generate is the first step toward becoming a master miner. Several core mechanics dictate where and how you’ll find precious resources.
- The Crucial Y-Level Dependence: Fundamentally, ore generation in Minecraft is inextricably linked to the Y-coordinate, which represents your vertical position in the world. Since the 1.18 “Caves & Cliffs” update, the Overworld extends from Y -64 (the deepest bedrock layers) up to Y 320 (the build limit). Most valuable ores are concentrated in the negative Y-levels, making deep exploration essential.
- Unearthing Peak Zones: Each ore type isn’t just found within a general Y-range; it has specific “peak zones.” These are particular Y-levels where that ore is most abundant and thus most likely to be encountered. Knowing these peaks is paramount for efficient mining.
- Biome-Specific Riches: The type of biome you’re in can also influence ore generation. Certain ores have increased spawn rates or even exclusive generation conditions within particular biomes. For instance, copper is notably more common in Dripstone Caves, iron can be found in greater quantities in mountain biomes, and emeralds are exclusively found within mountain biomes.
- Reduced/No Air Exposure (RAE/NAE) Logic: Some ores are shy. They are less likely to generate when exposed to air. This means that simply exploring open caves might not be the most efficient strategy for them. Ores with “No Air Exposure” (NAE) will explicitly not generate if any of their faces would be exposed to air, making methods like branch mining or exploring underground aquifers more effective for these particular resources.
- The Right Tool for the Job: Pickaxe Tiers: Even if you find an ore, you won’t be able to collect it without the correct tool. Every ore requires a minimum pickaxe tier to be successfully mined. Using a lower-tier pickaxe will destroy the block without yielding any ore. For example, to harvest diamonds, you absolutely need at least an iron pickaxe; a stone pickaxe will simply shatter the diamond ore block into nothing.
A Miner’s Path: Strategic Resource Acquisition
With the foundational knowledge established, let’s outline a strategic approach to mining that maximizes your yield and minimizes wasted effort.
- Pinpoint Your Desired Resource: Before even picking up your pickaxe, decide which ore you need most. This dictates your entire mining strategy. Consult an updated ore distribution chart to identify its optimal Y-level.
- Prepare Your Expedition: Equip yourself properly. This means crafting the appropriate pickaxe tier for your target ore (e.g., iron for diamonds), bringing plenty of torches to light your way and prevent mob spawns, stocking up on food to regenerate health and hunger, and carrying weapons for defense against the dangers lurking underground.
- Descent to the Depths: Travel to the recommended Y-level. This can involve digging a straight shaft down (always be careful of lava or ravines below!) or finding a natural cave system that descends to your target depth.
- Execute Your Mining Strategy:
- Branch Mining (Strip Mining): This highly efficient method involves digging a main tunnel at your target Y-level and then branching off with long, parallel tunnels. It’s particularly effective for ores that prefer not to be exposed to air, as you’re constantly digging into fresh blocks.
- Caving: Exploring natural cave systems can be a quick way to find exposed ores. This is especially good for ores that generate more freely or appear in larger veins. However, it can be more dangerous due to mob spawns and requires more careful navigation.
- Targeted Biome Exploration: If you’re after biome-specific ores, such as emeralds, make your way to the relevant biome (e.g., extreme hills or mountains) before descending.
- Collect and Retreat: Once you’ve gathered your desired ores, ensure you have a safe path back to your base to store your valuable findings.
Spotlight on Precious Materials: Where to Dig
Each ore has its own story of where it likes to hide. Here’s a quick guide to some of the most sought-after resources:
- Diamonds: The ultimate prize, diamonds are most abundant around Y -59 in modern Minecraft versions. Dig deep!
- Coal: Ubiquitous and essential, coal is found from Y 0 all the way up to Y 320, with noticeable peaks around Y 96 and Y 136. You’ll find plenty just about anywhere.
- Copper: Useful for building and lightning rods, copper peaks around Y 48 and is particularly prevalent within Dripstone Caves.
- Lapis Lazuli: Essential for enchantments, Lapis Lazuli is most common around Y 0, with a generation range extending from Y -64 to Y 64.
- Iron: A mid-game staple, iron peaks at two distinct levels: Y 16 and Y 232. It also enjoys a bonus spawn rate in mountain biomes and can be found in massive “iron ore veins.”
- Redstone: Crucial for complex contraptions, Redstone is generally found deeper underground. The adage “the deeper, the better” truly applies here.
Always remember that game updates can occasionally tweak ore generation. For example, Java Edition 1.20.2 saw an increase in diamond ore generation in its deepest layers. Keeping an updated ore distribution chart handy is always a wise practice.
Common Mining Pitfalls to Avoid
Even seasoned players can fall into traps of inefficiency. Steer clear of these common mistakes to maximize your mining success:
- The Wrong Pickaxe Woe: Attempting to mine valuable ores like diamonds with a stone pickaxe is a rookie error that yields nothing but wasted effort and a destroyed ore block. Always match your pickaxe tier to the ore you intend to mine.
- Disregarding Y-Levels: Blindly digging without consulting Y-levels is perhaps the biggest efficiency killer. You could spend hours digging through barren rock when just a few levels up or down lies a treasure trove.
- Overlooking Biome Advantages: Neglecting to seek out specific biomes for certain ores is a missed opportunity. Actively seeking out mountains for iron or emeralds, or Dripstone Caves for copper, can significantly boost your haul.
- Fear of the Deep: Many players hesitate to venture into the negative Y-levels due to increased danger from mobs and lava. However, avoiding these depths means missing out on the richest veins of diamonds, redstone, and other valuable resources. Embrace the challenge and delve deep!
By understanding the underlying mechanics, adopting strategic mining practices, and avoiding common pitfalls, any Minecraft player can transform their resource gathering from a chore into a highly rewarding and efficient endeavor. The world of Minecraft is rich with resources; knowing where to look is your key to unlocking its full potential.
Tags:
YOU MAY ALSO LIKE...


