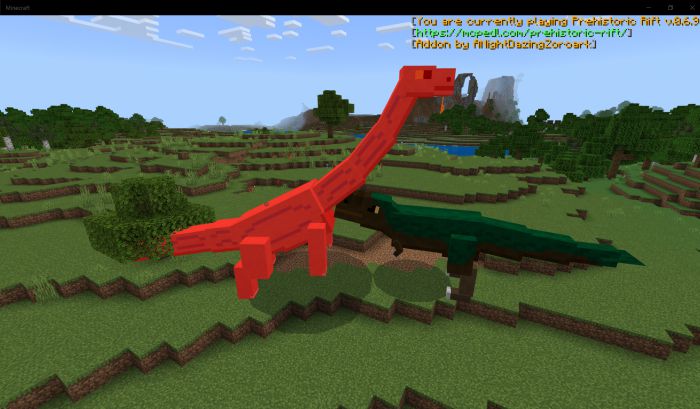
Prehistoric Rift Addon (1.19) – MCPE/Bedrock Dinosaur Mod
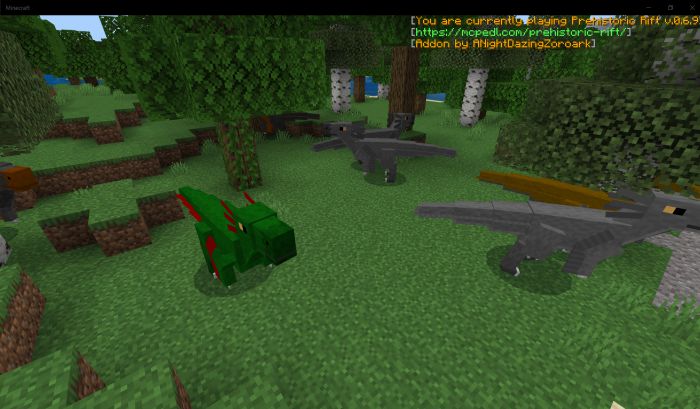
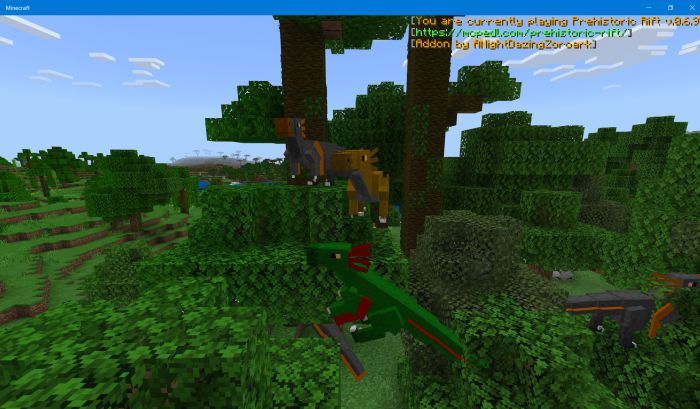
Prehistoric Rift Addon (1.19) aims to expand upon the gameplay of Minecraft by adding prehistoric creatures and enhancing the vanilla experience! Each new mob is worked out to the maximum: the author paid great attention not only to the model but also to the behavior. In addition, screenshots will make it easy to find out the necessary information about the mob – the developer presented them in the most convenient format.

Features:
Items
These items are essential to make the most out of the addon
Treats
These food items are needed to tame and breed the creatures in the addon. Different treats work on different mobs, so try playing around with them and see.
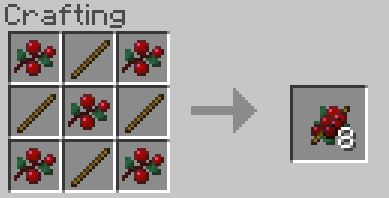
- Berry Treat
- Grassy Treat (tall grass and grass also work)
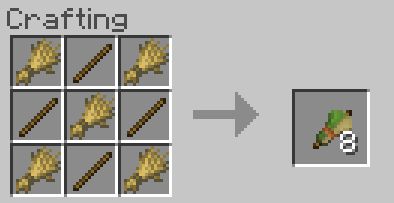
- Leafy Treat (all types of leaves work)

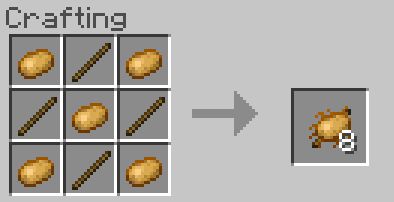
- Rooted Treats (Beetroots and Carrots also work)
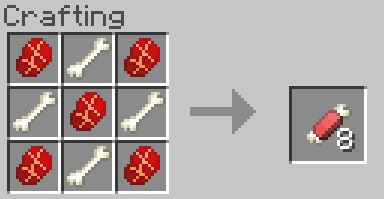
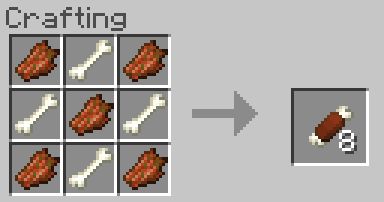
- Flesh Treats (any meat that’s not chicken works)
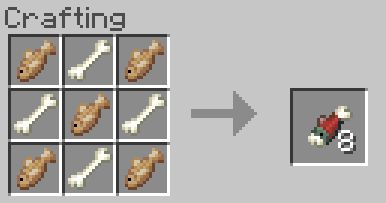
- Fish Treat (salmon also works)
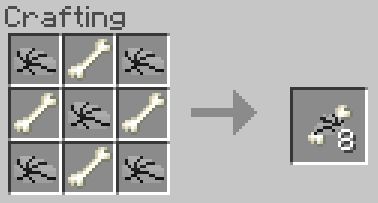
- Carrion Treat
- Bug Treat (requires raw hemolymph, which is dropped by bugs)
Command Staff
This item is required to utilize the special abilities of your mount. To activate an ability, just right-click/tap and hold once, and if your tamed creature has multiple abilities, right-click/tap and hold then release to change it. You can also use it to change the behavior of tamed creatures by interacting with them while holding this (i.e, make them assist you in combat or attack nearly everything in sight)

Harvest Staff
This item allows the creature you’re riding to harvest certain items at a higher efficiency than by hand. Different creatures can harvest different items with varying efficiencies. Some creatures may even extract resources from certain blocks!
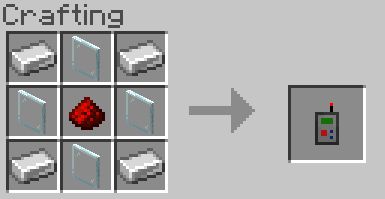
Command Console
This item allows you to use machines that are attached to the saddle of the creature you are riding if there are. For example, cannons!
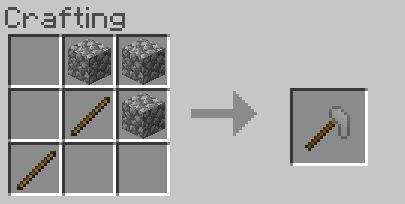
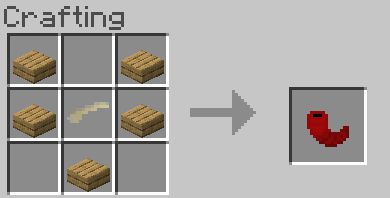
Aggravating Horn
This item makes all tamed creatures turn hostile towards nearby mobs that are not tamed until the target is killed or out of range. Any kind of wooden slab works. Also, that item in the center is a Parasaurolophus Horn, which is rarely dropped by Parasaurolophuses.
Creatures
(The main attraction of this addon)
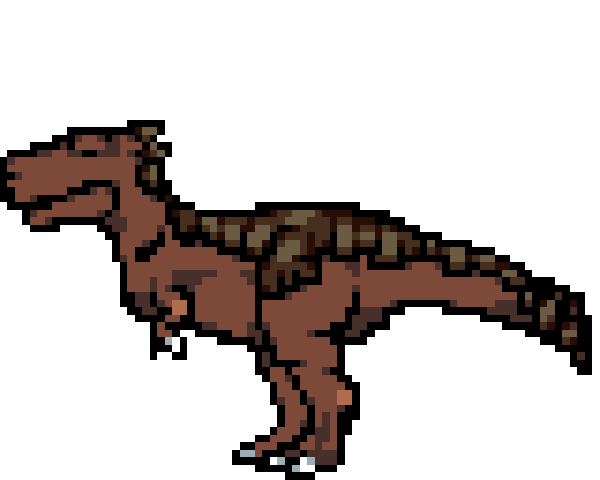
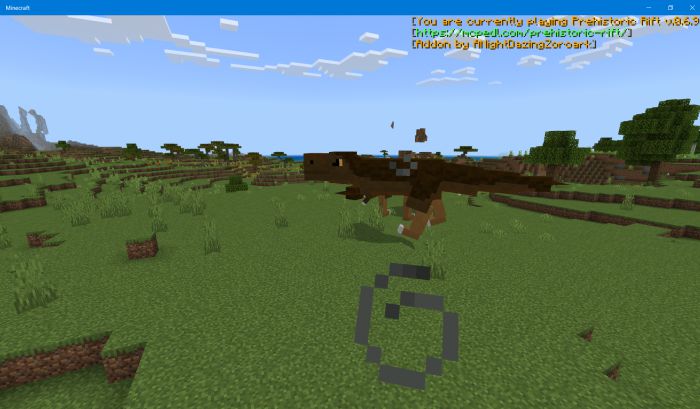
Tyrannosaurus
- Health: 80 Hearts
- Damage Output: 17.5 Hearts
- Taming Tier: Tier 3
- Favorite Treats: Flesh Treat, Carrion Treat
The Tyrannosaurus can be found in the plains or mountains. It’s neutral most of the time, but every once in a while it will attack anything it deems to be food. In order to tame it, you need to kill a wild Tyrannosaurus for a chance to get an egg. Be careful, as they may utilize their powerful roar to knock you back if you attempt to attack them, and they will inflict weakness 2 on most surrounding mobs!
Once tamed, its command staff’s ability is to let out a roar that will knock back most mobs and destroy blocks weaker than wood!
By the way, if you don’t want to go through the pain of trying to kill wild Tyrannosauruses and hope you’re lucky enough to get an egg from them, there’s an easier way. In the extreme hills biomes, there may be a nest full of piles of meat, a sleeping Tyrannosaurus, and an egg.
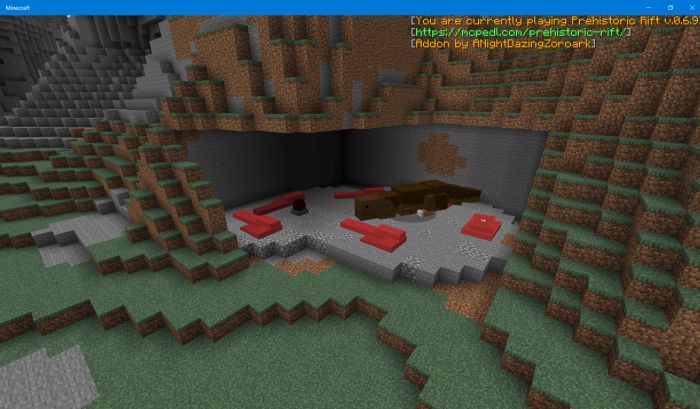
You can interact with the piles of meat to get some meat and other kinds of great loot, just make sure to sneak when you go near the nest or the sleeping Tyrannosaurus will wake up. But if you grab the egg, it will wake up, so be prepared!
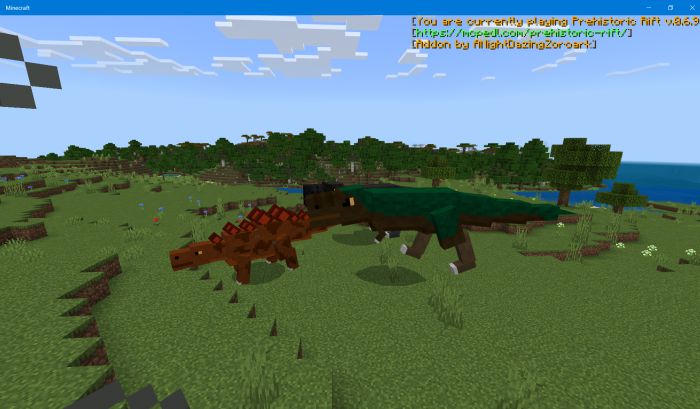
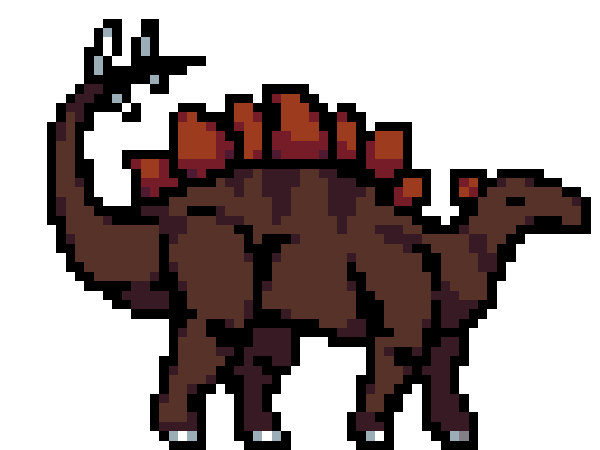
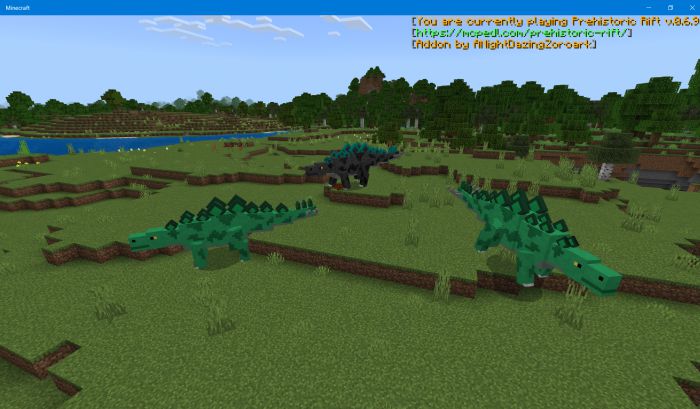
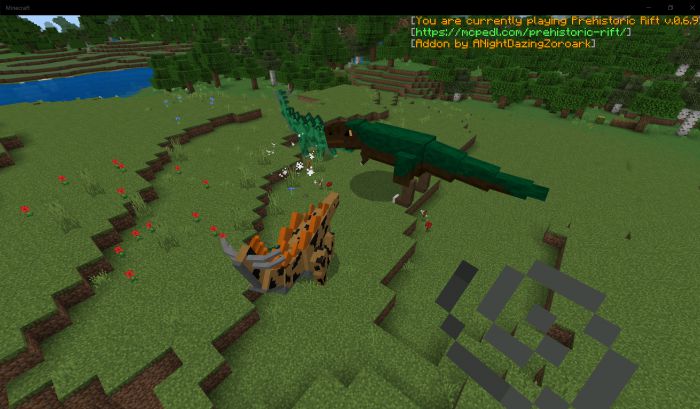
Stegosaurus
- Health: 50 Hearts
- Damage Output: 15 Hearts (melee), 2.5 Hearts (ranged)
- Taming Tier: Tier 1
- Favorite Treats: Berry Treat, Grassy Treat, Rooted Treat
The Stegosaurus can be found in plains biomes grazing alongside other Stegosauruses. Don’t aggravate it because it is capable of killing most mobs in one hit with its swing attack, or with a few shots from its ability to fling its plates at you. They can be tamed with berry treats, rooted treats, and grassy treats.
Once tamed, you can use the harvest staff to make them harvest grass fiber from grass, obtain more crops than you normally would from farming them, and convert flowers into a dye!
But what’s more is that they can charge up their regular tail stab attack for more damage! With a drawback of course, being a long cooldown. You may also use them as a form of ranged attack if you cannot use a bow for some reason.
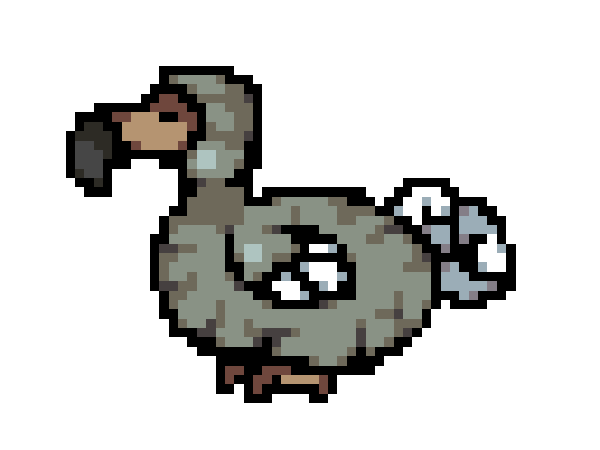
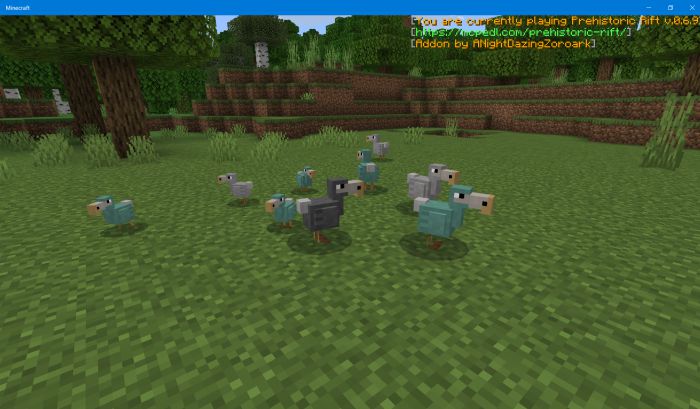
Dodo
- Health: 3 Hearts
- Damage Output: 0 Hearts
- Taming Tier: Untameable
- Favorite Treats: Berry Treat
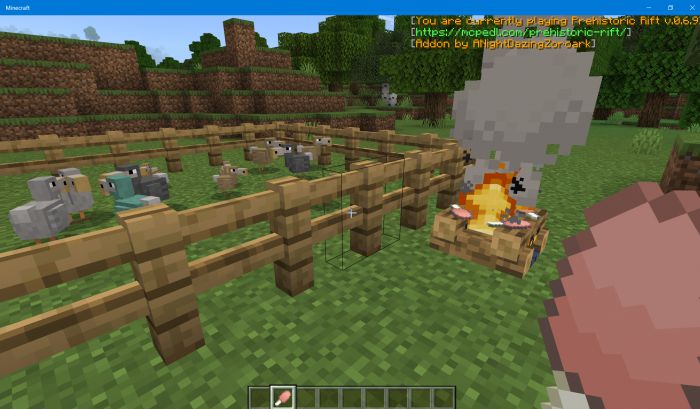
The Dodo is essentially a dumb chicken. You can just put them in a pen and breed them with berry treats.
Their meat however is quite special. When cooked, they will grant you absorption.
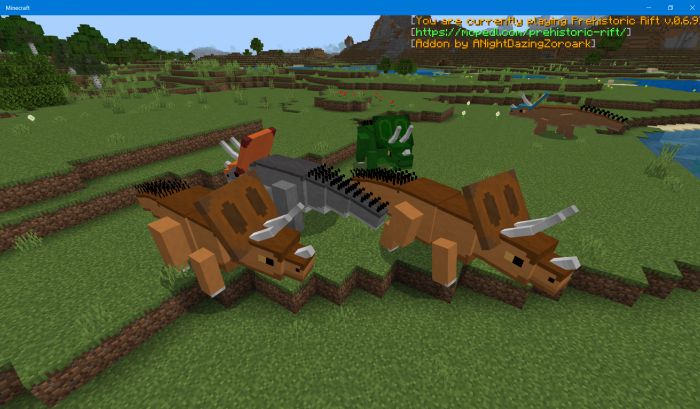
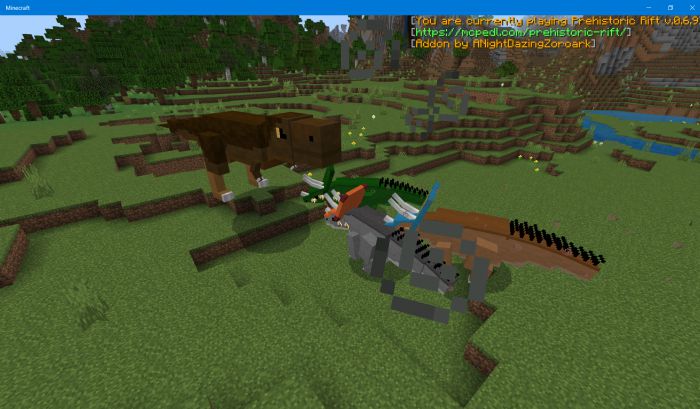
Triceratops
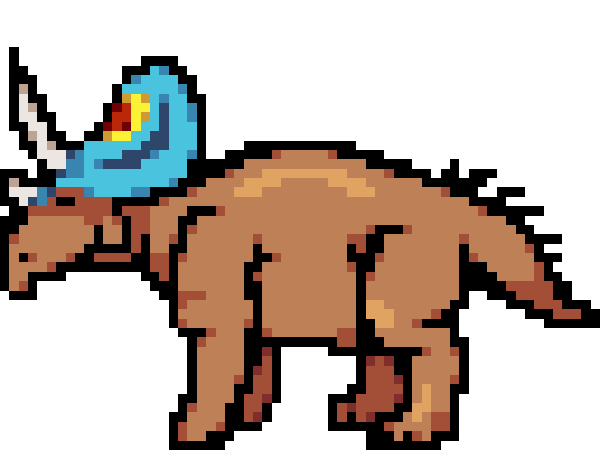
- Health: 40 Hearts
- Damage Output: 12.5 Hearts
- Taming Tier: Tier 1
- Favorite Treats: Berry Treat, Grassy Treat, Rooted Treat
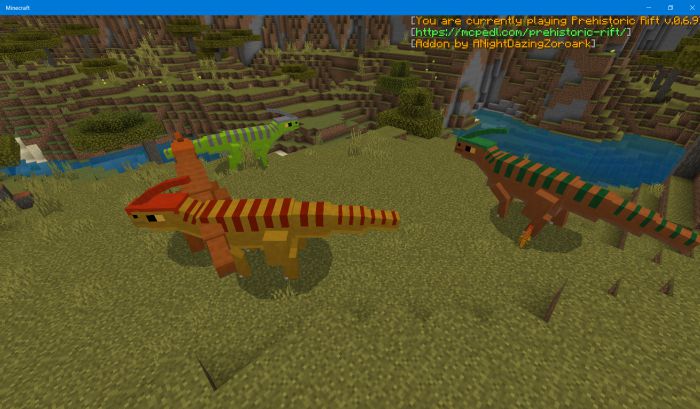
The Triceratops is a friendlier version of the Stegosaurus, like, you can go pat them in the wild. Don’t aggravate them because they’re quite fast and will not take you lightly. They can be tamed with berry treats, rooted treats, and grassy treats.
Once tamed, their command staff ability is to go into a rage mode where they will be faster and can charge into blocks weaker than wood and mobs. You can also use the harvest staff to make them harvest thatch from logs, lots of saplings, and leaves from leave blocks.
If a Triceratops goes near a Tyrannosaurus or a boss, they will gain a rivalry buff that will grant them strength 3 and resistance 3. This makes them perfect for busting Tyrannosauruses and maybe even the Wither.
Utahraptor
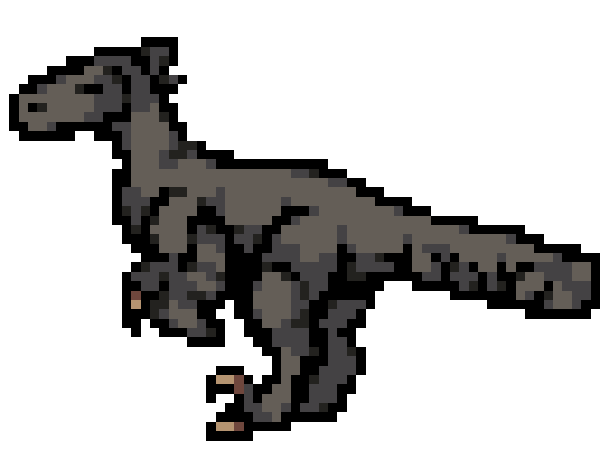
- Health: 15 Hearts
- Damage Output: 6 Hearts
- Taming Tier: Tier 2
- Favorite Treats: Flesh Treat
Utahraptors can be either found in packs hunting or hiding in the forests. Once a pack spots a target there’s a chance that one of the pack members will activate a pack buff to grant swiftness and strength to its packmates. You can tame them however by sneaking up on them and giving them flesh treats over time.
Once tamed, you can power jump way higher than a horse would, and you can even pounce on other mobs. The command staff allows them to use the pack buff but only for other tamed Utahraptors. Finally, you can climb walls with them! Just jump while looking up to latch yourself to a wall, then look up while holding jump to climb up! To climb down, just look down and press jump once!
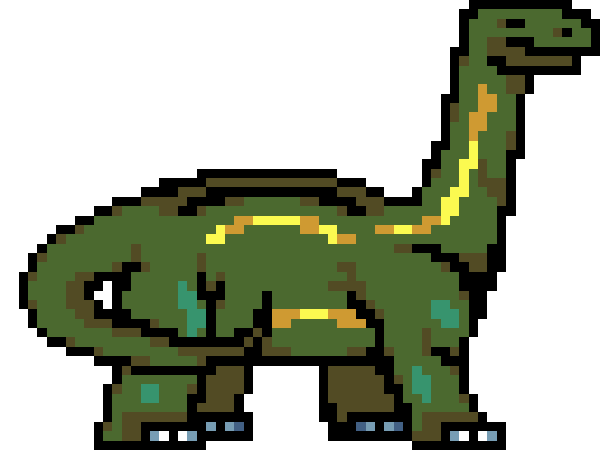
Apatosaurus
- Health: 100 Hearts
- Damage Output: 40 Hearts (stomp), 1 Heart (tail whip), 5 Hearts (passive)
- Taming Tier: Tier 3
- Favorite Treats: Leafy Treat, Grassy Treat, Berry Treat
Apatosauruses can be found in the plains biomes in small family units. They are one of the strongest herbivores in the addon so far, as they can simply stomp over small mobs and babies and can smash blocks weaker than stone by walking through them. When low on health, they’ll start running away and will use their tail to knock back all nearby mobs. The adolescents that may accompany them are untameable, so you have to kill adults for a chance to get their eggs.
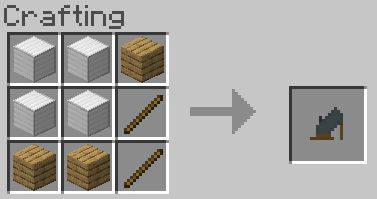
Once tamed, you need to give them a special saddle known as the Apatosaurus Platform to control them, which can be crafted as shown:
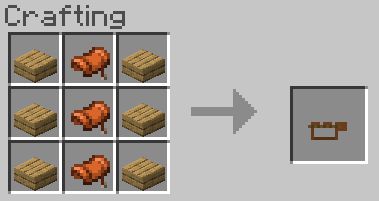
To make the best out of it, you must attach a chest to it alongside it as well as any one of the available stationary weapons to an Apatosaurus with a platform.
The cannon allows you to fire explosives at far away targets. You need to fill its inventory with cannonballs to use.
The mortar fires explosives high up in the sky so that they will hone in on far-away mobs. You need to fill its inventory with mortar shells to use.
The catapult hurls massive boulders that deal massive damage and can paralyze the target. You will need to fill them with catapult boulders first for them to work.
Once you have attached a weapon of your choice to an Apatosaurus, you can activate them by using the command console!
Also, in case you attached the wrong weapon to your Apatosaurus’s platform, you can remove it by using the wrench!
If you cannot access these tools for whatever reason, the Apatosaurus also has a few command staff abilities that can help, such as their stomp attack, a tail whip attack, and a bulldoze ability.
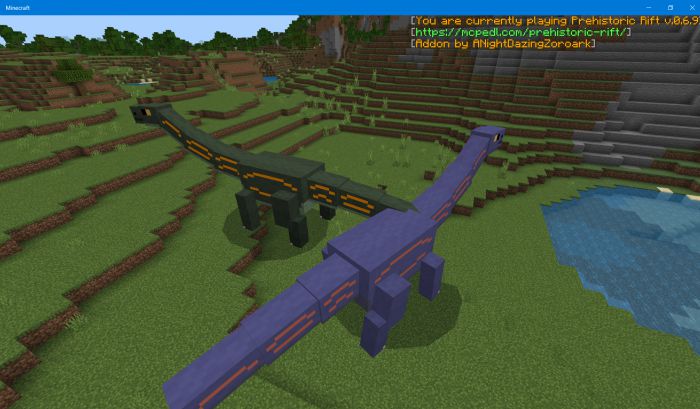
Parasaurolophus

- Health: 30 Hearts
- Damage Output: 0 Hearts
- Taming Tier: Tier 1
- Favorite Treats: Berry Treat, Grassy Treat, Rooted Treat
Parasaurolophus can be found in groups in plains and savannah biomes. They’re passive, but if one member of the group spots a carnivore or gets attacked, all other nearby Parasaurolophuses will run away, and maybe even use the horn to emit a shockwave that can immobolize nearby mobs for a short time.

Tamed Parasaurolophuses have a couple of abilities that utilize their horns. The first one is their sound blast ability which stuns mobs. The second one allows them to scare away most mobs, like animals, monsters, and even Utahraptors. The third one makes most nearby mobs attack you, including the normally passive animals. Just note that its ability may not work on mobs from other addons.
Tamed Parasaurolophuses happen to turret mode by making them stand up, sneak, and right-click on them while using the command staff. In this state, they will scare away monsters, animals, and carnivores every 10 seconds.
You can also use the harvest staff to make them harvest crops, flowers, and most importantly, truffles from grass blocks.
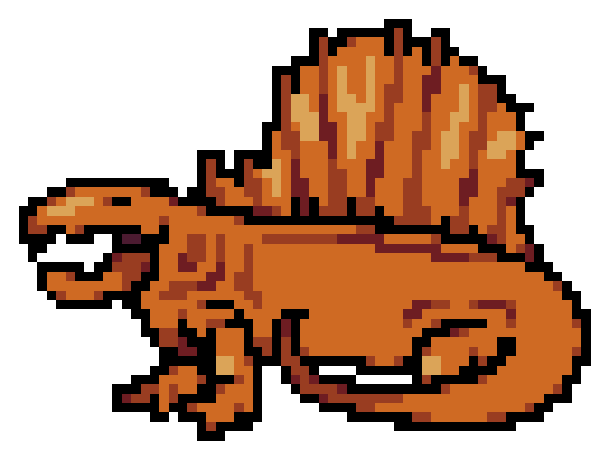
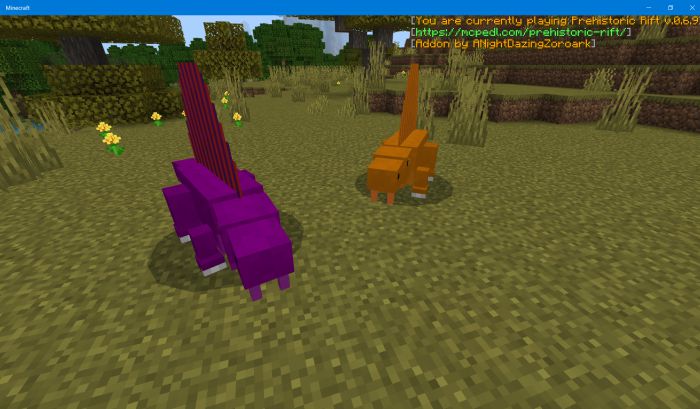
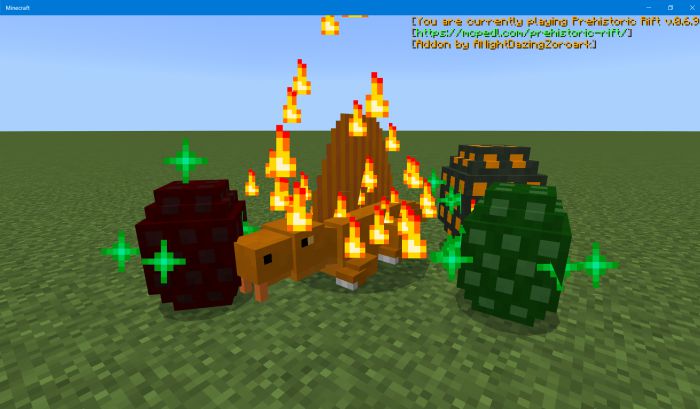
Dimetrodon
- Health: 20 Hearts
- Damage Output: 4 Hearts (neutral and flame mode), 6 Hearts (frost mode)
- Taming Tier: Tier 2
- Favorite Treats: Flesh Treat, Fish Treat
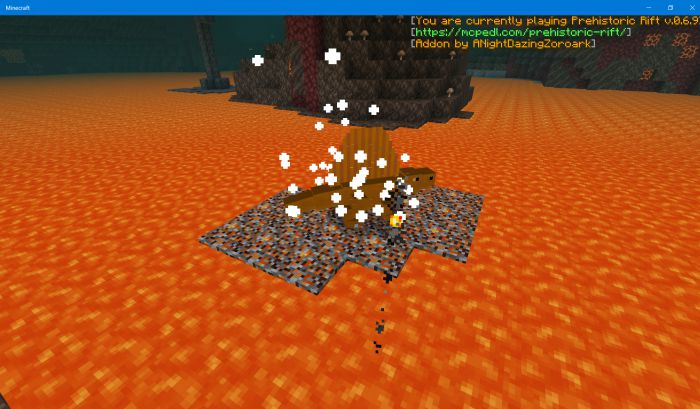
Dimetrodon is a neutral carnivore that can be found in swamps, deserts, or savannas. The sail on its back gives it different abilities depending on the biome its in.
In hot biomes (deserts, badlands, the nether), it wil go into frost mode, which lets it turn any liquid it touches into solid and inflicts slowness and weakness 3 onto mobs it attacks!
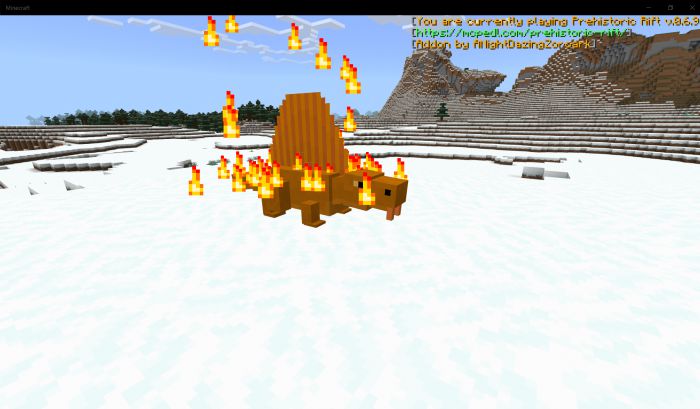
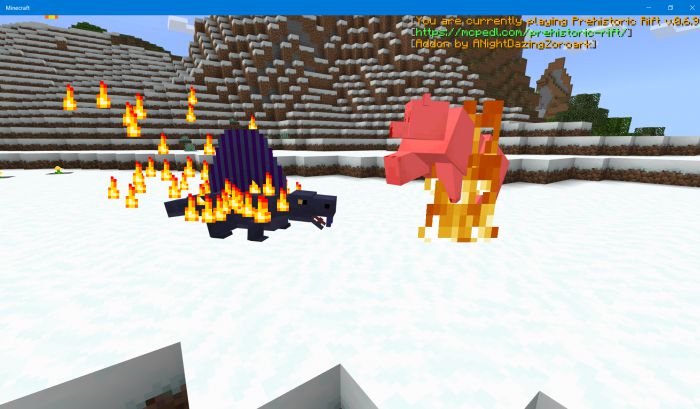
In cold biomes (anything with snow except the extreme hills biome for now), it will go into flame mode, which makes it immune to fire and lets it set fire onto groups of mobs!
Once it exits the biome that granted it the temperature mode it was in a while ago, it will stay in that temperature mode for about 90 seconds before turning back to normal.
The taming method for the Dimetrodon is the same for the Utahraptor, except that its somewhat easier as its neutral.
You can manually change the temperature mode of a tamed Dimetrodon by using stimulants.
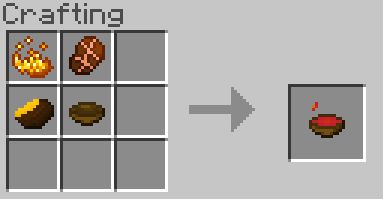
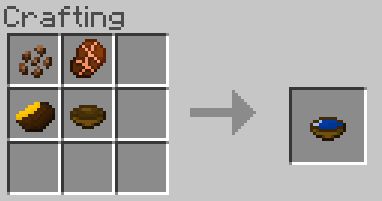
The flame stimulant lets it stay in the flame mode for 8 minutes. Can be crafted with blaze powder, cooked exotic meat (from most of the mobs in this addon), a truffle (which can be harvested by parasaurs from the grass), and a bowl.
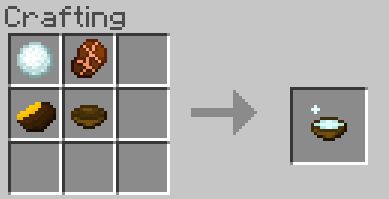
The frost stimulant lets it stay in frost mode for 8 minutes. Same recipe as the flame stimulant, but with a snowball instead of blaze powder.
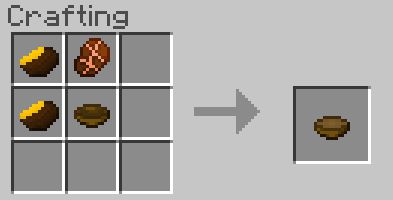
The neutral stimulant lets it stay in the neutral mode for 1 minute.
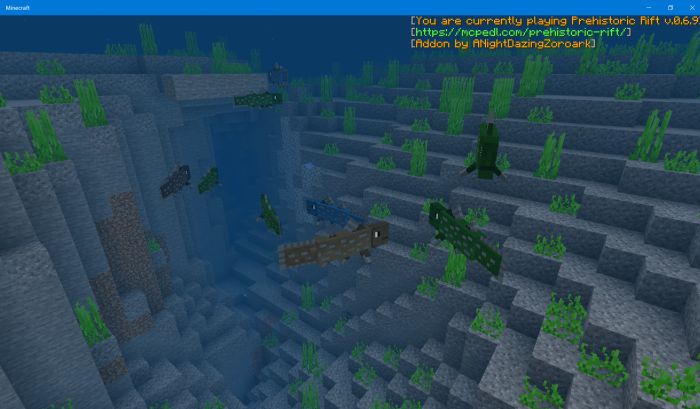
Coelacanth
- Health: 3 Hearts
- Damage Output: 0 Hearts
- Taming Tier: Untameable
- Favorite Treats: n/a
Coelacanths are boring fish that spawn in the oceans. Not much else can be said other than the fact that their meat isn’t good for consumption.
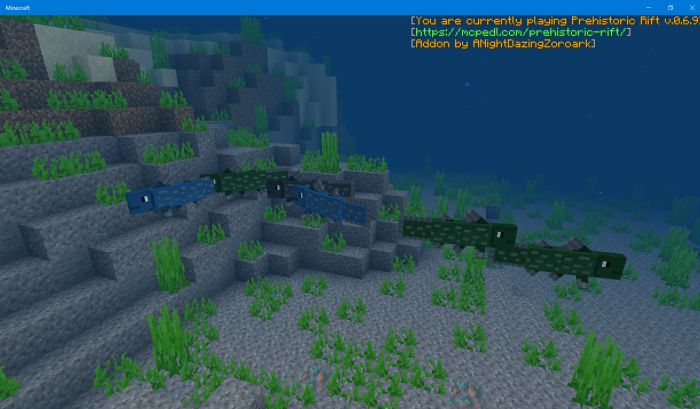
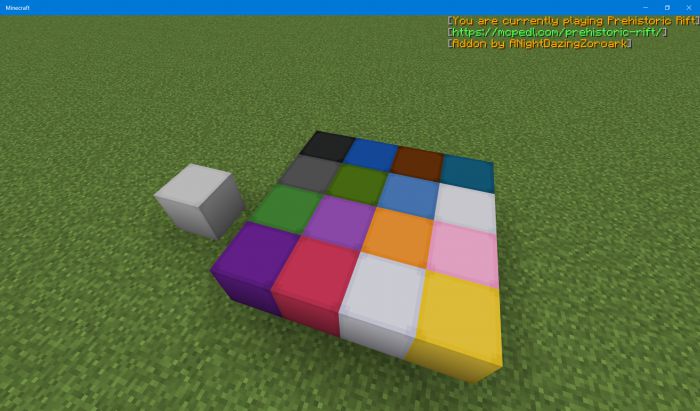
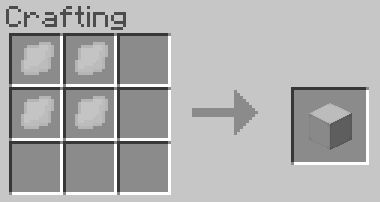
Their meat however can be turned into crude oil, which happens to be a good fuel source. The oil can be also smelted to make plastic frames, which are needed to make plastic furniture.
The plastic frames can also be dyed by just placing them in a crafting grid with whatever dye available in the game. These items can also be used to make plastic blocks which just serve as decorative blocks.
Megapiranha
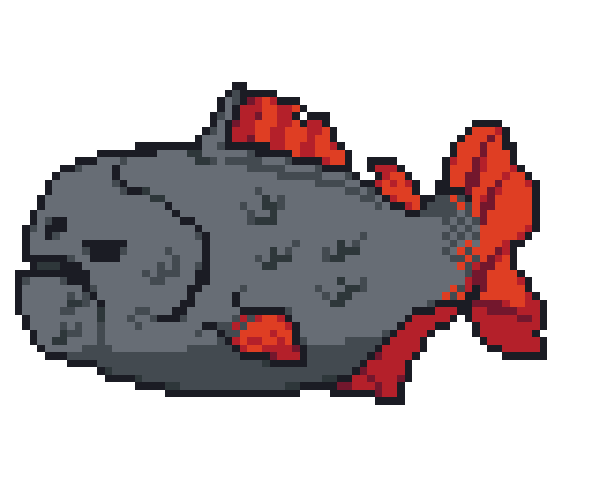
- Health: 6 Hearts
- Damage Output: 2 Hearts
- Taming Tier: Untameable
- Favorite Treats: n/a
Megapiranhas are small aquatic fish that spawn in nearly every body of water except for outside the edges of the oceans. They are very aggressive to anything that swims in the water as long as it is not another water predator. Though weak on their own they can be devastating when they’re in a group.
There’s barely any use for them other than the fact that their meat when cooked gives you regeneration, so make sure to kill them as soon as you see them.
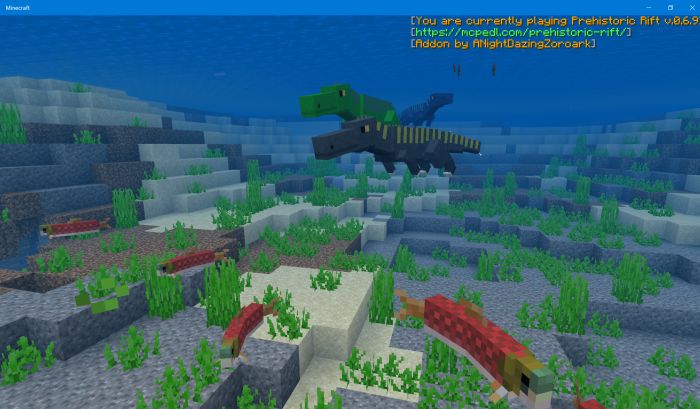
Sarcosuchus
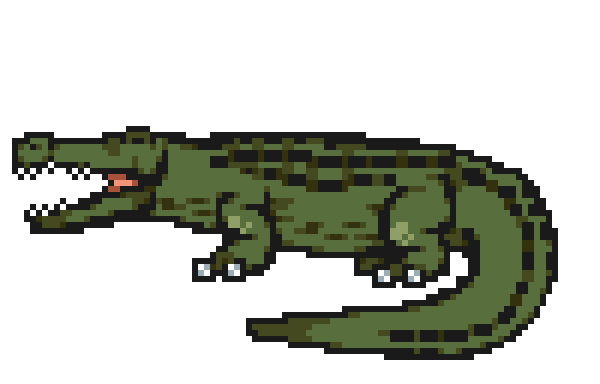
- Health: 40 Hearts
- Damage Output: 7.5 Hearts (bite attack), 7.5 Hearts (spin attack on land), 17.5 Hearts (spin attack on water)
- Taming Tier: Tier 2
- Favorite Treats: Fish Treat
Sarcosuchus can be found in the rivers and swamps, swimming about and attacking anything that steps into the waters they dwell in. They happen to have a regular attack and a devastating spin attack that deals a lot of damage and slows down whatever it hits.
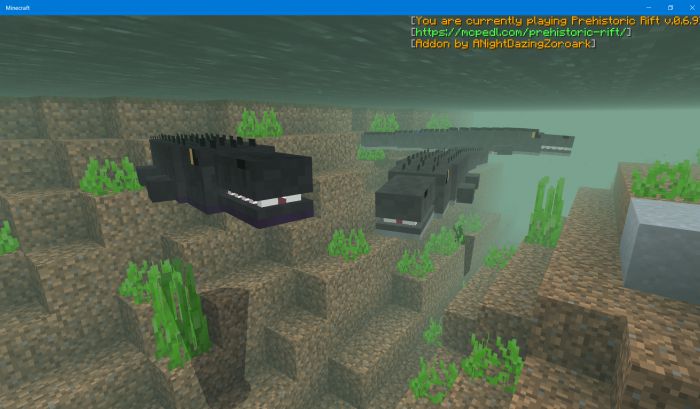

They can be tamed and ridden in both water and land. While cumbersome in the land, they’re very fast in the water, making them perfect for navigating waterways and even the oceans. Also, Megapiranhas are scared of them, making them the best repellent against such pests. Whats more, you can utilize their bite and spin attacks with the command staff when you ride them!
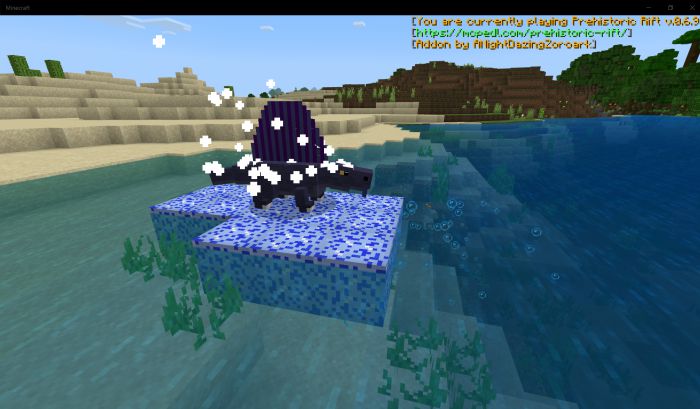
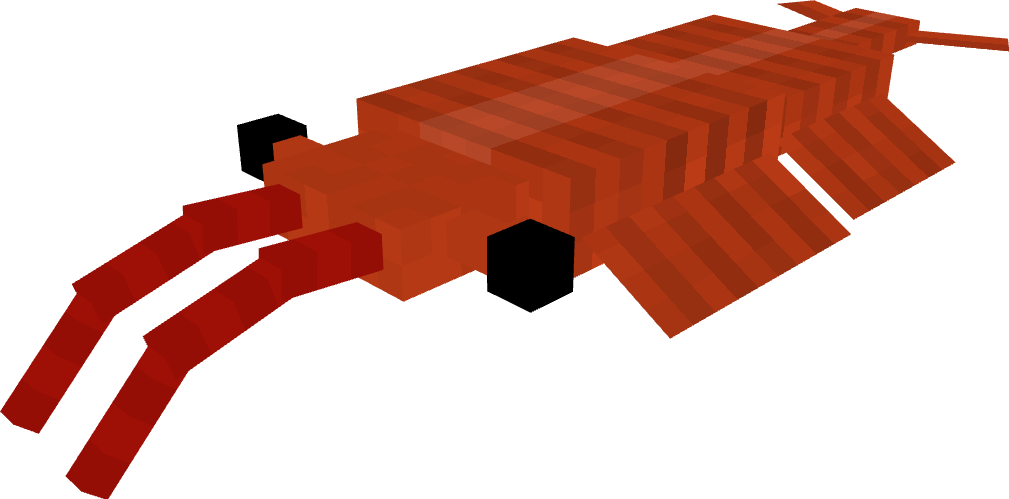
Anomalocatris
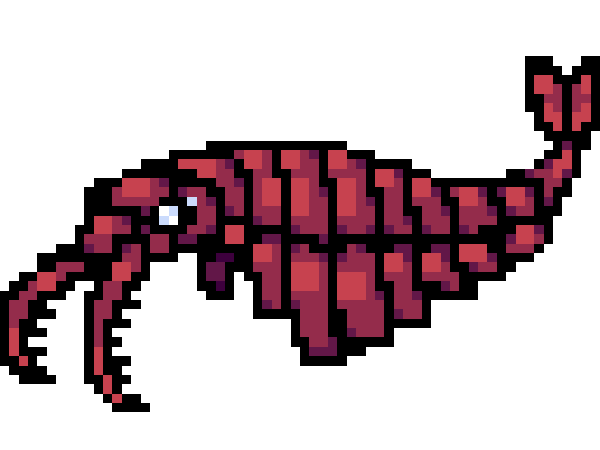
- Health: 25 Hearts
- Damage Output: 5 Hearts
- Taming Tier: Tier 2
- Favorite Treats: Fish Treat, Bug Treat
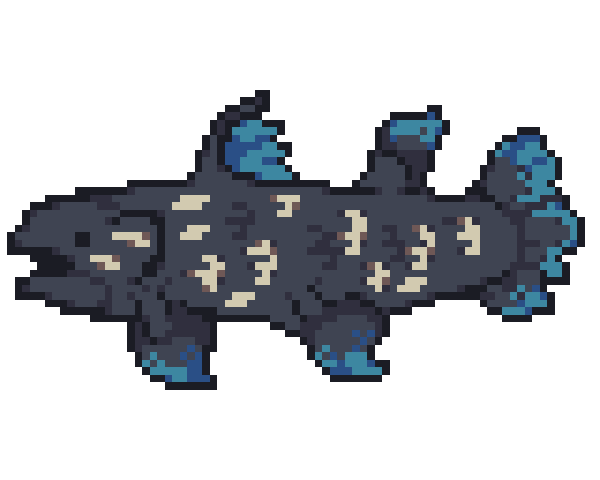
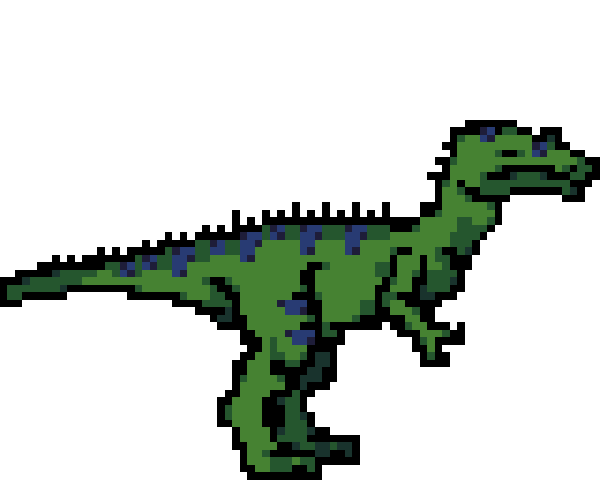
Anomalocatris is an aquatic invertebrate that can be only found in coral reefs. They remain invisible in their wild state, so you have to hit them when you see invisibility particles in the water all of a sudden or see a fish die all of a sudden. Due to this, it is impossible to capture pictures of them hanging out, so here’s a random model screenshot for now.
Just make sure to stay vigilant as they might grab you and drain you of your health!
But anyways, it’s possible to tame them, and when you do, you can use their invisibility cloak to hide from the drowned. They can also grab mobs with their appendages, so you can capture random mobs at the surface or the edge of the water to drown them or to attack them.
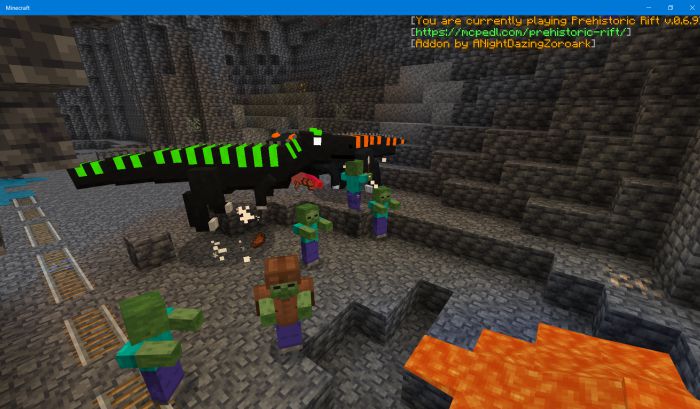
Saurophaganax
- Health: 50 Hearts
- Damage Output: 30 Hearts (Bite Attack), 15 Hearts (Light Blast Attack)
- Taming Tier: Tier 2
- Favorite Treats: Bug Treat, Carrion Treat
The Saurophaganax is a nocturnal carnivore that can be found nearly anywhere in the overworld (including underground) that eats monsters and bugs (zombies, creepers, spiders, anything that’s considered a bug/monster in-game). By day they sleep and become really weak, but by night (or when they’re deep underground) they reach their full strength. What’s more, for every 10 mobs they kill, they will release a light blast that can deal considerable AOE damage toward monsters and bugs!

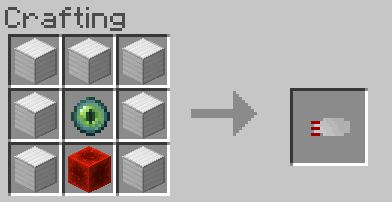
They can be tamed and used to quickly exterminate monsters or for their immense strength as long as it’s nighttime. But if you want to be able to use or ride them by day, you can use the lunar stimulant, but it only lasts for a minute, and even then, they will be significantly weaker and slower. It can be crafted as shown here.
Direwolf
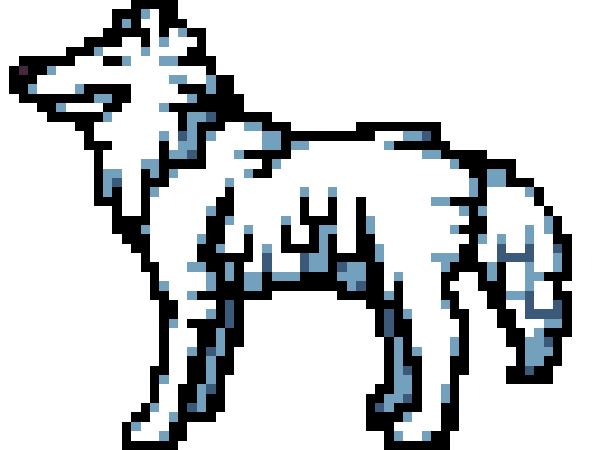
- Health: 15 Hearts (Normal Form), 50 Hearts (Werewolf Form)
- Damage Output: 4 Hearts (Normal Form), 6 Hearts (Werewolf Worm, Bite Attack), 8 Hearts (Werewolf Form, Slash Attack)
- Taming Tier: Tier 2
- Favorite Treats: Flesh Treat
Direwolves can be found in the snowier areas. They are similar to Utahraptors except that they cannot pounce, cannot have a chest, and deal less damage, but the best perk is that they do not need a saddle to be ridden. Just like Utahraptor packs, when they spot a target there’s a chance that one of the pack members will activate a pack buff to grant swiftness and strength to its packmates. When they’re hurt, there’s a chance that they will snarl which will cast weakness on nearby mobs! You can tame them however by sneaking up on them and giving them flesh treats over time.
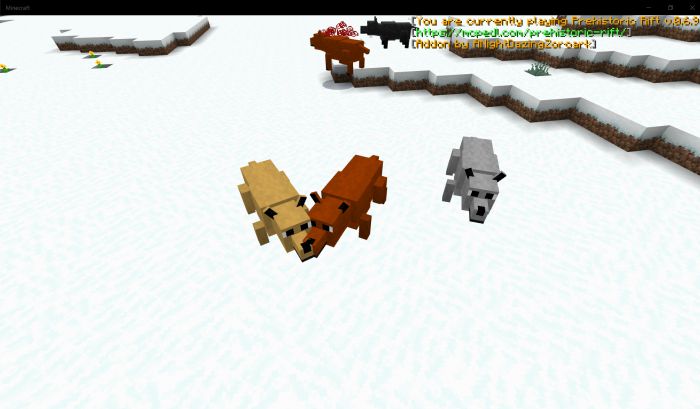
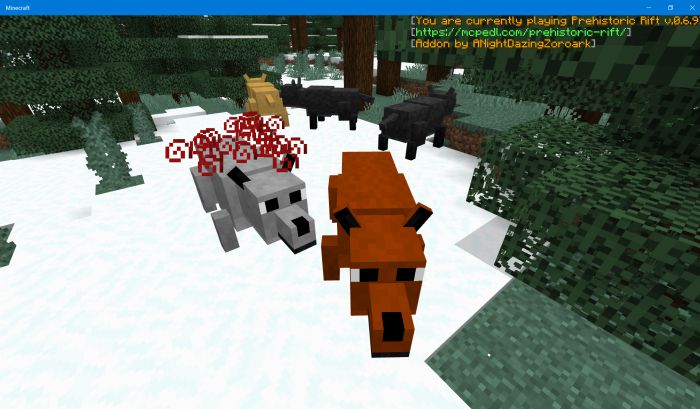
However, certain dire wolves can be found emitting red particles! These certain direwolves will transform into werewolves by night, will be stronger, and will gain new abilities such as throwing boulders and climbing! Beware, especially since they cannot be tamed when in werewolf mode!

Once they’re tamed, they may be used as either a poor man’s Utahraptor by day or a powerful mount by night if they can transform! Climbing controls for them when they’re in werewolf form are the same as the Utahraptor’s.
You can also use the lunar stimulant to turn normal dire wolves into their werewolf form, but only for the ones that emit red particles.
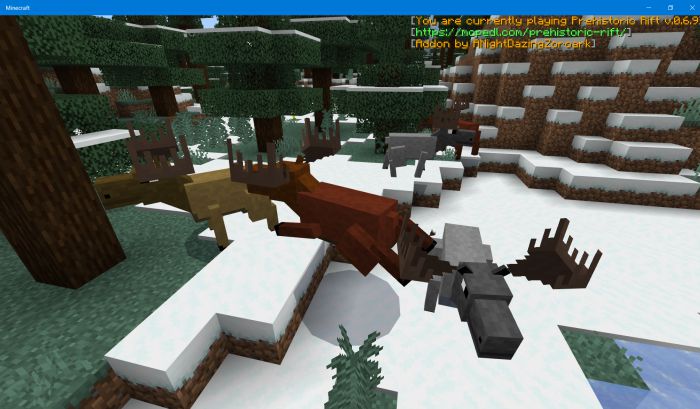
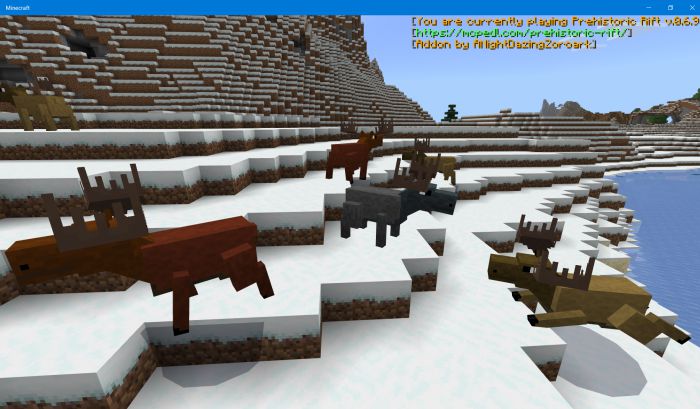
Megaloceros
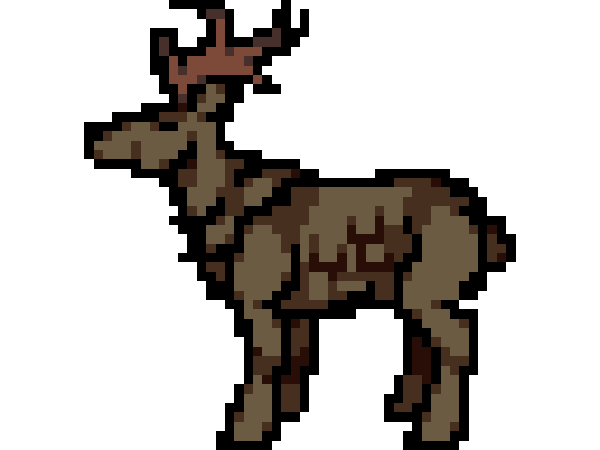
- Health: 10 Hearts
- Damage Output: 2.5 Hearts
- Taming Tier: Tier 1
- Favorite Treats: Berry Treat, Grassy Treat, Leafy Treat
Megaloceros can be found in snowier areas. They are usually found in herds, and while they possess antlers, they mainly use them to attack other Megaloceros randomly. Their reactions towards attackers vary, and they will either run away from them or fight back. They can be tamed with berry treats, leafy treats, or grassy treats.
When tamed, they turn out to be really fast, and combined with their ability to jump, they can be used for navigation. They also have a charge attack that can break leaves and glass, which can be activated with the command staff, and they can also harvest thatch and wood from logs which can be activated with the command staff.
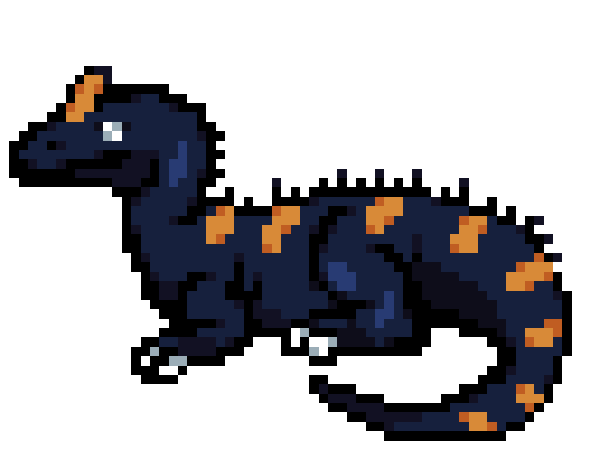
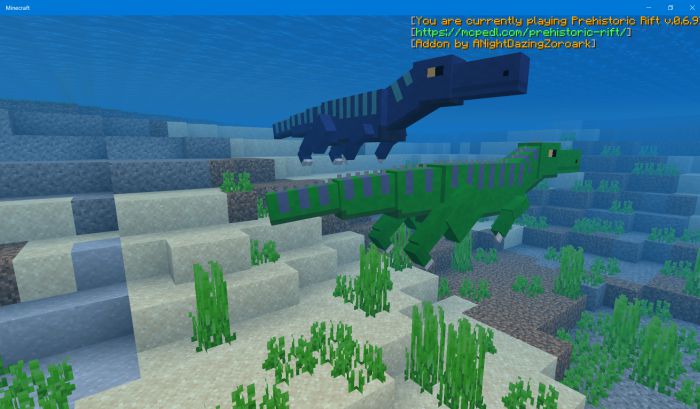
Baryonyx
- Health: 30 Hearts
- Damage Output: 5 Hearts (bite attack), 3.5 Hearts (slash attack)
- Taming Tier: Tier 2
- Favorite Treats: Fish Treat
Baryonyx can be found in the rivers and swamps, swimming about and eating fish, but they will occasionally come to the land and eat some random animals and herbivores. Their claws are capable of injecting poison into their targets, and when in water, their skin will emit poison that can affect nearby mobs.
They can be tamed and ridden in both water and land. Also, if they’re tamed, their poison secretion ability will not affect their owners and other tamed creatures.
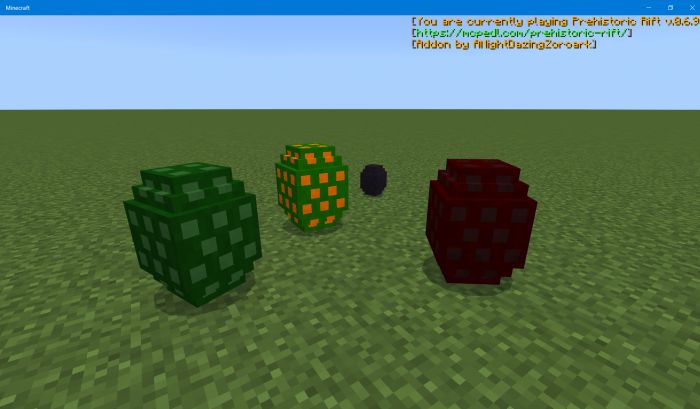
Eggs

Eggs can be obtained thru breeding or through killing Tier 3 mobs. You can pick them up by sneaking and right clicking (tap and hold for mobile).
In order to hatch them, you need to put them in an area of their preferred temperature. The ff are the preferred temperature values of the eggs:
- Tyrannosaurus – Warm
- Stegosaurus – Warm
- Dodo – Neutral, Warm
- Triceratops – Warm
- Utahraptor – Cold
- Apatosaurus – Warm
- Parasaurolophus – Neutral, Cold
- Dimetrodon – Neutral
- Sarcosuchus – Cold
- Saurophaganax – Neutral
- Baryonyx – Cold
Warm areas include deserts, badlands, the nether, and altitudes of 32 and below while underground. Cold areas include anything with snow (except for extreme hills), places where it’s raining, water, and altitudes of 128 and above while exposed to air. Neutral areas include everything else between altitudes of 32 and 128.
It can take minutes to hatch eggs, but if you want to speed up the process, you can use the Dimetrodon!
When a Dimetrodon is in an egg’s preferred temperature, its hatch time gets halved!
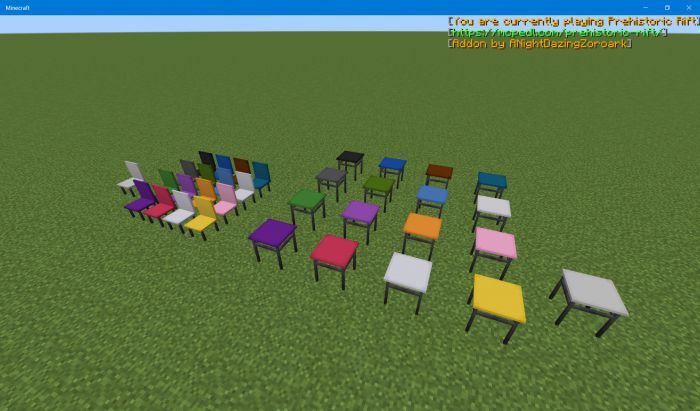
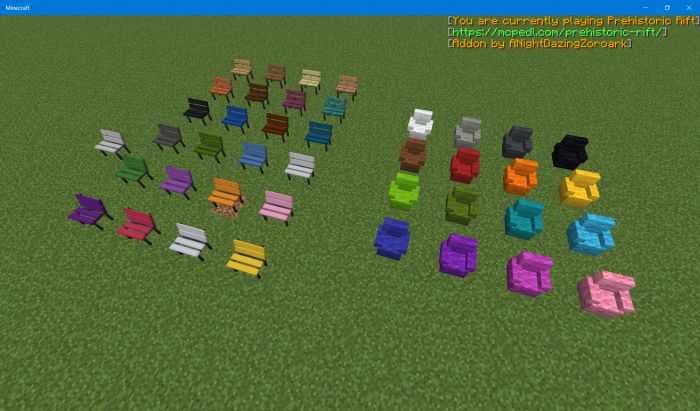
Furniture
Why did I add furniture to a dinosaur addon you may ask, well this is my addon and I do whatever I want with it. So far there are tables, chairs, sofas, benches, taxidermy stands, spiked walls, large gates, and behemoth gates.
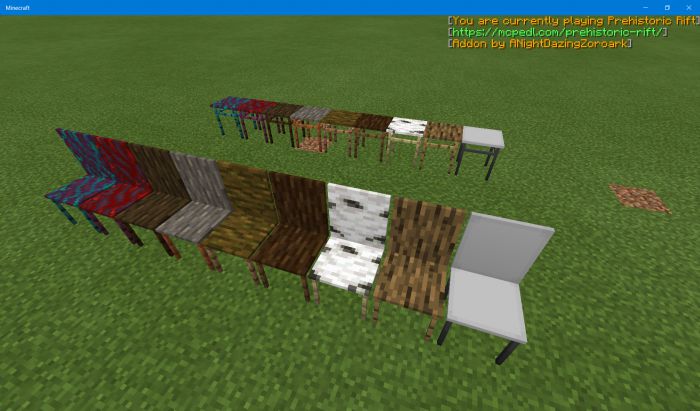
Anyways, to start making furniture, you need to find loot sacks. Loot sacks are dropped by carnivorous creatures, and come in 4 rarities. The items required to make furniture, the blueprints, can be found in loot sacks of uncommon rarity and rarer.
Next, you need to place down the blueprints. This will create a phantom that you must interact with to finally create the furniture. Remember, planks only work with phantoms of wooden furniture blueprints, and plastic frames only work with phantoms of plastic furniture blueprints.
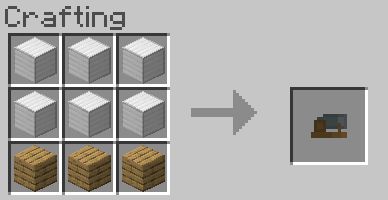
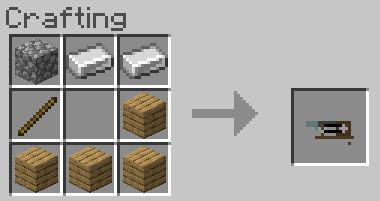
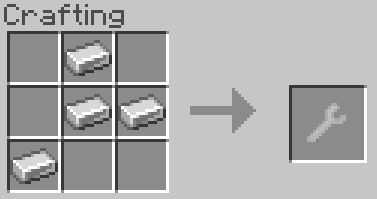
Also, the furniture tool can be used to change the rotation of chairs, sofas, and benches when they’re in phantom mode. It can be crafted as shown:

Taxidermy Stands
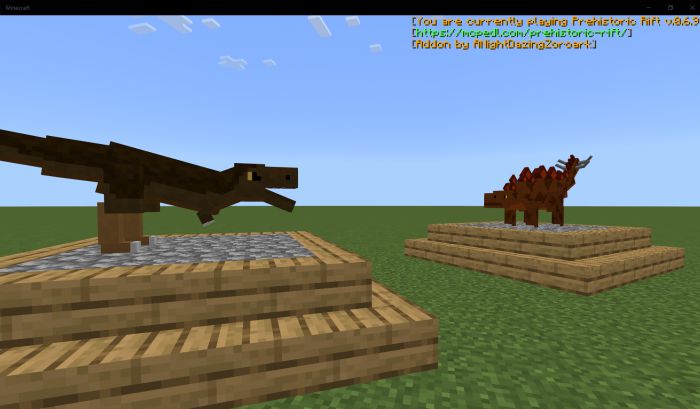
Unlike all the other furniture which are blocks with custom geometry and have some functionality, taxidermy stands are basically entities. They can be built like all the other furniture with planks. To place a mob on them, interact with them while holding a tribute item, which is basically a rare item dropped by any of the creatures in the addon.
- Stegosaurus – Stegosaurus Plate
- Tyrannosaurus – Tyrannosaurus Arm
- Dodo – Dodo Beak
- Triceratops – Triceratops Horn
- Utahraptor – Utahraptor Claw
- Apatosaurus – Apatosaurus Vertebrae
- Parasaurolophus – Parasaurolophus Horn
- Dimetrodon – Dimetrodon Sail
- Coelacanth – Coelacanth Scales
- Megapiranha – Megapiranha Scales
- Sarcosuchus – Sarcosuchus Snout
- Anomalocaris – Anomalocaris Appendage
- Saurophaganax – Saurophaganax Eye
- Direwolf – Direwolf Tail
- Megaloceros – Megaloceros Antler
- Baryonyx – Baryonyx Claw
Afterward, you can do any one of the following things to the taxidermy stand to edit it further:
- Interact while holding a furniture tool while sneaking to change the pose
- Interact while holding a furniture tool without sneaking to change the skin
- Hit while holding a furniture tool while sneaking to remove the mob from the taxidermy stand
- Hit while holding a furniture tool without sneaking to change the rotation
The Journal
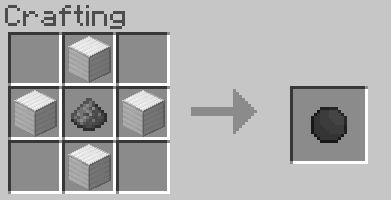
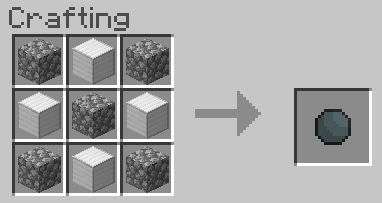
You can get info about the creatures as well as learn some lore through the Journal, which you can craft with a book, a paper, and a bone.
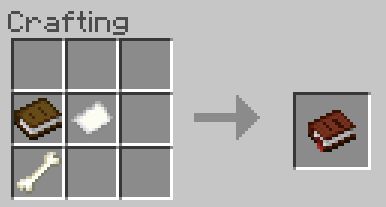
To read it, just right-click/tap and hold anywhere while holding it!
Other Note
- The vanilla help section has been replaced with a handy guide to the addon, so be sure to read it every now and then!
Installation Note:
- Make sure you activated Commands, Holiday Creator Features, Creation of Custom Biomes, Additional Modding Capabilities, Upcoming Creator Features, Gametest Framework, and Experimental Molang Features in your world.
How to install:
How To Install Mod / Addon on Minecraft PE
How To Install Texture Packs on Minecraft PE
How To Install Map on Minecraft PE
Prehistoric Rift Addon (1.19) Download Links
For Minecraft PE/Bedrock 1.19
mcaddon: Download from server 1 – Download from server 2

