How to convert a zombie villager back into a villager
Understanding Zombie Villagers and the Curing Process
In the vast and blocky world of Minecraft, villagers are cornerstone inhabitants, offering valuable trades and adding life to your settlements. However, these peaceful mobs can sometimes fall victim to the hostile forces of the night, transforming into their undead counterparts: the zombie villager. These variants are aggressive, posing a threat rather than offering commerce. Fortunately, Minecraft provides a heroic opportunity to redeem these corrupted villagers through a unique curing process. This guide will walk you through every detail of converting a zombie villager back into a productive member of your Minecraft society, turning a potential menace into a valuable ally.
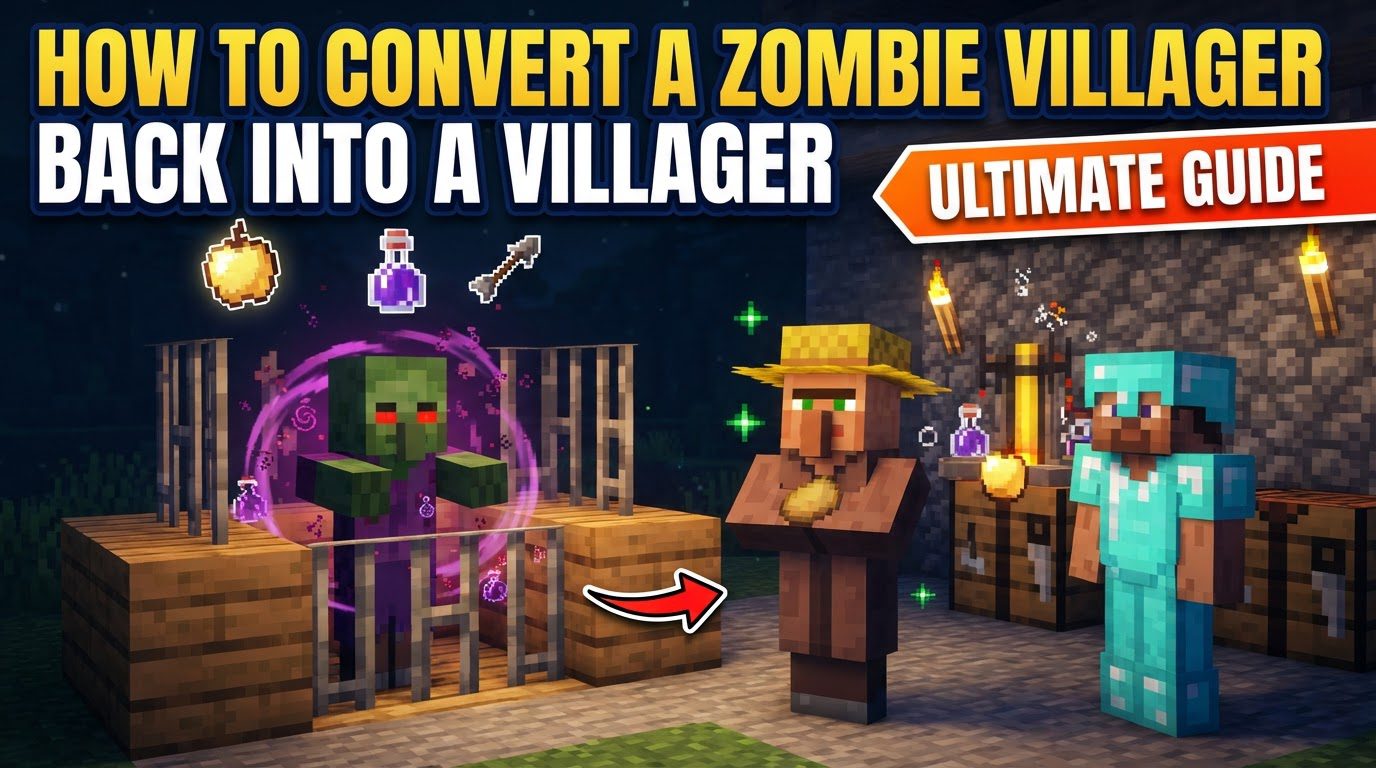
The essence of curing a zombie villager lies in applying two specific items in quick succession: a Splash Potion of Weakness and a Golden Apple. This combination initiates a transformation that, while taking a few minutes, yields significant rewards, most notably substantial trade discounts with the newly cured villager and those nearby. Successfully completing this benevolent act also earns you the prestigious “Zombie Doctor” advancement, a testament to your compassion and expertise.
The Step-by-Step Guide to Curing a Zombie Villager
1. Find or Create a Zombie Villager
Your journey begins by locating a zombie villager. There are several ways to encounter these undead entities:
- Natural Spawns: Zombie villagers have a 5% chance of spawning naturally in the place of a regular zombie in most biomes. Keep an eye out during the night or in dark caves.
- Villager Zombification: If a regular villager is attacked and killed by a zombie, there’s a chance it will turn into a zombie villager instead of simply dying. The probability of this occurring depends on your game’s difficulty setting:
- Easy Difficulty: Villagers will always die when attacked by a zombie; they will not zombify.
- Normal Difficulty: There is a 50% chance for a villager to transform into a zombie villager.
- Hard Difficulty: A villager attacked by a zombie has a 100% chance of turning into a zombie villager, making this difficulty ideal if you plan to intentionally create them.
- Igloo Basements: Some igloos generate with a hidden basement containing a zombie villager and a regular villager, along with the necessary brewing ingredients for a Potion of Weakness. This can be a convenient starting point.
2. Trap the Zombie Villager
Once you’ve found your target, securing it is paramount. Zombie villagers are hostile and susceptible to sunlight, which will burn them to death. They can also despawn under certain conditions. To prevent these issues, you must trap them safely:
- Enclosed Pen: Construct a small, fully enclosed structure using solid blocks. Ensure there are no gaps where sunlight can enter or where the zombie villager can escape.
- Boats or Minecarts: These are excellent tools for transportation and containment. Guide the zombie villager into a boat or minecart, which will prevent it from moving freely and protect it from despawning if you move too far away.
- Persistence: To guarantee a zombie villager doesn’t despawn, ensure it picks up an item, is named with a name tag, or has been traded with (though trading is only possible after curing).
3. Obtain a Splash Potion of Weakness
This is one of the two critical components for the cure. Brewing is the primary method:
- Brewing Stand Setup: You will need a Brewing Stand, which is crafted from one Blaze Rod and three Cobblestone. Fuel the Brewing Stand with Blaze Powder, obtained by crafting a Blaze Rod.
- Crafting a Potion of Weakness:
- Start with a Water Bottle (empty glass bottle filled with water).
- Combine the Water Bottle with a Fermented Spider Eye in the Brewing Stand. A Fermented Spider Eye is crafted by combining a Spider Eye, a Brown Mushroom, and Sugar. This will yield a Potion of Weakness.
- Converting to a Splash Potion:
- Once you have a Potion of Weakness, place it back into the Brewing Stand.
- Add Gunpowder (dropped by Ghasts or Creepers) to the top slot. This will convert the regular Potion of Weakness into a Splash Potion of Weakness, which can be thrown.
- Alternative Source: As mentioned, a Splash Potion of Weakness can sometimes be found pre-made in the basement of an igloo structure.
4. Obtain a Golden Apple
The second essential item is the Golden Apple:
- Crafting: The standard Golden Apple is crafted by placing a regular Apple in the center of a crafting grid and surrounding it with eight Gold Ingots. Gold Ingots are smelted from Gold Ore or crafted from Gold Nuggets.
- Finding in Chests: Golden Apples can also be found as loot in various generated structures’ chests across the game world, such as dungeons, strongholds, desert temples, and more.
5. Apply the Cure
With both items in hand, it’s time for the crucial moment. Ensure the zombie villager is safely contained and you have a clear shot:
- Throw the Splash Potion of Weakness: Aim and throw the Splash Potion of Weakness directly at the zombie villager. Upon impact, it will emit purple particles, and the zombie villager will gain the “Weakness” status effect, indicated by a faint grey aura.
- Use the Golden Apple: Immediately after applying the Weakness effect, right-click (or use the equivalent action button for your platform) with the Golden Apple while targeting the weakened zombie villager. It will consume the apple, and the curing process will begin.
6. Wait for Conversion
Once the Golden Apple has been applied, the zombie villager will enter a transformative state:
- Visual Cues: The zombie villager will start shaking uncontrollably and emit numerous red particles, indicating the cure is taking effect.
- Duration: The conversion process takes between 3 to 5 minutes to complete. During this time, the zombie villager remains hostile and vulnerable.
- Successful Transformation: After the duration, the zombie villager will vanish, and in its place, a regular villager will appear, ready to offer trades and contribute to your village.
Important Tips and Benefits
Curing zombie villagers isn’t just a humanitarian act in Minecraft; it’s a strategic move with lasting benefits:
- Significant Trade Discounts: The most compelling reason to cure a zombie villager is the substantial, often permanent, trade discounts you receive. These discounts can make essential items incredibly cheap. The discounts can even deepen if you intentionally zombify and re-cure the same villager multiple times, creating extremely favorable trading opportunities.
- Speeding Up the Process: While the cure naturally takes 3-5 minutes, you can potentially accelerate this. Placing iron bars and beds in close proximity to the curing zombie villager can help speed up the transformation time, allowing you to get your new villager faster.
- Protection During Curing: It is absolutely critical to protect the zombie villager during its conversion. Other hostile mobs, especially other zombies, can attack and kill it, or even re-zombify a newly cured villager if not properly secured. Ensure your curing chamber is well-lit and mob-proof.
- Preventing Despawning: As mentioned earlier, zombie villagers that pick up items, are named with a name tag, or have been traded with (after curing) become persistent and will not despawn, ensuring your efforts are not wasted.
Common Mistakes to Avoid
Even with the best intentions, certain missteps can hinder or even ruin your curing efforts:
- Villager Death on Lower Difficulties: Attempting to create a zombie villager by having a zombie attack a regular villager on Easy difficulty will always result in the villager’s death. On Normal difficulty, there’s only a 50% chance of zombification. For guaranteed success in creating zombie villagers this way, play on Hard difficulty.
- Accidentally Attacking the Zombie Villager: During the curing process, or even before, avoid hitting the zombie villager with any weapons or applying harmful potions. This can kill it, wasting all your efforts and resources.
- Interference from Other Mobs: Ensure the curing area is completely secure. Other zombies might attack the curing zombie villager, or worse, re-zombify it immediately after it converts. Iron Golems, protectors of villagers, will also attack zombie villagers, so keep them away from your subject.
- Forgetting to Use a Golden Apple Promptly: The “Weakness” status effect from the splash potion is temporary. If you delay too long in applying the Golden Apple, the effect will wear off, and you’ll have to reapply the Splash Potion of Weakness, consuming another potion.
- Curing Multiple Villagers Too Closely: If you plan to cure several zombie villagers simultaneously, ensure they are adequately separated. A newly cured villager could be re-zombified by an adjacent, still-hostile zombie villager if they are too close, leading to a frustrating cycle. Provide enough space or cure them one by one in isolated chambers.
By understanding these mechanics and following this comprehensive guide, you’ll be well-equipped to transform any zombie villager into a grateful, trading companion. The benefits of discounted trades and the satisfaction of saving a villager make the effort well worth it, enhancing your Minecraft experience and building a thriving, prosperous world.
Tags:
YOU MAY ALSO LIKE...