Difference between client-side and server-side mods
One of the most frequent pitfalls for new and even experienced Minecraft players venturing into the world of modding is misunderstanding the fundamental difference between client-side and server-side modifications. This distinction isn’t just technical jargon; it dictates where a mod needs to be installed, who experiences its effects, and ultimately, whether your game or server will even launch correctly.
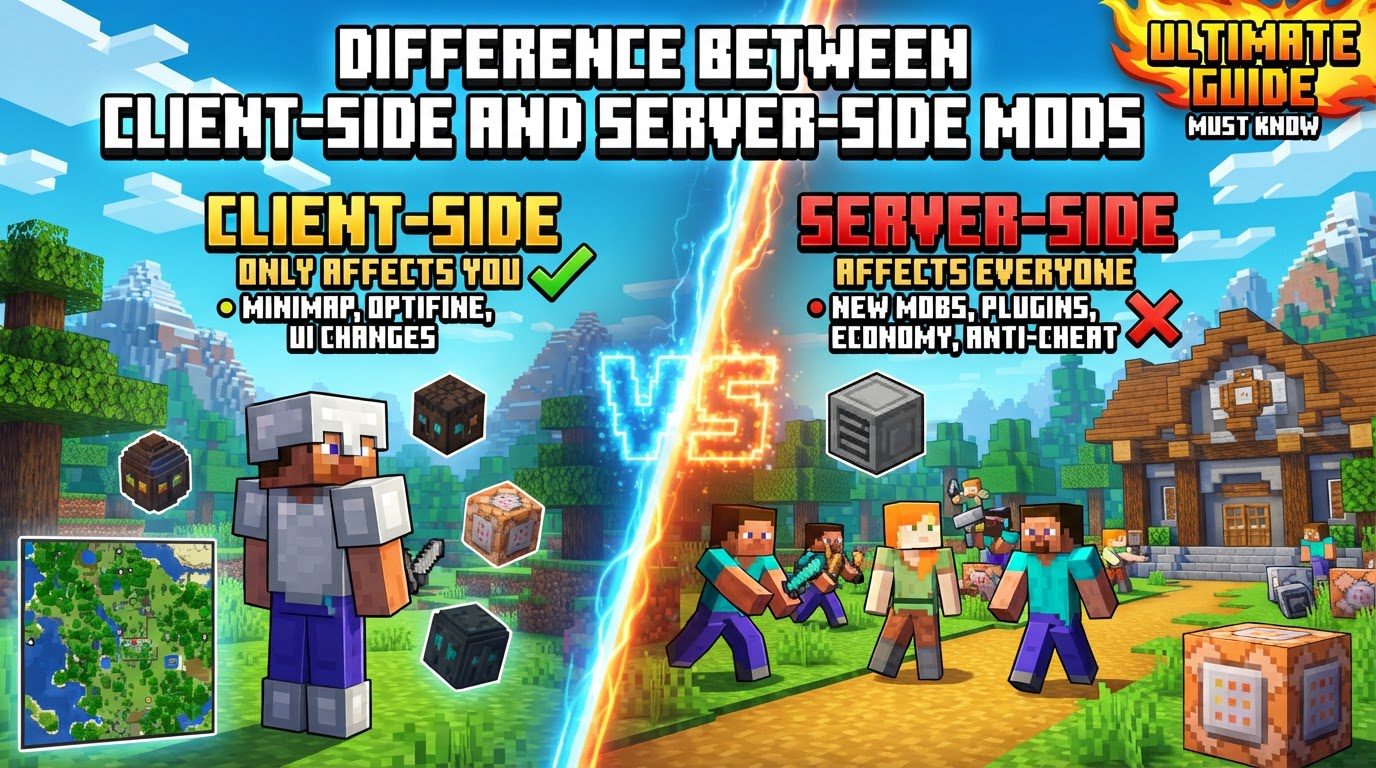
At its core, Minecraft operates on a client-server model, even when playing single-player (your computer acts as both client and server). The “client” is your local game application, the software running on your computer that you interact with directly. The “server” is the central host that manages the game world, its rules, and synchronizes the experience for all connected players. Understanding which side a mod targets is paramount to successful installation and a smooth gameplay experience.
The Client’s Perspective: Mods for Your Personal Experience
Client-side mods are specifically designed to run on your computer, the “client,” and exclusively affect your personal view and interaction with the game. They do not alter the core game logic or world state that the server manages. This means that if you install a client-side mod, other players on a server will not see its effects or even know you are using it, unless it’s a mod that enhances communication or display of information that already exists in the game.
What Client-Side Mods Do:
- Visual Enhancements: These are perhaps the most popular client-side mods. Examples include shaders, which dramatically improve lighting and visual effects, and graphical overhauls that change textures or models.
- User Interface (UI) Tweaks: Mods that modify the in-game interface, such as custom fonts, health bars, or inventory management utilities.
- Information Display: Minimaps that show your surroundings, coordinates, or creature locations without altering the world itself.
- Performance Optimizations: Mods like OptiFine, which can boost frame rates, add advanced graphical options, and support shaders.
- Input and Sound Modifications: Changes to how your game listens to player input or plays sounds and effects, without affecting server-side mechanics.
Functionality at a Glance:
These mods primarily deal with how the game renders graphics, processes your direct input (like mouse clicks or keyboard presses), plays audio, and manages your personal game settings. They are about enhancing your personal interaction and perception of the Minecraft world, not changing the world itself for others.
Installing Client-Side Mods:
The process for getting these mods up and running is typically straightforward:
- First, you’ll need a mod loader compatible with your Minecraft version, such as Forge or Fabric. Download and install this loader into your Minecraft client.
- Once the mod loader is installed, locate your Minecraft installation directory (often
.minecraft). Inside, there will be amodsfolder. - Place the client-side mod file (usually a
.jarfile) directly into thismodsfolder. - Finally, launch Minecraft using the profile created by your mod loader. The mod should now be active for your game client.
The Server’s Domain: Mods Governing the World
Server-side mods, in contrast, run exclusively on the game server. They are the backbone of the multiplayer experience, dictating the rules, generating the world, and managing all entities within it. When a server-side mod is installed, its effects are universally applied to every player connected to that server. You, as a player, do not need to install anything on your client to experience these changes, unless the mod introduces new content that your client needs to render (which leads us to hybrid mods).
What Server-Side Mods Do:
- Core Gameplay Mechanics: Mods that introduce new game modes, alter mob behavior, or change how redstone works.
- World Content: Adding entirely new items, blocks, creatures, or even changing how the world is generated.
- Administrative Tools: Custom commands for server operators, permission systems to control player access and abilities, and anti-griefing tools.
- Economy Systems: Mods that facilitate in-game economies, trading, and shops.
Functionality at a Glance:
These mods are responsible for creating and loading the entire game world, spawning and managing all mobs and entities, enforcing game rules, processing redstone logic, managing every player’s health and inventory, and crucially, keeping all connected players synchronized with the current state of the game world. They are the ultimate authority on what happens in the shared Minecraft experience.
Installing Server-Side Mods:
To implement server-side mods, you’ll need access to the server’s files:
- Set up a Minecraft server running a compatible mod loader (e.g., Forge, Fabric) for your desired Minecraft version. This is similar to the client-side loader but installed on the server software.
- Locate the server’s
modsfolder within its main directory. - Place the server-side mod file (typically a
.jarfile) into thismodsfolder. - Start or restart the server to load the new modifications. All connected players will now experience the mod’s effects.
Hybrid Mods: Bridging Both Worlds
Some modifications don’t fit neatly into either category because they alter both the server’s game logic and introduce new content that your client needs to recognize. These are known as hybrid mods, and they require installation on both your client and the server to function correctly. If you only install them on one side, you’ll likely encounter errors, crashes, or an inability to interact with the new content.
What Hybrid Mods Do:
- New Blocks and Items: Mods that introduce entirely new block types, items, or entities (like new creatures or vehicles) that need to be understood by the server’s game logic and rendered by your client.
- World Generation Overhauls: Extensive mods that add new biomes, structures, or dimensions. While the server generates these, your client needs to know how to display them.
Example:
A prime example is a mod like Biomes O’ Plenty. It adds numerous new biomes and blocks to the game. The server needs this mod to generate these biomes and store the new block data, but your client also needs the mod to know how to render these specific new blocks and textures correctly.
Installing Hybrid Mods:
The installation for hybrid mods is a combination of the client-side and server-side processes:
- Install the mod on your client, following the steps for client-side mod installation (mod loader,
.minecraft/modsfolder). - Install the exact same mod on the server, following the steps for server-side mod installation (server mod loader, server’s
modsfolder). - Ensure both client and server are running the same version of the mod and the same mod loader.
The Constant Dialogue: Client-Server Communication
Regardless of the mod types in play, the client and server are in constant communication. Your client sends messages to the server detailing your actions – moving, breaking blocks, placing items, attacking mobs. The server receives these messages, validates the actions against its game rules, updates the world state accordingly, and then sends synchronization messages back to all connected clients, ensuring everyone sees the same updated world. This continuous back-and-forth is vital for a seamless multiplayer experience, and mods often hook into this communication to achieve their effects.
Navigating the Modding Landscape: Essential Tips
Successful modding relies on careful attention to detail. Here are some crucial tips:
- Always Identify Mod Type: Before downloading, always check the mod’s description or download page. It will almost always specify whether it’s client-side, server-side, or both. This is your first and most important step.
- Check Mod Requirements: Read the mod’s documentation thoroughly. Some mods have specific dependencies (other mods required to run) or unique installation instructions.
- Leverage Mod Managers: Tools like the CurseForge Launcher can significantly simplify the process, especially for modpacks. They manage installations, dependencies, and version compatibility for both client-side and server-side mod setups.
- Server Configuration: If you’re running a server, be aware that many server-side mods come with configuration files that allow you to customize gameplay features for all players. Review these settings to tailor your server experience.
- Version Matching is Key: Ensure that your mods, your mod loader (Forge/Fabric), and your Minecraft game version (and the server’s Minecraft version) all precisely match. Mismatched versions are a leading cause of crashes and errors.
Avoiding Common Modding Pitfalls
Understanding the distinctions can help you sidestep these frequent issues:
- Installing Client-Side Mods on a Server: Uploading mods like shaders or minimaps to a server’s
modsfolder will almost certainly cause the server to fail to start or crash. These mods rely on client-specific code that is not present on the server. - Expecting Hybrid Features Without Client Installation: If a mod requires both client and server installation (e.g., new blocks, items, or biomes) and you only install it on the server, your client won’t know how to render the new content. You might see “ghost” blocks, experience crashes when encountering new biomes, or simply be unable to interact with new items.
- Mismatched Mod Versions: Using different versions of the same mod on the client and server (even if both are for the correct Minecraft version) can lead to connectivity problems, desynchronization issues, crashes, or unpredictable behavior.
- Ignoring Mod Dependencies: Some mods are add-ons to larger core mods. Failing to install all necessary dependencies will prevent the dependent mod from working, often resulting in startup failures or in-game errors.
Mastering the art of Minecraft modding begins with a clear understanding of where your modifications belong. By distinguishing between client-side, server-side, and hybrid mods, you empower yourself to install, troubleshoot, and enjoy a vastly expanded and customized Minecraft experience, whether you’re playing alone or with friends.
Tags:
YOU MAY ALSO LIKE...