Minecraft Armor Stand Recipe
At its core, the Minecraft Armor Stand is a deceptively simple yet incredibly versatile item, requiring just seven basic components to craft. Often overlooked by new players, this seemingly static block holds immense potential for decoration, display, and even complex Redstone contraptions, transforming your virtual spaces from functional to fantastic. Understanding its recipe and myriad uses is a fundamental step for any aspiring Minecraft builder or decorator.
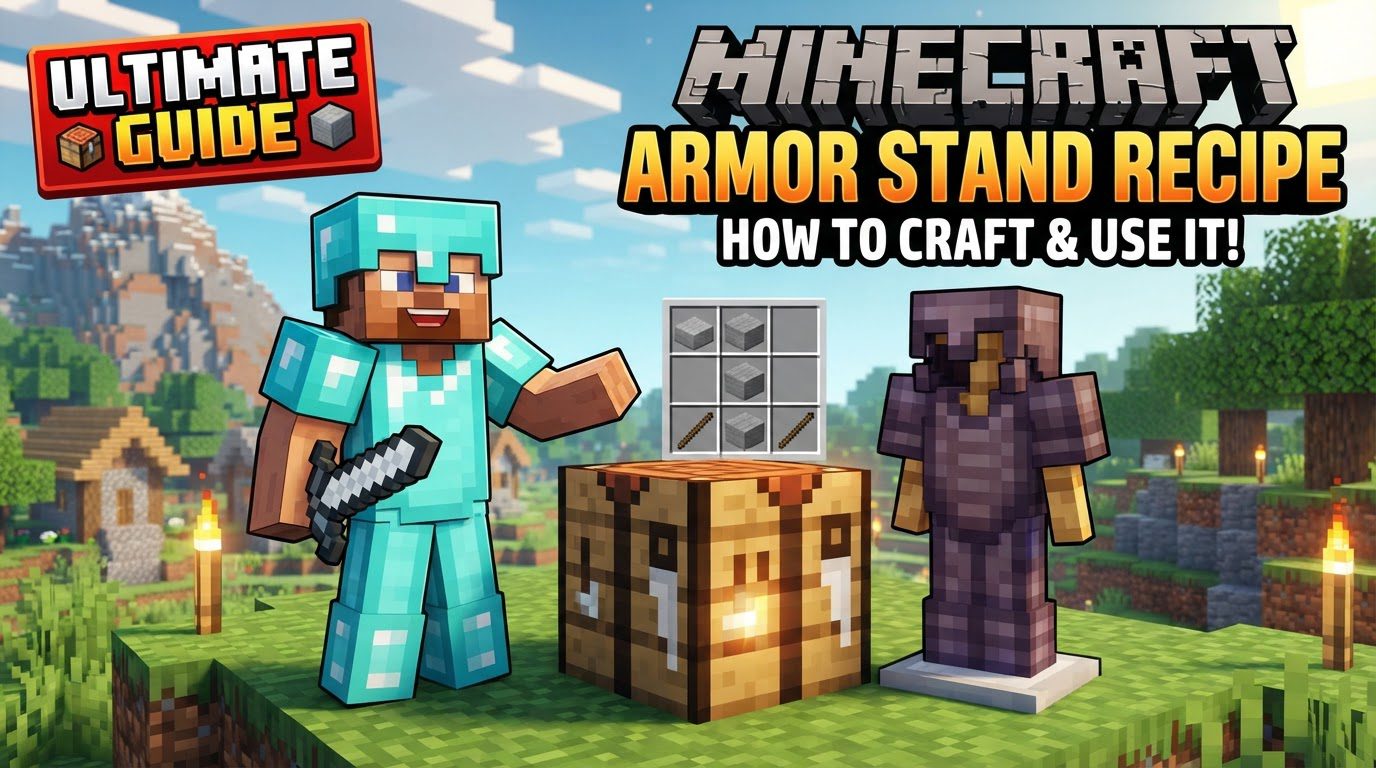
What is an Armor Stand?
An Armor Stand is a non-solid entity in Minecraft that serves as a display mannequin for armor, tools, weapons, and even certain decorative blocks like mob heads or carved pumpkins. Unlike item frames, which display items as flat images, Armor Stands present items in three dimensions, allowing for a much more immersive and visually appealing display. They can be posed in various ways, adding a dynamic element to your builds, whether you’re creating a museum, a shop, a trophy room, or a battle scene.
The Essential Ingredients: Sticks and Smooth Stone Slabs
Crafting an Armor Stand requires only two types of materials, both readily available early in your Minecraft journey:
- Sticks (x6): Sticks are one of the most fundamental crafting components in Minecraft. They are easily made from any type of wooden plank. Each wooden plank yields two sticks, meaning you’ll need at least three wooden planks (or one and a half logs) to get the six sticks required for the recipe.
- Smooth Stone Slab (x1): This is arguably the most “advanced” ingredient, but still very accessible. Obtaining a Smooth Stone Slab involves a few steps:
- Mine Cobblestone: Break any stone block with a pickaxe to get cobblestone.
- Smelt Cobblestone to Stone: Place cobblestone in a furnace with fuel (coal, wood, lava bucket, etc.) to produce regular stone blocks.
- Smelt Stone to Smooth Stone: Take the regular stone blocks and smelt them *again* in a furnace to create smooth stone.
- Craft Smooth Stone Slabs: Place three smooth stone blocks horizontally in a crafting table to yield six smooth stone slabs. You only need one for the Armor Stand recipe, so you’ll have five left over for other building projects!
Crafting Your Armor Stand: Step-by-Step
Once you have your six sticks and one smooth stone slab, head over to a crafting table. The recipe layout is very specific:
Imagine the 3×3 crafting grid:
- Top Row: Place a Stick in the first slot, a Stick in the second slot, and a Stick in the third slot.
- Middle Row: Place a Stick in the first slot, your Smooth Stone Slab in the second (middle) slot, and a Stick in the third slot.
- Bottom Row: Leave the first slot empty, place a Stick in the second (middle) slot, and leave the third slot empty.
Visually, it looks like this:
- Stick | Stick | Stick
- Stick | Slab | Stick
- Empty | Stick | Empty
After arranging the ingredients in this pattern, the Armor Stand will appear in the output slot. Drag it into your inventory, and you’re ready to start decorating!
Interacting with Armor Stands: Posing and Equipping
Placing an Armor Stand is as simple as right-clicking on a block where you want it to stand. Once placed, its utility truly shines:
- Equipping Items: Right-click the Armor Stand while holding any piece of armor (helmet, chestplate, leggings, boots) to place it on the corresponding slot. You can also equip swords, pickaxes, shovels, axes, hoes, and even shields in its hands (or main/off-hand slots). Certain decorative items like carved pumpkins or mob heads can also be placed on its head slot.
- Retrieving Items: To take an item back, simply right-click the Armor Stand with an empty hand on the item you wish to retrieve.
- Posing (Java Edition): In Java Edition, you can change an Armor Stand’s pose by sneaking (holding Shift) and right-clicking it. Each right-click will cycle through various pre-set poses, allowing you to create dynamic displays.
- Posing (Bedrock Edition): In Bedrock Edition, Armor Stands come with arms by default and can be posed by simply right-clicking them without sneaking. This difference is important to remember if you play across both versions.
- Breaking: Like most entities, an Armor Stand can be broken by hitting it. It will drop itself and any items it was holding or wearing, ready to be picked up and repositioned.
Advanced Uses and Creative Applications
Beyond basic display, Armor Stands offer a wealth of creative possibilities:
- Mannequins and Statues: Dress them in different armor sets to create a personal armor gallery, or use them as silent guards at your base’s entrance. Combine them with custom player heads or mob heads for unique character displays.
- Item Showcases: Display rare or enchanted items prominently. Imagine a legendary sword held aloft by an armored figure, or a collection of Netherite armor shimmering under a spotlight.
- Redstone Integration (Java Edition): While direct Redstone interaction is limited, Armor Stands in Java Edition can be manipulated with commands. For example, specific NBT (Named Binary Tag) data can be used to give them arms (which they don’t have by default in Java), make them invisible, or even make them invulnerable. This opens doors for complex Redstone contraptions where hidden armor stands hold items or trigger effects.
- Invisible Armor Stands: Using commands like
/effect @e[type=armor_stand] invisibility 999999 1 true(Java Edition) or by summoning them with specific NBT tags (/summon minecraft:armor_stand ~ ~ ~ {Invisible:1b}), you can create truly unique floating item displays or hidden mechanisms. This allows items to appear as if they are floating in mid-air, held by an unseen force. - Propaganda and Storytelling: Arrange multiple Armor Stands in a scene to tell a story or create a diorama. A group of armored figures standing ready for battle, or a lone knight guarding a treasure chest, can add immense character to your builds.
Differences Between Java and Bedrock Editions
It’s worth noting the primary difference in Armor Stand functionality between the two main versions of Minecraft:
- Arms: In Bedrock Edition, Armor Stands are crafted with arms by default. In Java Edition, they are crafted without arms. To give a Java Edition Armor Stand arms, you must use a command (e.g.,
/summon minecraft:armor_stand ~ ~ ~ {ShowArms:true}or modify an existing one with NBT editors). This is a crucial distinction for builders aiming for specific looks. - Posing: As mentioned, posing mechanics differ slightly. Java requires sneaking, while Bedrock does not.
Common Mistakes and Troubleshooting
- Incorrect Recipe: Double-check the crafting grid. The exact placement of sticks and the smooth stone slab is critical. A single misplaced item will result in nothing being crafted.
- Missing Smooth Stone Slab: Ensure you’ve smelted your stone twice (cobblestone -> stone -> smooth stone) before crafting the slab. Regular stone slabs will not work.
- Forgetting to Sneak (Java Posing): If you’re in Java Edition and can’t change your Armor Stand’s pose, remember to hold down your sneak key (default Shift) while right-clicking.
- Accidental Breaking: Armor Stands have low health and can be easily broken. Be careful when mining or fighting near them, especially if they are displaying valuable items.
The Minecraft Armor Stand, while a humble item, stands as a testament to the game’s depth in creative expression. From simple armor displays to intricate Redstone-powered scenes, mastering its recipe and understanding its capabilities will undoubtedly elevate your building prowess. So gather your sticks and smooth stone, and begin populating your world with these versatile figures.
Tags:
YOU MAY ALSO LIKE...