

Identifying Desert Temple Trap Mechanics (Step by Step)
Minecraft’s desert temples are iconic structures, instantly recognizable by their distinct pyramid-shaped roofs and the orange terracotta blocks that form their construction. These ancient edifices, found exclusively within arid desert biomes, promise valuable loot to intrepid adventurers. However, beneath their sandy exteriors lies a cunning and lethal trap, meticulously designed to protect the treasures held within. Understanding the precise mechanics of this trap is not merely beneficial, but absolutely essential for any player hoping to successfully navigate a desert temple and claim its rewards without peril.
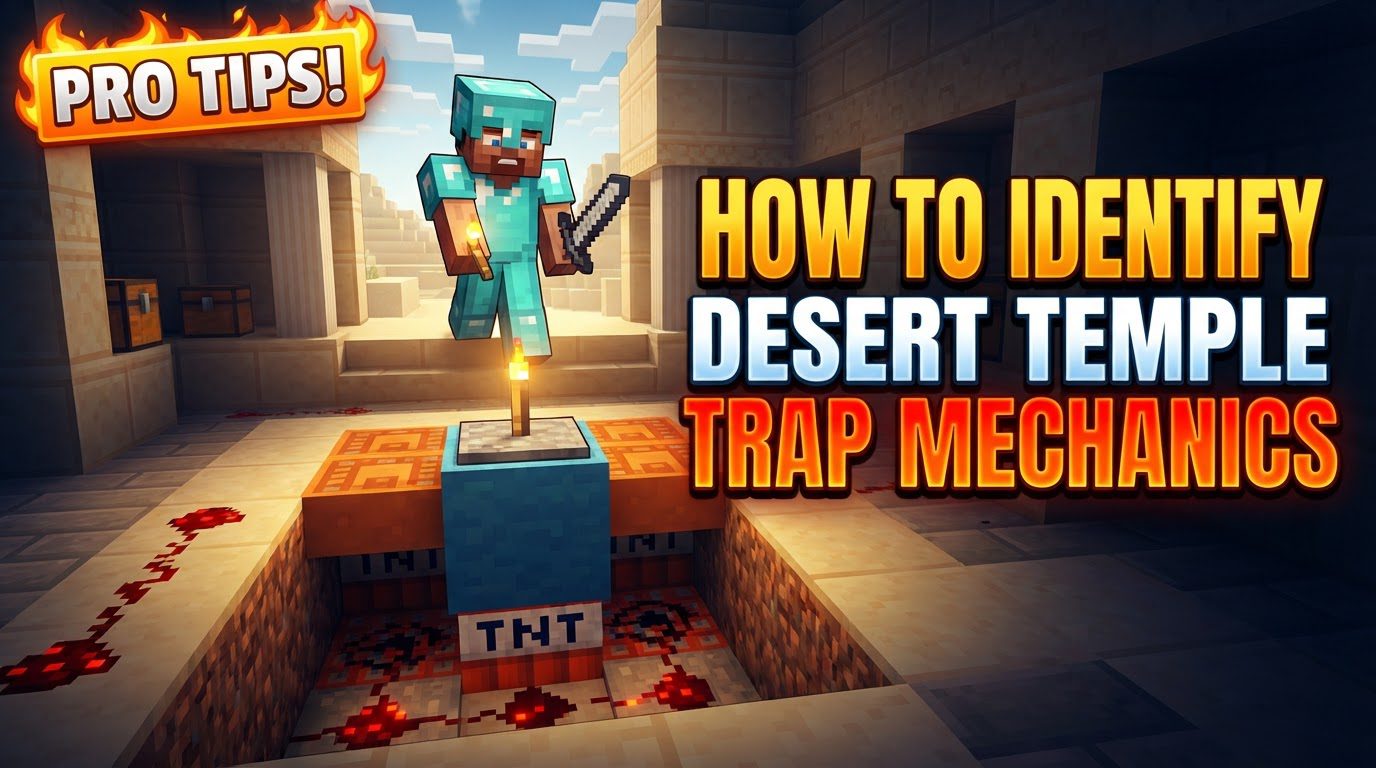
Understanding the Desert Temple Trap Mechanics
The core danger within every desert temple stems from a highly effective and destructive trap. This mechanism is not hidden in plain sight but resides in a secret chamber positioned directly beneath the central floor of the temple’s main room. The trap’s destructive power comes from a cluster of nine TNT blocks, strategically placed to cause maximum devastation. The activation of this explosive payload is triggered by a single, inconspicuous stone pressure plate.
-
Location of the Trap: The nine TNT blocks are found within a concealed chamber, directly beneath the main floor. This chamber is accessible from the central area of the temple.
-
Activation Mechanism: The trap is activated by a single stone pressure plate. This pressure plate is almost always located directly under the central blue terracotta block that forms a distinctive pattern on the main room’s floor. This central blue block is usually surrounded by chiseled sandstone, making it a key identifier for the trap’s location.
-
Triggering the Trap: The pressure plate is highly sensitive. Stepping on it yourself will immediately trigger the detonation of the TNT. Furthermore, the trap can be activated by other means; if an item happens to land on the pressure plate, or if any mob, whether a friendly animal or a hostile creature, steps onto or falls onto it, the TNT will detonate. This means even indirect interaction can lead to disaster.
-
Consequences of Activation: Once activated, the cluster of nine TNT blocks explodes. This explosion causes significant damage to anything caught within its blast radius, including the player. Crucially, the detonation also destroys the four loot chests located within the same hidden chamber. This ensures that if the trap is sprung, the valuable treasures are lost forever, emphasizing the importance of a cautious and informed approach.
Step-by-Step Guide to Disarming the Trap
To safely disarm the desert temple trap and secure its valuable contents, a precise and careful process must be followed. Haste and carelessness will almost certainly lead to failure and destruction.
-
Locate the Desert Temple: Your adventure begins by exploring desert biomes. Desert temples are easily distinguishable by their unique pyramid-shaped roof and the predominant use of orange terracotta blocks in their structure. Spotting one is the first step towards its riches.
-
Carefully Enter and Survey: Once you have found a temple, approach with caution. Enter the main structure and take a moment to survey the main room. Observe its layout, identify any potential immediate threats like hostile mobs, and familiarize yourself with the general environment before proceeding.
-
Identify the Central Pattern: The key to locating the trap’s activation point is the distinctive floor pattern in the main room. Look for the central design, which typically consists of blue terracotta blocks surrounded by chiseled sandstone. This central column is the direct indicator of the hidden chamber below and the trap’s location.
-
Avoid Direct Descent (Crucial Step): This is perhaps the most vital instruction: do not dig straight down from the central blue terracotta block. Digging directly downwards from this point will place you squarely onto the stone pressure plate below, instantly triggering the TNT and destroying everything. Instead, choose a safe point of entry. You should mine down from a block adjacent to the opening of the chasm that leads into the hidden chamber, or select one of the sandstone blocks positioned directly next to the central column. This indirect approach ensures you land safely off to the side, away from the pressure plate.
-
Mine Down Safely: Once you have identified a safe adjacent block, carefully mine downwards. Dig a controlled shaft into the hidden chamber below the central floor. Proceed slowly to maintain awareness of your surroundings and your exact landing spot.
-
Locate and Destroy the Pressure Plate: Upon safely entering the hidden chamber, your immediate priority is to locate the stone pressure plate. It will be readily visible. Once identified, carefully destroy it using your pickaxe or any other tool. Removing this pressure plate permanently disarms the trap, rendering the TNT harmless.
-
Collect Disarmed TNT: After the pressure plate has been successfully removed, the cluster of nine TNT blocks is no longer a threat. They are now inert and can be safely collected. These blocks are valuable resources that you can use for your own mining, demolition, or creative building projects.
-
Collect the Loot: With the trap fully disarmed and the TNT collected, you can now safely access the four chests located within the chamber. These chests contain the ancient treasures of the desert temple. Collect their valuable contents, knowing that your careful and strategic approach has paid off.
Essential Tips for Safe Exploration
Beyond the direct steps of disarming the trap, several general practices and preparations will significantly enhance your safety and overall success when exploring desert temples.
-
Survey Before Entry: Always take a few moments to survey the temple from the outside before committing to entry. This initial assessment allows you to note the trap’s visible location from above (if possible) and to identify any potential hostile mobs that might be lurking nearby or within the temple itself. An informed approach is a safe approach.
-
Light Up the Interior: As soon as you enter the temple, proactively place torches throughout its interior spaces. This crucial step prevents hostile mobs from spawning within the temple’s dark corners. An uncontrolled hostile mob could inadvertently step on the pressure plate, triggering the trap and ruining your efforts. Proper lighting ensures you maintain control over the environment and prevent unforeseen activations.
-
Proceed Slowly and Carefully: Rushing through a desert temple is a recipe for disaster. Always proceed slowly and deliberately, paying close attention to every step you take. Haste can lead to misjudgments, accidental pressure plate activation, or falling into unforeseen hazards.
-
Consider Crouching: If circumstances necessitate moving near the central area where the pressure plate is located before it is disarmed, consider crouching (sneaking). Crouching reduces your hitbox and can help prevent accidental activation of the pressure plate, providing an extra layer of safety when navigating hazardous areas.
-
Be Prepared: Before embarking on any desert temple raid, ensure you are adequately prepared for potential challenges. Equip yourself with sturdy armor for protection, effective weapons to handle any hostile encounters, and sufficient food to replenish your hunger and health. Being well-prepared minimizes risks and significantly increases your chances of a successful and safe expedition.
-
Collect Disarmed TNT: Remember that the nine TNT blocks, once disarmed by removing the pressure plate, are not merely obstacles to be ignored. They are valuable resources. Collect them for your own use; TNT is highly useful in various Minecraft activities, from rapid mining to creating impressive explosions.
Common Pitfalls to Avoid
Understanding and actively avoiding common mistakes is just as critical as knowing the correct procedure for disarming the trap. These pitfalls frequently lead to failure and the destruction of the temple’s treasures.
-
Stepping Directly onto the Pressure Plate: This is the most direct and common error that triggers the trap. Always assume the pressure plate is present beneath the central blue terracotta block and actively avoid stepping on that specific spot or any block directly above it until the trap is disarmed.
-
Allowing Mobs to Trigger the Trap: Be vigilant about the presence of any mobs, whether hostile or passive, within the temple. If a mob happens to fall onto or step on the pressure plate, it will detonate the TNT just as if you had stepped on it yourself. This underscores the importance of thorough lighting and mob control to prevent accidental activations.
-
Digging Straight Down from the Central Blue Terracotta Block: As previously emphasized, this is a critical and often fatal mistake. Digging directly downwards from the central blue terracotta block will inevitably lead you directly onto the pressure plate below. This action triggers the trap instantly, destroying the loot and often harming the player. Always choose an adjacent block for a safe descent.
-
Ignoring Other Potential Hazards: While the TNT trap is the primary and most significant danger in a desert temple, do not become complacent about other potential threats. Hostile mobs can still ambush you in dark corners, and other environmental hazards or hidden holes might exist. Maintain a general awareness of your surroundings and potential dangers beyond just the main trap mechanism.
By thoroughly understanding the intricate mechanics of the desert temple trap and diligently adhering to these safety protocols, you can transform a potentially deadly encounter into a highly rewarding adventure. Approach each temple with caution, precision, and thorough preparedness, and the ancient treasures within will undoubtedly be yours to claim.

