Building a Base Inside a Mountain (Step by Step)
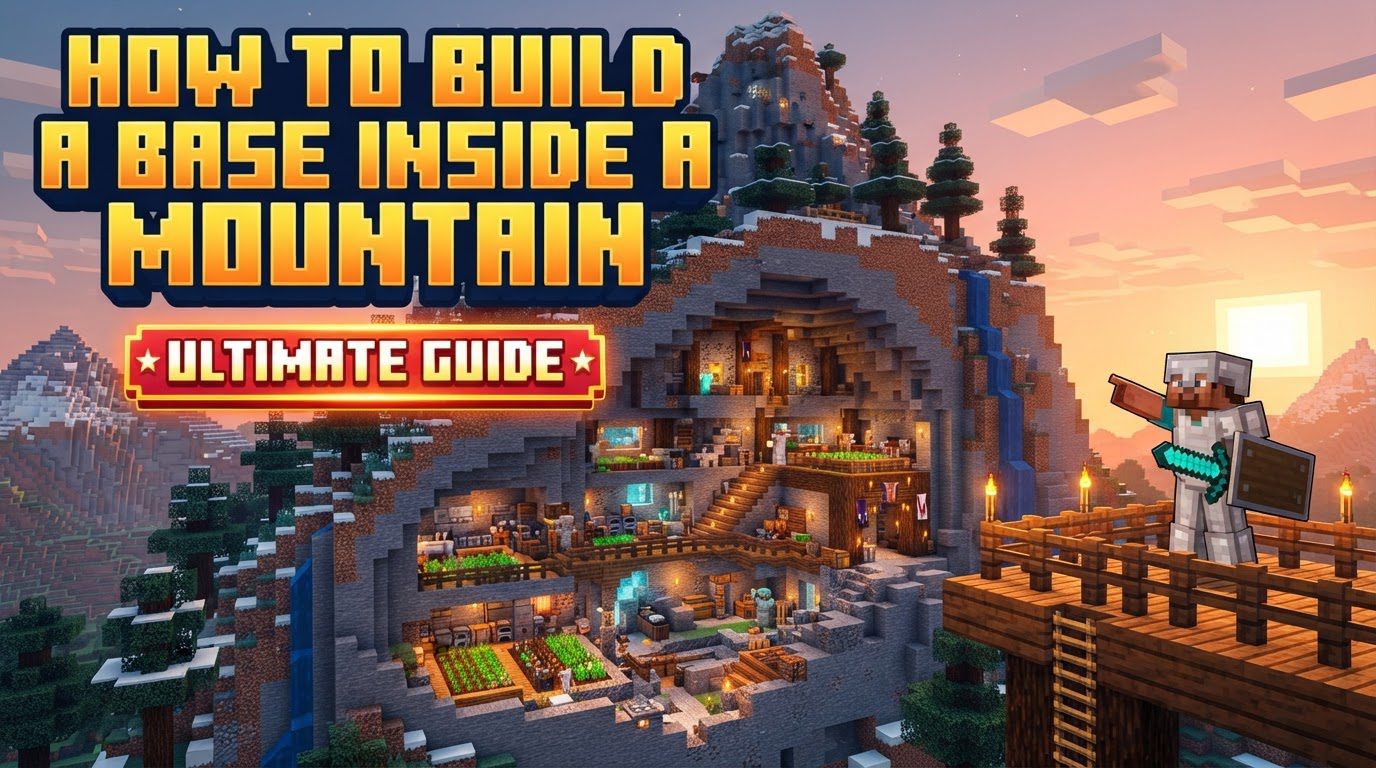
Building a base inside a mountain in Minecraft offers a unique blend of strategic advantage, natural defense, and aesthetic appeal. Far from being a simple hole in the ground, a well-constructed mountain base can become a formidable fortress and a visually stunning architectural marvel, perfectly integrated into the rugged landscape.
Key Mechanics of Mountain Bases
Understanding the inherent advantages of a mountain base is crucial for planning your build:
- Strategic Advantage: An elevated position provides an unparalleled strategic overview of the surrounding landscape. From your mountain perch, you gain excellent visibility, allowing you to spot approaching hostile mobs, identify potential threats from other players in multiplayer, and locate valuable resources or points of interest in the distance. This high vantage point is invaluable for planning expeditions and maintaining situational awareness.
- Natural Defense: The very terrain of a mountain acts as your primary defense. Rugged topography, sheer cliffs, and winding paths naturally deter hostile mobs and make it significantly harder for enemies to access your base. This reduces the need for extensive perimeter walls and complex external defenses, allowing you to focus more on internal design and functionality.
- Resource Proximity: Mountains are often rich veins of essential materials. Within the mountain itself, you’ll frequently find abundant stone for construction, along with valuable ores such as coal, iron, and sometimes even rarer minerals. This proximity to resources makes mining and gathering materials for your base and other projects much more efficient, saving you considerable travel time.
- Aesthetic Appeal: Beyond the practical benefits, mountain bases possess a unique charm. They offer distinct architectural opportunities, allowing for multi-tiered structures, cliffside balconies, and panoramic windows that showcase breathtaking views. A well-designed mountain base can be visually stunning, blending seamlessly with its natural environment while providing a grand and impressive living space.
Step-by-Step Process for Building Your Mountain Base
Embarking on a mountain base project requires careful planning and execution. Follow these steps to construct your ideal subterranean haven:
- 1. Choose the Right Location: Your first and most critical step is selecting the perfect mountain. Look for a spot that offers a good balance of features:
- Views: Prioritize panoramic views for aesthetic pleasure and strategic observation.
- Natural Ledges: These can serve as ready-made foundations for balconies, terraces, or external extensions.
- Cave Openings: Existing caves can significantly reduce initial excavation work and provide natural entry points.
- Resource Access: Ensure the mountain itself or its immediate surroundings offer access to desired resources like wood (if not in a forest biome), water, and specific ore types.
- 2. Gather Materials: Before you even start digging, amass a substantial supply of building materials.
- Wood: Essential for crafting tools, temporary structures, and interior decorations. Plan for at least 30% more wood than you initially estimate, as it’s often scarcer in mountain biomes.
- Stone (Various Types): Your primary building material. Collect cobblestone, regular stone, andesite, diorite, and granite for variety.
- Glass: Crucial for windows to enjoy those mountain views. Stock up on sand for smelting into glass.
- Scaffolding: This is non-negotiable for working on uneven and elevated terrain. Acquire a significant amount, as it will be indispensable for safe and efficient construction.
- 3. Prepare the Site: Begin clearing out the initial space within the mountain. The key here is to work with the mountain’s existing contours rather than against them. Instead of trying to blast out perfectly flat, rectangular areas, embrace the natural rock formations. Shape your rooms and tunnels to blend with the mountain’s curves and angles, preserving its organic feel and reducing the amount of excavation required.
- 4. Build Foundation and Structure: Once the initial spaces are carved out, start building the more permanent elements. Focus on establishing robust foundations and walls. Even if not strictly necessary for game mechanics, incorporate visible support structures like pillars, buttresses, and wide bases where your structure connects to the mountain. This creates a strong, stable appearance that enhances the realism and aesthetic integrity of your base.
- 5. Incorporate Access: Efficient and safe navigation within your multi-level mountain base is vital. Plan clear pathways, stairs, ladders, or even water elevators to connect different levels and rooms.
- Stairs: Offer a gradual and aesthetically pleasing ascent.
- Ladders: Provide compact vertical travel, ideal for tight spaces.
- Water Elevators: Offer quick and often automated transport between floors.
- Secret Entrances: For added security and intrigue, consider designing hidden pathways or concealed entrances that are difficult for intruders to discover.
- 6. Interior and Decoration: Once the basic structure is complete, turn your attention to the interior. Add essential features like crafting stations, furnaces, storage systems, and beds. Beyond functionality, focus on aesthetics:
- Variety of Blocks: Use a diverse palette of blocks (stone bricks, polished stone, wood types, wool) to add texture and visual interest.
- Add Depth to Walls: Avoid flat, uninteresting designs by incorporating overhangs, recessed windows, pillars, or partial blocks. This adds visual depth and makes your interior spaces feel more dynamic and lived-in.
- Lighting: Ensure proper lighting throughout to prevent mob spawns and create a welcoming atmosphere.
Important Tips for Mountain Base Construction
Keep these crucial tips in mind to ensure your mountain base is both functional and beautiful:
- Work With the Terrain: This cannot be stressed enough. The most successful mountain bases integrate seamlessly with their environment. Embrace natural caves, ledges, and slopes. This approach not only looks more natural but also often reduces the amount of manual excavation needed.
- Ensure Proper Lighting: Adequate lighting is paramount for safety. Hostile mobs can spawn in any dark space. Use torches, lanterns, glowstone, or sea lanterns generously throughout your base, both inside and at any external access points, to prevent unwelcome visitors.
- Plan for Resources: Mountain biomes can sometimes be sparse in certain resources, particularly wood and readily available water sources.
- Water: Plan how you will access water – perhaps by piping it from below, creating a rain collection system, or establishing an infinite water source within your base.
- Wood: Consider setting up a tree farm nearby or planning regular expeditions to forested biomes to gather wood.
- Visibility and Defense: Leverage your elevated position for defensive purposes. Designate observation points or watchtowers. Incorporate defensive features around your base, such as perimeter walls, fences to deter climbing mobs, and traps (like pit falls or dispenser traps) at key access points to protect your sanctuary.
- Stock Scaffolding: Scaffolding is your best friend when building in mountains. It allows for quick, safe, and efficient vertical construction and traversal on uneven surfaces. Acquire significantly more scaffolding blocks than you initially think you’ll need; you’ll be surprised how much you use.
- Vary Blocks and Add Depth: To create an aesthetically pleasing and engaging base, avoid monotonous designs. Use a diverse range of blocks that complement each other. Break up large, flat surfaces by adding depth through recessed windows, protruding pillars, or varying the thickness of your walls. This technique adds architectural interest and prevents your build from looking bland.
Common Mistakes to Avoid
Being aware of common pitfalls can save you time, effort, and frustration:
- Over-Excavation: One of the most frequent mistakes is trying to flatten vast areas within the mountain. This destroys the natural character of the terrain, making your base look artificial and losing the essence of a “mountain base.” Work with the mountain, not against it.
- Structural Instability (Visual): While Minecraft physics don’t always require structural integrity, your base should *look* stable. Avoid designs that appear to defy gravity or have unsupported sections. Use wide bases, thick walls where your structure meets the mountain, and visible support pillars to convey a sense of strength and stability.
- Insufficient Lighting: Forgetting or neglecting to adequately light your base is a recipe for disaster. Dark areas will become mob spawning grounds, turning your peaceful sanctuary into a constant battleground. Light every nook and cranny.
- One-Dimensional Walls: Building with entirely flat, untextured walls results in a bland, uninspired aesthetic. Your base will lack character and visual appeal. Always strive to add depth and variety to your wall designs.
- Building with Rare Material Blocks Excessively: While tempting to show off your wealth, using blocks like diamond, emerald, or gold excessively can make a build look gaudy and aesthetically unpleasing rather than impressive. Use rare blocks sparingly as accents or for specific decorative elements to achieve a more refined look.
- Losing Track of Your Base: Mountains can be disorienting. Always build your base near your initial spawn point, or set a bed inside to establish a new spawn point. Use a compass, map, or set waypoints to easily find your way back, especially after dying or venturing far from home.
With careful planning and adherence to these principles, your mountain base will serve as a secure, functional, and awe-inspiring home in the world of Minecraft.
Tags:
YOU MAY ALSO LIKE...