Beginner’s Guide to Twilight Forest Progression
Many new adventurers to the Twilight Forest stumble into its depths unprepared, only to be met with impenetrable barriers and frustrating debuffs. This unique dimension in Minecraft isn’t just a new biome to explore; it’s a meticulously crafted adventure with a strict, enforced progression system. Unlike the open-ended nature of the Overworld, the Twilight Forest mod guides you through a linear series of challenges, ensuring a structured and rewarding journey. Understanding this progression is paramount to your success and enjoyment, preventing wasted effort and frustrating encounters.
Deciphering the Forest’s Core Mechanics
Before stepping into the Twilit realm, it’s crucial to grasp the fundamental rules that govern this dimension. The Twilight Forest isn’t a free-for-all; it’s a narrative-driven experience that demands adherence to its inherent structure.
- The Enforced Progression System: This is the cornerstone of the Twilight Forest experience. You cannot simply waltz into any dungeon or biome you please. Specific areas and bosses are gated, becoming accessible only after you’ve defeated previous bosses and obtained their respective trophies. Attempting to bypass this system will result in severe negative effects. These can manifest as biome protection (rendering weather effects useless or dealing constant damage) or area protection (making blocks unbreakable, chests locked, and mobs invulnerable).
- Your Personal Compass: The Advancements Screen: To avoid confusion and track your progress, the mod integrates seamlessly with Minecraft’s in-game Advancements screen. This invaluable tool provides clear objectives and indicators of what you need to do next, serving as your primary guide through the forest’s challenges.
- Unveiling the Unknown with the Magic Map: Navigation in the dense, often confusing Twilight Forest would be a nightmare without the Magic Map. This essential item, crafted using a Torchberry, a Raven Feather, and Glowstone Dust for its focus, reveals the intricate layout of the dimension. It highlights crucial landmarks, including the locations of boss structures and significant points of interest, making it an absolute priority to craft early on.
- Trophies: Keys to the Kingdom: Defeating a boss in the Twilight Forest isn’t just about the loot; it’s about the trophy. Each boss drops a unique trophy upon defeat, which often serves as a literal key to unlock the next stage of your adventure. These trophies are frequently required to activate mechanisms or open sealed entrances to subsequent strongholds, so never leave one behind.
Your First Steps into the Gloom
The journey begins not in the Twilight Forest itself, but with its creation. Establishing your entry point and an initial base are critical for a smooth adventure.
Crafting the Gateway: The Twilight Forest Portal
Creating the portal is a simple yet specific process:
- First, locate a grassy area in the Overworld. Dig a 2×2 hole, ensuring it is only one block deep.
- Fill this 2×2 hole with four water source blocks. It’s crucial that these are source blocks, not flowing water.
- Next, completely surround the 2×2 water pool with at least 12 “nature-type” blocks. This can include grass blocks, dirt, flowers, mushrooms, saplings, or even tall grass. The key is to encircle the entire water area.
- Finally, throw a single diamond into the water. If done correctly, a dramatic lightning strike will signify the portal’s activation, and the gateway to the Twilight Forest will appear.
Establishing Your Foothold
Upon entering the Twilight Forest, the immediate priority is to establish a temporary base. This provides a safe haven from the dimension’s unique (and often hostile) inhabitants. Crucially, as soon as you can gather the materials, craft a Magic Map. This will be your most valuable tool for locating structures and avoiding getting hopelessly lost in the dense, perpetually twilight landscape.
The Path of the Warrior: Boss Progression
The core of the Twilight Forest experience lies in its boss encounters. Each victory opens new pathways and challenges, guiding you deeper into the dimension’s mysteries.
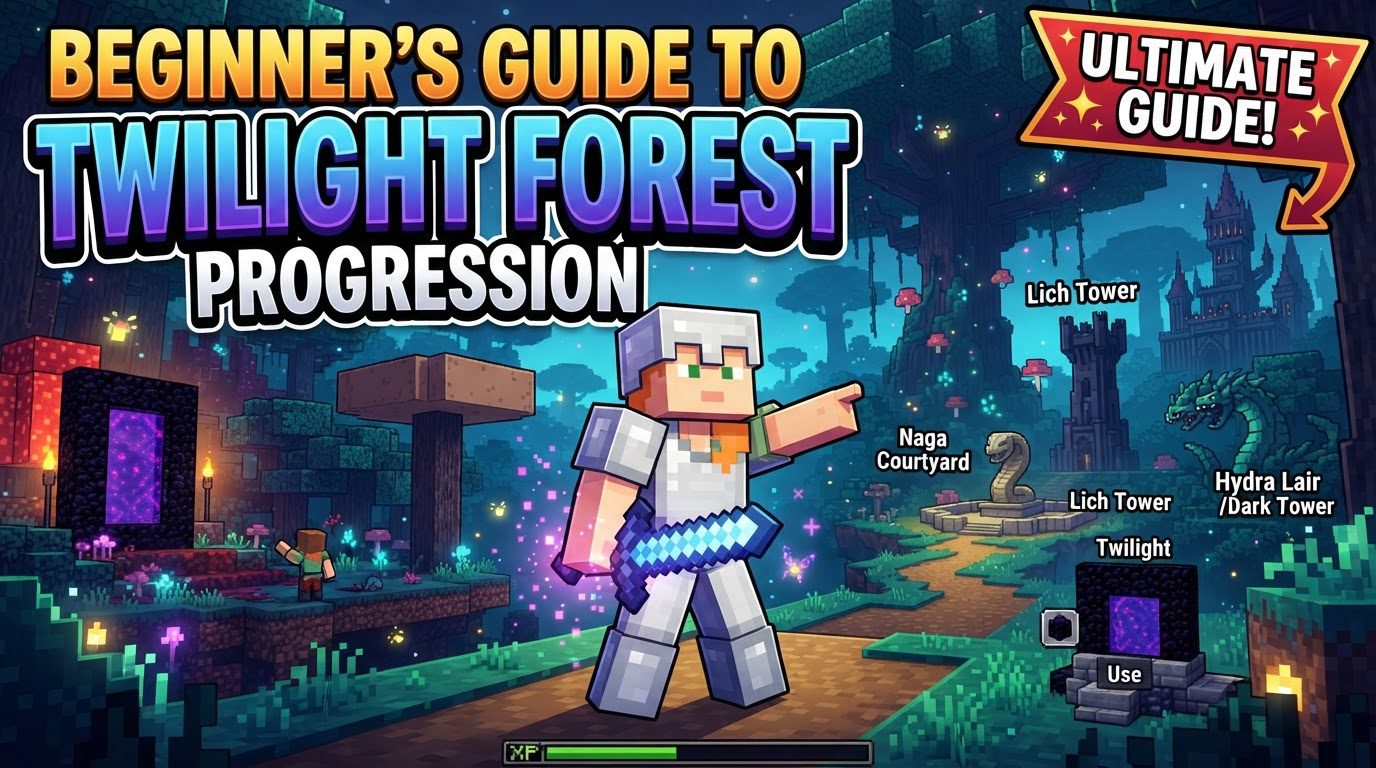
- 1. Defeating the Naga: Your first significant challenge will likely be the Naga, often regarded as the most approachable initial boss. These serpentine foes reside in distinct structures known as Naga Courtyards. Upon its defeat, the Naga will yield valuable Naga Scales, which can be crafted into unique armor, and crucially, a Naga Trophy. This trophy is your key to advancing, as it unlocks the path to the formidable Lich Tower, your next destination.
- 2. Confronting the Twilight Lich: Located within a prominent, large wooden compound known as a Lich Tower, the Twilight Lich awaits. This magical adversary presents a greater challenge than the Naga. Successfully defeating the Lich and claiming its trophy will open up access to three distinct biomes: the treacherous Twilight Swamp (home to the Labyrinth), the foreboding Dark Forest (housing the Knight Stronghold), and the frigid Snowy Forest (containing the Yeti Lair).
- 3. Battling the Minoshroom: Venturing into the Labyrinths found beneath the Twilight Swamp, you will encounter the unique Minoshroom. This bovine-like boss drops a special food item, Meef Stroganoff. Consuming this dish is vital, as it grants immunity to the burning damage encountered in the Fire Swamp, making further progression possible. Defeating the Minoshroom unlocks the path to the Hydra Lair.
- 4. Overcoming the Hydra: Deep within the Fire Swamp, typically found in a massive Hollow Hill, resides the multi-headed Hydra. This fiery beast is a significant threat. Its defeat is one of three crucial steps towards accessing the Twilight Highlands.
- 5. Facing the Knight Phantoms: Within the ominous Darkwood Forest, you’ll discover imposing Knight Strongholds. To gain entry, you’ll need a trophy from a previously defeated boss. Inside, you’ll face the spectral Knight Phantoms. Their defeat is another prerequisite for accessing the Twilight Highlands, and it specifically unlocks the tower of the Ur-Ghast.
- 6. Conquering the Ur-Ghast: At the very pinnacle of the towering Dark Tower in the Darkwood Forest, the colossal Ur-Ghast floats. This aerial menace demands strategic combat. Its defeat is the final of the three prerequisites required to safely enter the Twilight Highlands.
- 7. Defeating the Alpha Yeti: Journeying to the icy reaches of the Snowy Forest, you’ll find Yeti Lairs, home to the powerful Alpha Yeti. This formidable creature guards the path to the Aurora Palace.
- 8. Challenging the Snow Queen: In the magnificent Aurora Palace, situated within the Glacier biome, you will face the elegant yet deadly Snow Queen. Her defeat is the final boss required to fully unlock the Twilight Highlands without incurring negative effects.
Navigating the Endgame: The Highlands and Beyond
With the primary bosses vanquished, a new, elevated challenge awaits in the Twilight Highlands.
Accessing the Highlands: To safely access the majestic Twilight Highlands without suffering from the debilitating acid rain debuff, you must have defeated three specific bosses: the Snow Queen, the Ur-Ghast, and the Hydra. Attempting to enter prematurely will result in constant environmental damage.
Exploring the Highlands: The Highlands introduce a unique vertical progression. Here, you’ll need to find Magic Beans (often located in Obsidian vaults or dropped by Trolls). Plant these beans in Uberous Soil to grow an enormous Beanstalk, providing access to the elevated Cloud Cottages. Within these sky-high dwellings, you’ll encounter Giants. Defeating them yields a rare Giant’s Pickaxe, an essential tool for breaking into the formidable Giant Obsidian Vault. Inside, you’ll claim the powerful Lamp of Cinders, which is needed to burn away the thorny barriers leading to the (currently largely unimplemented) Final Castle.
Essential Preparations and Pro Tips
A successful adventure in the Twilight Forest relies heavily on preparation and smart play.
- Preparation is Key: Never enter the Twilight Forest unprepared. Ensure you have at least Iron armor (preferably Diamond), quality tools, a reliable bow, and a substantial, renewable food source. Health potions and extra utility blocks (like dirt or wood) are also highly recommended.
- Magic Map First: As reiterated, make crafting the Magic Map your absolute top priority. It saves countless hours of aimless wandering and helps you locate crucial structures.
- Read Biome Effects: Pay close attention to any visual cues or negative status effects you receive upon entering a new area. These are clear indicators that you are in a protected biome and need to adjust your progression path.
- Resource Gathering: The Twilight Forest is rich in unique resources. Collect ores, and gather unique plants like Torchberries (for abundant light) and Liveroots (essential for crafting Ironwood tools and armor).
- Boss Tactics:
- Naga: Bring a shield! Blocking its charge attacks will briefly stun the Naga, creating an opening for you to strike.
- Hydra: Arrows will often bounce off its tough hide. Wait for its mouth to open before attacking its heads, as this is its vulnerable point.
- Ur-Ghast: A powerful bow with plenty of arrows is crucial. If you have any means of flight (like a jetpack or creative mode for testing), it can significantly aid in reaching and battling this high-flying boss.
- Base Location: Choose your portal location wisely in the Overworld, as it’s your primary entry and exit. Once in the Twilight Forest, consider placing a bed near your portal or a safe temporary shelter to set your spawn point, saving long treks back after an unfortunate demise.
Pitfalls to Avoid
Even experienced players can make mistakes in the Twilight Forest. Be aware of these common missteps.
- Entering Protected Areas Prematurely: This is the most common and frustrating mistake. Attempting to access dungeons or biomes out of order will trigger powerful negative effects such as blindness, freezing, acid rain, or the inability to break blocks or damage enemies. Always check your advancements!
- Incorrect Portal Creation: Double-check your portal setup. Ensure the 2×2 water pool is precisely one block deep, uses still water sources, and is completely surrounded by at least 12 valid “nature-type” blocks. Any deviation will prevent activation.
- Forgetting Boss Trophies: Some progression steps explicitly require placing a boss trophy on a pedestal or using it in a crafting recipe to unlock the next area. Forgetting to pick up a trophy or losing it can halt your progression entirely, forcing a re-fight or a frustrating search.
- Not Using the Advancements Tab: Neglecting the in-game Advancements screen is a recipe for confusion. It’s your most reliable source of information for the correct progression order and current objectives.
By understanding and respecting the Twilight Forest’s unique progression system, you transform a potentially frustrating experience into a deeply rewarding adventure. Prepare wisely, fight strategically, and let the Advancements guide you through every mysterious corner of this enchanted dimension.
Tags:
YOU MAY ALSO LIKE...