The Hidden Truth About Armor Stand Collision Boxes
Did you know that the seemingly static armor stand in Minecraft, often used just for displaying gear, possesses a complex interaction of hitboxes and collision boxes that can be completely manipulated? Far from being simple decorative blocks, armor stands are powerful entities with intricate mechanics that, once understood, unlock a world of possibilities for builders, redstone engineers, and command block enthusiasts. The true nature of their collision properties is a hidden gem, allowing for everything from invisible markers to pixel-perfect decorative elements.
Understanding Armor Stand Collision and Hitboxes
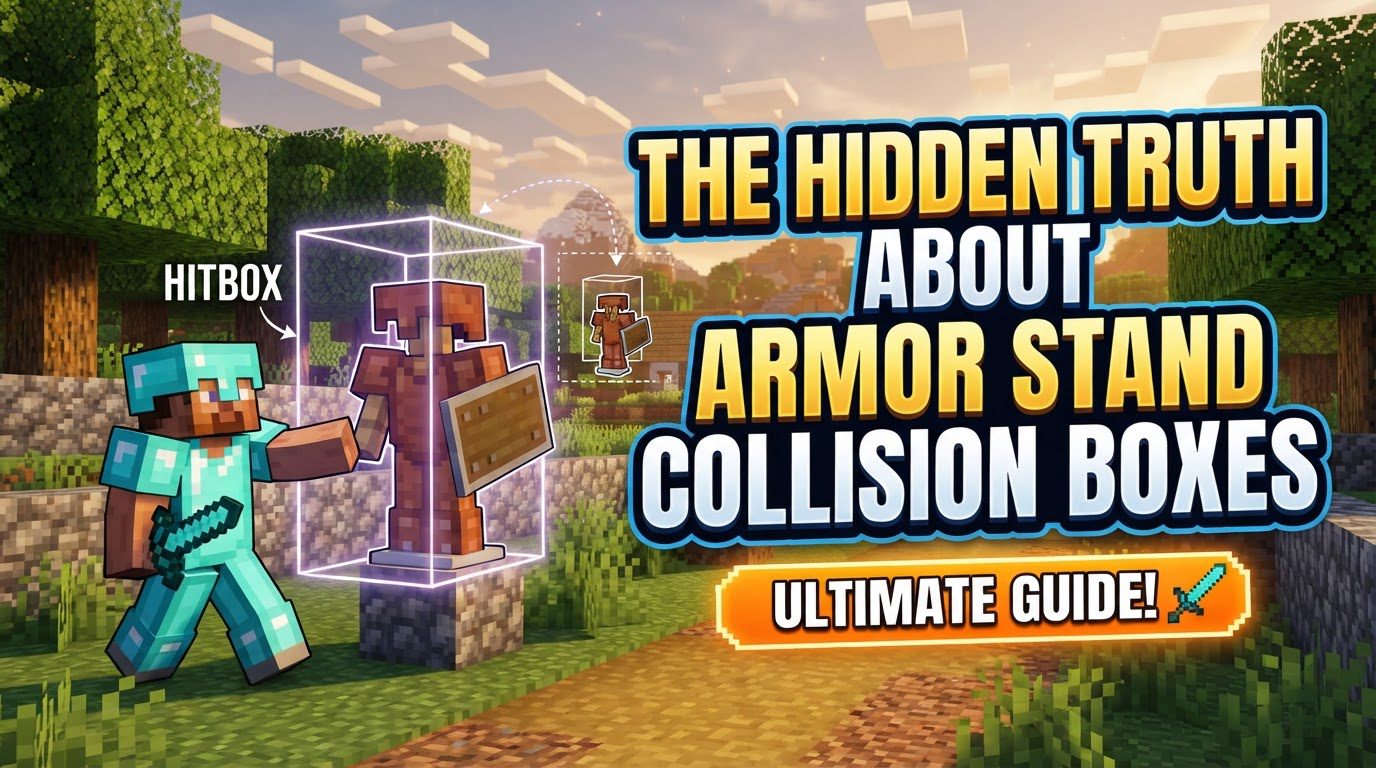
To truly master armor stands, it’s crucial to differentiate between two key terms: hitbox and collision box. In Minecraft, an armor stand is treated as an entity, which means it’s not a static block but a dynamic object that can be affected by various forces. This entity status grants it properties like being pushed by pistons, moved by water streams, pulled by fishing rods, or even bounced by slime blocks. Every entity, including the armor stand, possesses both a hitbox and a collision box by default.
- Hitbox: This is the interactive area that players target for actions like attacking, right-clicking, or punching. For an armor stand, its hitbox is approximately 0.5 blocks wide, 0.5 blocks deep, and 1.975 blocks tall. If an armor stand holds armor enchanted with Thorns, players will take damage when hitting this hitbox.
- Collision Box: This is the physical boundary that prevents other entities, including players, from passing through. It’s what makes the armor stand feel like a solid object in the world. By default, the armor stand’s collision box matches its hitbox, making it a physical obstruction.
The distinction is subtle but vital, as we’ll soon discover how to manipulate one without necessarily affecting the other in the same way, or even remove both entirely.
The Power of the `Marker` Tag: Vanishing Collision
The most profound revelation regarding armor stand collision boxes lies in the NBT (Named Binary Tag) data. Specifically, the Marker:1b tag is the key to making an armor stand effectively disappear from a physical interaction standpoint. When this tag is applied, the armor stand becomes a “marker” entity.
What does Marker:1b do?
- Removes Collision Box: Other entities and players can pass directly through it as if it weren’t there.
- Removes Hitbox: Players can no longer interact with it by punching or right-clicking. This means you can’t hit it, even if it has Thorns armor.
- Removes Gravity: A marker armor stand will no longer fall due to gravity, staying suspended in the air if placed mid-air.
This transformation is incredibly useful for command block systems, where you might need an invisible, non-obstructive point of reference. To apply this, you can use commands:
- For an existing armor stand:
/data merge entity @e[type=armor_stand,sort=nearest,limit=1] {Marker:1b} - When summoning a new one:
/summon minecraft:armor_stand ~ ~ ~ {Marker:1b}. For maximum utility in command block applications, it’s often combined with invisibility and no gravity:/summon minecraft:armor_stand ~ ~ ~ {Marker:1b,Invisible:1b,NoGravity:1b}.
The recommendation is strong: when using armor stands as markers for command block systems, always remove their hitbox and collision box using Marker:1b to prevent interference with gameplay and other entities. Invisible, non-colliding armor stands are invaluable for precise tracking, teleportation markers, or custom mob behaviors without any visible or physical presence.
Achieving Pixel-Perfect Placement
Even with their collision properties, armor stands offer remarkable precision in positioning. This is especially useful for decorative purposes or intricate contraptions where exact alignment is paramount.
- Piston Pushing: Pistons are a go-to for precise movement. By pushing an armor stand with a piston, you can nudge it into specific positions. Pushing an armor stand into an extended piston head, for instance, allows for extremely fine alignment within a block space.
- Wall Alignment: Walls, due to their slightly thinner nature than full blocks, can be used creatively. Placing two walls diagonally adjacent and pushing an armor stand into the corner with pistons or by punching it can center it within a 2×2 block area, effectively aligning it to a grid. However, be aware that the space between two walls is just wide enough but slightly too deep, so perfect alignment might require further fine-tuning.
- Water Streams and Guiding: Water flows can gently push armor stands, guiding them into desired locations. Combining this with bells or fishing rods allows for directional control, pulling or nudging them into place.
- Punching for Fine-Tuning: A simple punch can move an armor stand slightly. This is surprisingly effective for minor adjustments, especially when trying to get it into a very specific spot. Partial blocks like fences or glass panes can also be strategically placed to create tight channels, helping to guide armor stands during punching or piston pushes.
Beyond Collision: Invisibility and Arms
While collision is a core aspect, armor stands offer further customization that enhances their utility:
- Making them Invisible: The
Invisible:1bNBT tag, used with either the/summonor/data mergecommand, renders an armor stand completely invisible. This is crucial for decorative builds where you want items to appear suspended or for command block systems where the marker should not be seen. - Adding Arms (Java Edition): In Java Edition, armor stands can be given arms using the
{ShowArms:1}tag during summoning or by merging it onto an existing one. This allows them to hold items like swords, shields, or tools, greatly expanding their decorative potential.
Combining Invisible:1b with Marker:1b and NoGravity:1b creates the ultimate utility armor stand: an invisible, non-colliding, non-falling entity that can still hold items or be posed, serving as a silent workhorse for complex contraptions.
Common Pitfalls and Considerations
Despite their versatility, working with armor stands and their collision properties comes with its own set of challenges:
- Forgetting `Marker:1b` in Command Contraptions: A common mistake is to summon or place armor stands for command block functionality without applying the
Marker:1btag. This can lead to them obstructing players or other entities, creating unexpected physical barriers in your contraptions. - `Marker:1b` and Gravity: Remember that applying
Marker:1balso removes gravity. If you intend for an armor stand to fall (e.g., to simulate an arrow trail), usingMarker:1bis not suitable. In such cases, alternative entities like area effect clouds might be a better choice. - Imperfect Corner Alignment: While walls can help align, attempting to perfectly align an armor stand in a corner using only walls might result in it being slightly off. The precise nature of the armor stand’s hitbox and the wall’s thickness means a pixel-perfect center might not be achieved without the aid of pistons.
- Invisible Hitbox Interaction: If an armor stand is made invisible and placed in the floor, its interactive hitbox might still be present (if
Marker:1bwasn’t used). This can make it difficult to interact with items it holds if the hitbox is covered by a block, as your clicks will hit the block instead. - Shared Hitboxes for Detection: When using an armor stand to detect hits, but it shares its hitbox with another entity (like a player standing in the same spot), it can be challenging to engineer a reliable and specific detection system without careful positioning or command logic.
Mastering the nuanced world of armor stand collision boxes opens up a new dimension of creativity and technical prowess in Minecraft. From crafting intricate decorative displays to engineering sophisticated command block systems, understanding these hidden truths transforms armor stands from mere item holders into indispensable tools.
Tags:
YOU MAY ALSO LIKE...